4 Software
Tip – On the scan display screen, the Scan icon is always enabled. By tapping it, you can acquire another Full
scan or perform an area scan. You can check that you are still in the Full Scan acquisition mode in the next
step (after tapping on the Scan icon) as the next page name is Full Scan and the framing area is indicated as
0° to 360°.
Note – When resetting the Personal Settings, the Area scan density defaults to the last setting
used.
CAUTION – A warning message appears at the end of the acquisition if the instrument position has changed
before, between, or after the scanning.
Once a full scan is complete, you have the option to perform another full scan within the same
station or perform a scan of a specific area (known as an Area scan) or change the Instrument
Height.
Changing the Instrument Height
If your instrument has been initially leveled (green bubble) and the Compensator enabled, you are
able to change the Instrument Height you previously set.
1.
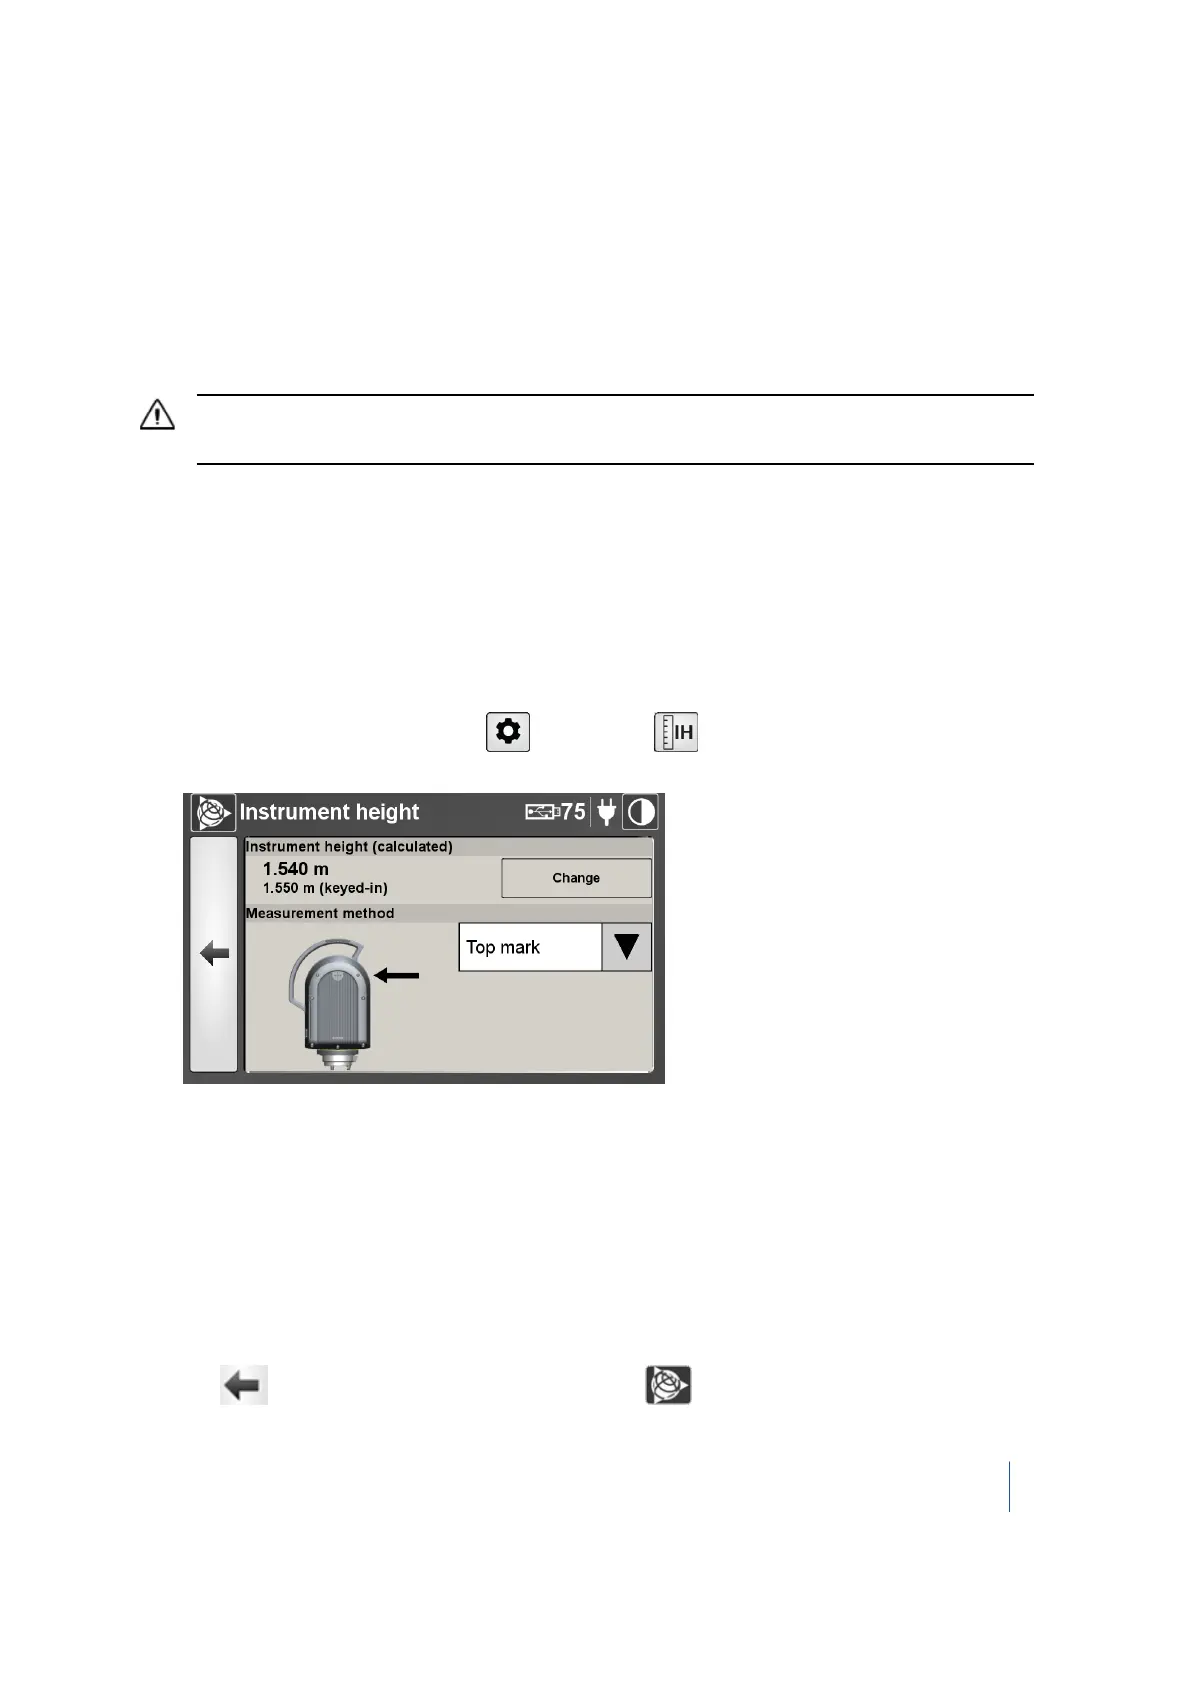
From the scan display screen, tap and then tap . The Instrument height screen
appears:
The keyed-in value displayed in the Instrument height pane and the Measurement method are
those set in the Scan Parameters dialog.
2. Tap Change and the on-screen keyboard appears.
3. Enter the new value. You can add numbers that include a decimal point.
4. Tap OK. The on-screen keyboard disappears. The input value is shown in the Instrument height
panel as well as the corrected value (obtained according to the formula given in the Setup
chapter).
5. If required, tap the pull-down arrow and change the current method.
6.
Tap to return to the scan display dialog or tap to return to the main menu.
Trimble TX8 3D Laser Scanner User Guide 62