Pag. 45
PMS701 HS-TR
STD version
Disassemblaggio/assemblaggio
Disassembly / assembly
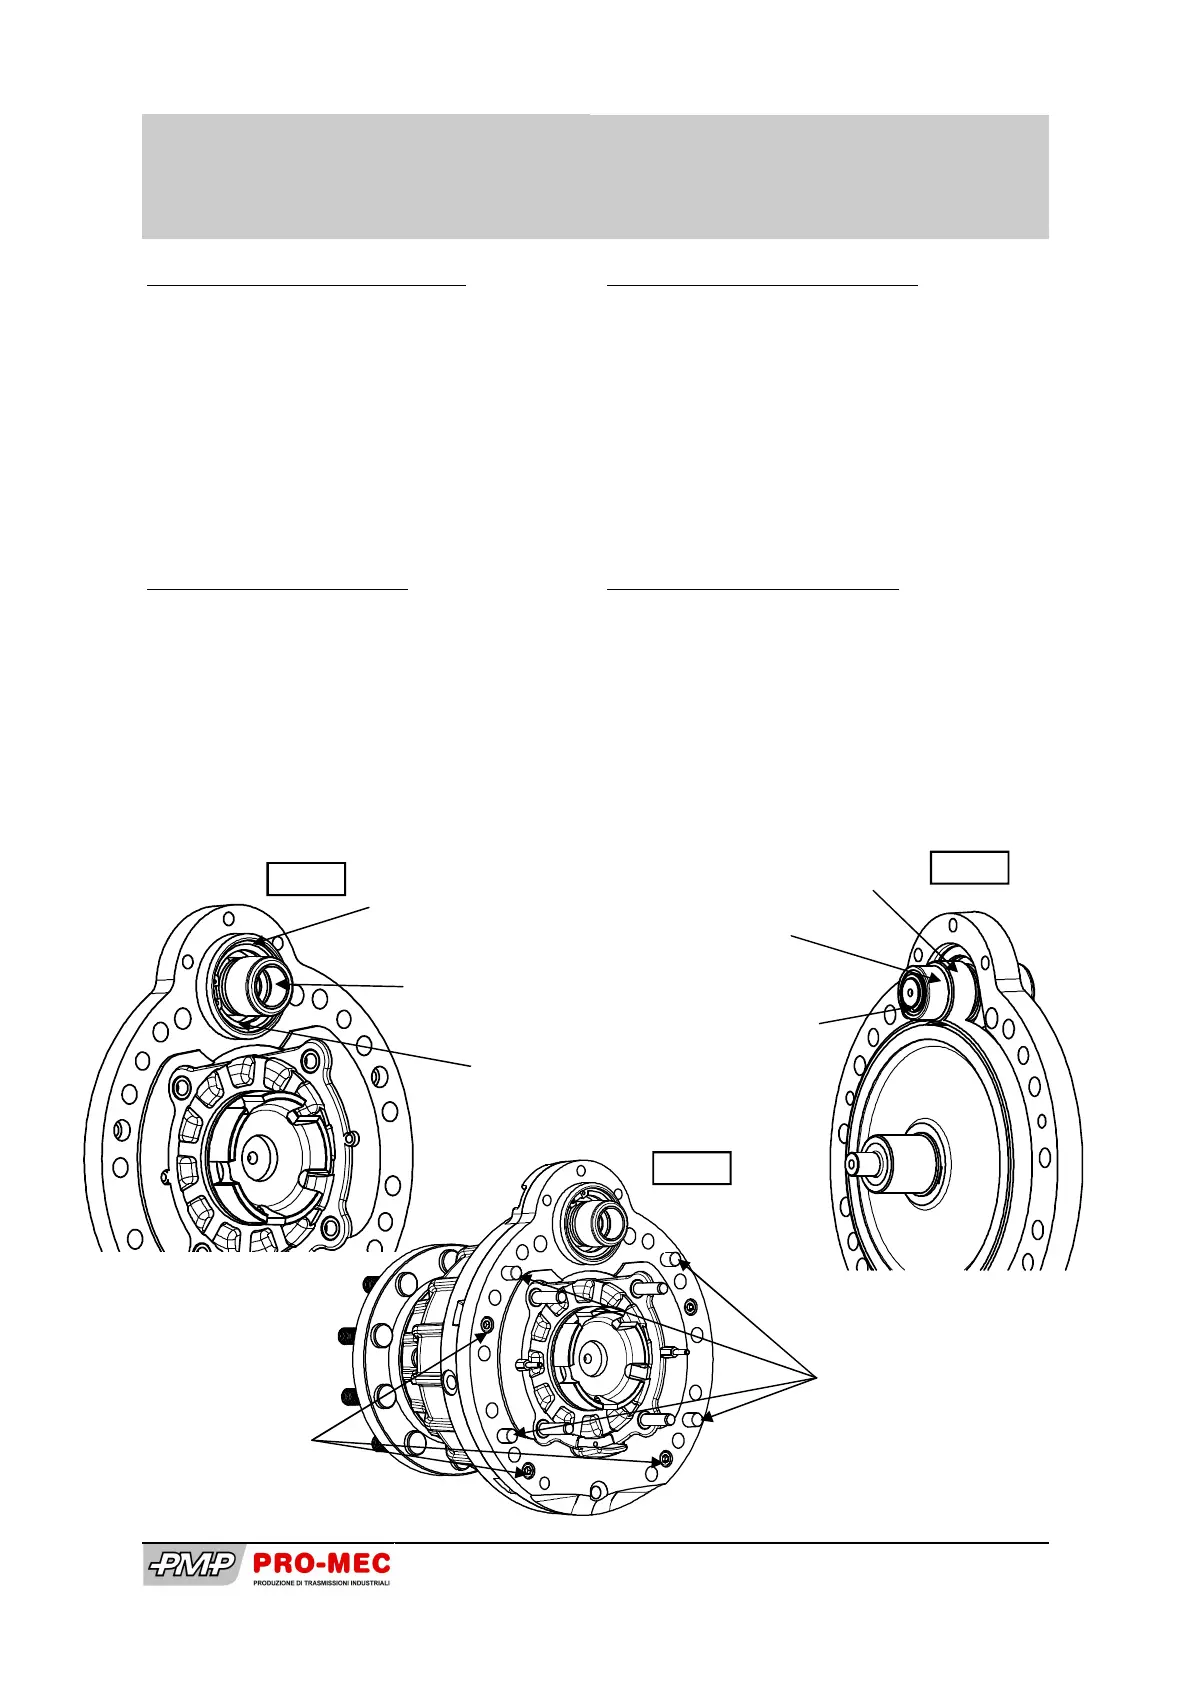
Montaggio Albero Ingresso (1/2)
Calettare il cuscinetto (56) sull' albero (1/2),
inserire il tutto nella sede della flangia
(16/17) e bloccare con l’anello Seeger (45)
(fig. 19a), quindi posizionare la linguetta
(64) nell’alloggiamento ricavato sull’albero,
inserire il pignone (90), il cuscinetto (57) e
bloccare il tutto con l'anello Seeger (40)
(fig. 19b)
Montaggio Flangia (16/17)
Cospargere di sigillante la superficie di
contatto della scatola (31) e calettare la
flangia (16/17) preassemblata sulla scatola
usando come guida le spine (74) (fig. 19c).
Compiere l’operazione con l'aiuto di un
martello di gomma.
Introdurre le 4 viti (84) nelle apposite sedi
e avvitarle con una coppia di serraggio di
40Nm.
Fig 19b
Cuscinetto (57)
Needle cage (57)
Anello Seeger (40)
Retaining ring (40)
Fig 19a
Cuscinetto (56)
Bearing (56)
Anello Seeger (45)
Retaining ring (45)
Albero ingresso (1/2)
Input shaft (1/2)
Spine (74)
Pins (74)
4 viti (35)
4 screws (35)
Fig 19c
Assembling the Input Shaft (1/2)
Key the bearing (56) onto the input shaft
(1/2), insert it into the housing in the flange
(16/17) and lock all with the retaining ring
(45) (fig. 19a), then place the feather key
(64) into its own slot on the shaft, insert the
helix pinion (90), the needle cage (57) and
finally lock all with the retaining ring (40)
(fig. 19b).
Assembly of the Cover (16/17)
Lay a coat of sealant on the housing con-
tact surface (31) and key the pre-mounted
flange (16/17) onto the housing centring it
on the four pins (74) (fig. 19c) and, using a
rubber hammer, seal it all.
Insert the 4 screws (84) into their own seats
and tighten them at 40Nm torque wrench
setting.
Pignone motore(90)
Helix pinion (90)