2500 Automatic Tank Gauge
30 Installation and Operations Manual
Float installation on an Out-of-Service Tank
Note Be sure to read Chapter before proceeding with this installation. Ensure you have
completed all previous steps from your installation checklist before proceeding.
Cone Roof Tank
• From inside the tank, tilt the float on edge and slip the guide cables through the loops.
Set the float on the tank bottom with the tape connection up.
Floating Pan with Floatwell
Note The float’s guide wires should be removed (cut off) as it is possible for these to get
caught on the sides of the floatwell.
• Rest the float at the bottom of the tank in the float well (lowest measuring point).
Connecting the Tape to the Float
Note Be sure to read Chapter before proceed-
ing with this installation. Ensure you have com-
pleted all previous steps from your installation
checklist before proceeding.
1. Using the box that the tape came in, pull the tape
out like a measuring tape. This keeps the tape
from becoming twisted or kinked.
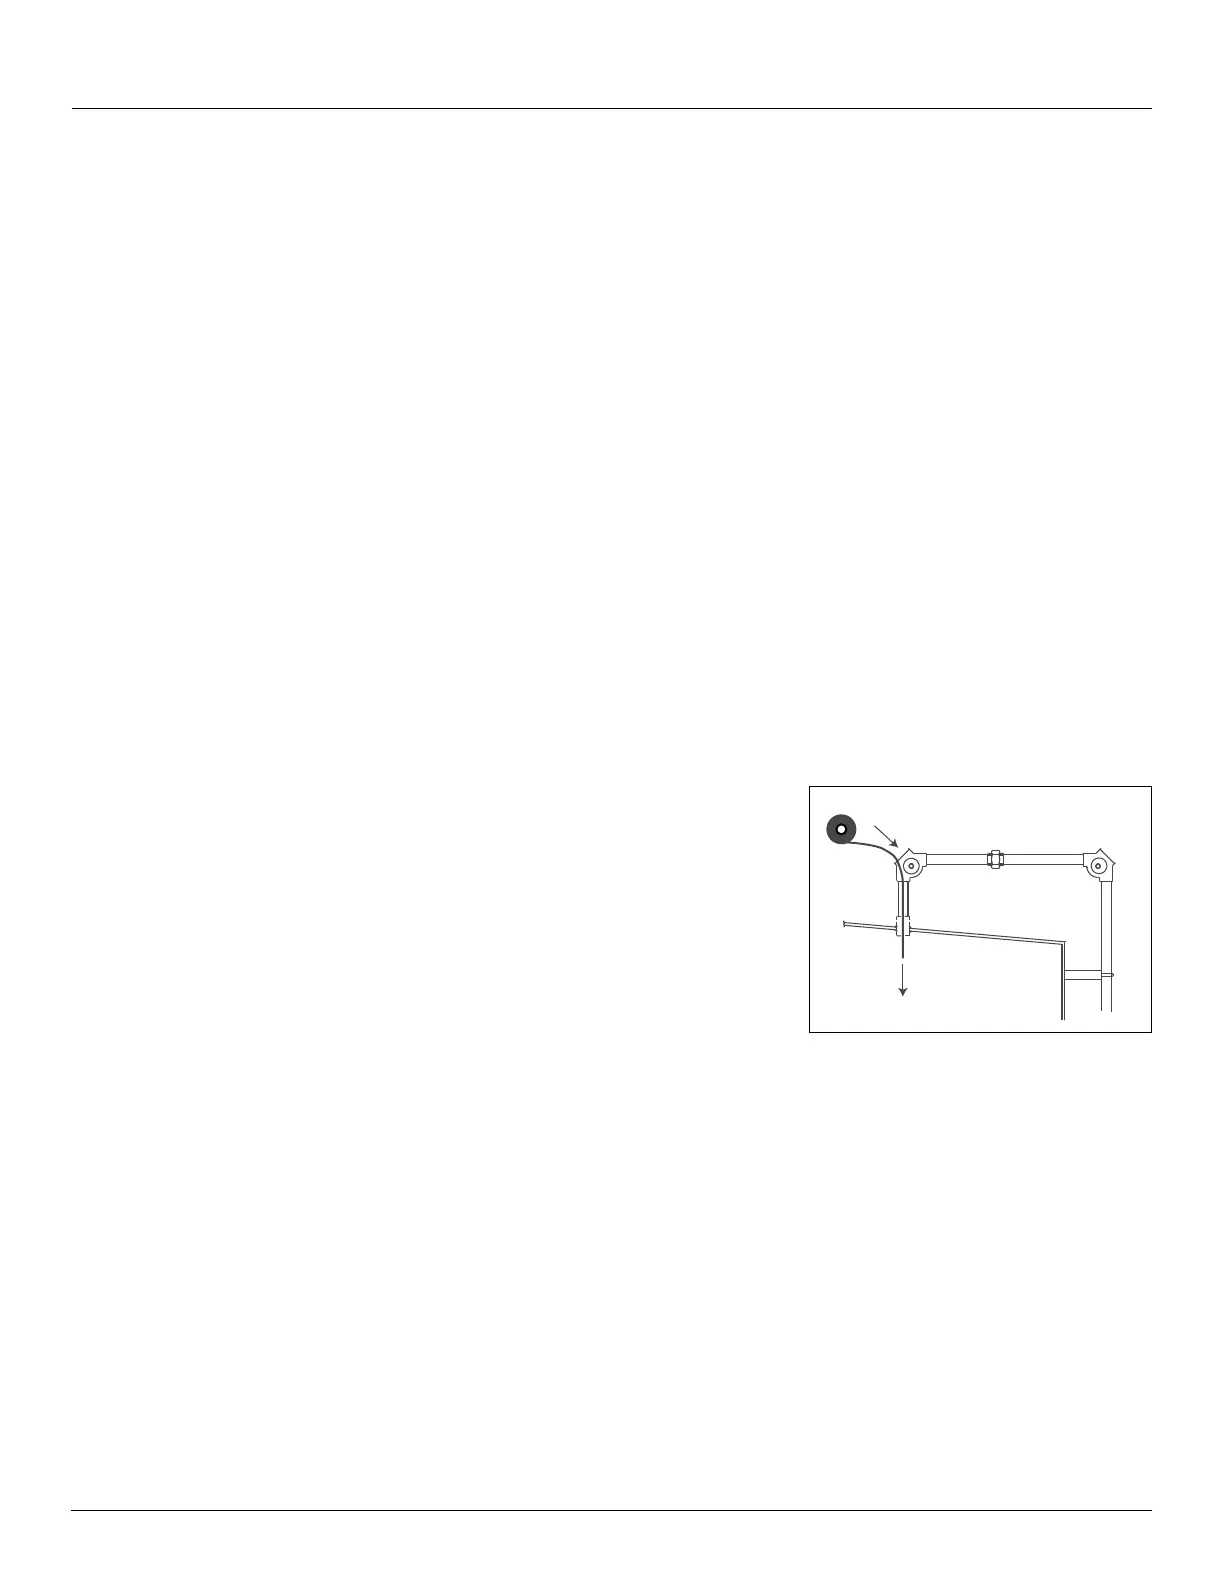
Figure 9: Feed the Tape into the Tank
2. At the elbow on the tank entry pipe, unroll one or
two turns of the perforated tape and start to feed it into the tank. If your installation is a
roof-reading application with the gauge head installed on the conduit on the roof, feed the
tape through the back of the gauge head first. Continue to unroll it several turns at a time
until it reaches the bottom of the tank. Let several more inches fall on the tank bottom.
3. Cut a 6-inch (152 mm) piece of tape from the end inside of the tank. Form a 'U' with this
piece of tape so there is no hole in the bottom portion of the 'U'. Do not kink.
1
2