Varec, Inc. 35
Install Tape in the Gauge Head
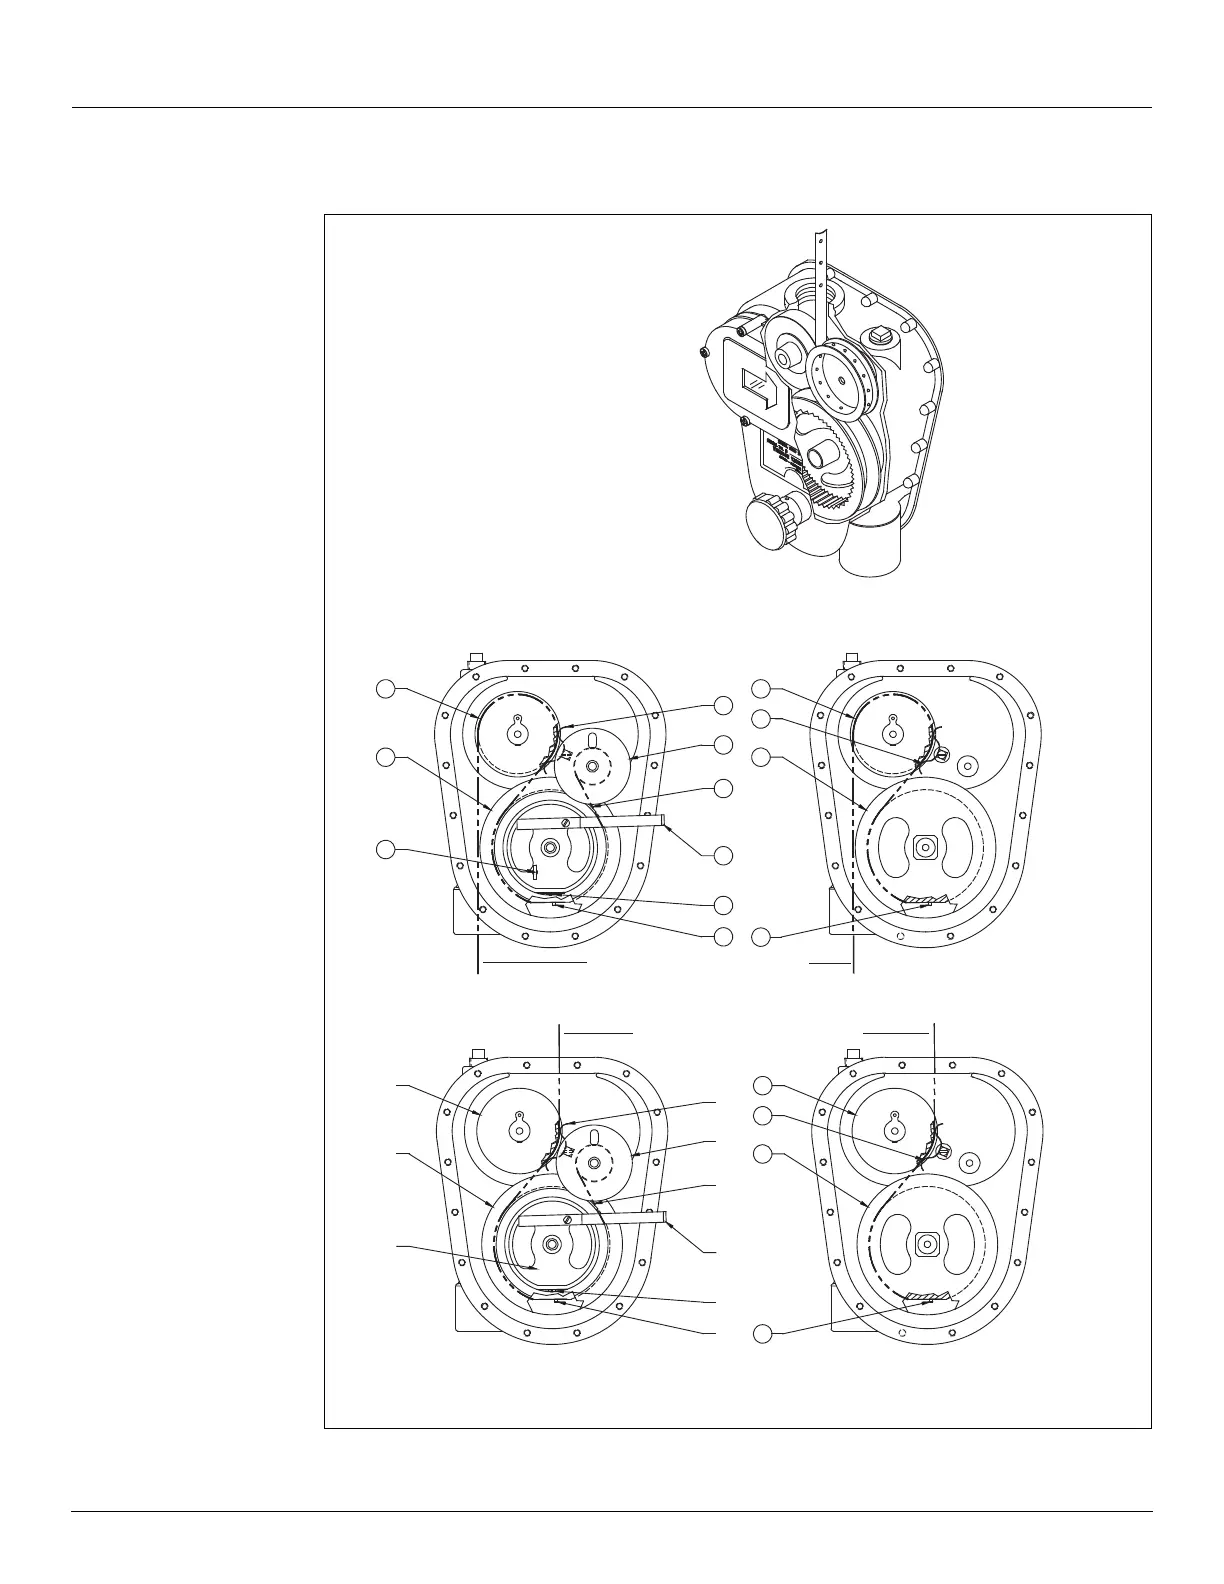
Figure 14: Tape Routing
1
2
3
4
5
6
7
8
9
2
1
4
9
Tape entry for Top-Mounted Gauge
Caution! Do not release crank handle (7) when
negator spring motor is being loaded
and thumbscrew lock is removed.
Item Description
1 Sprocket Sheave
2 Tape Storage Sheave
3 Thumbscrew Lock
4 Tape Keeper
5 Motor Storage Sheave
6 Negator Spring Motor
7 Removable Installation Crank
8 Negator Spring Motor Screw
9 Tape Sheave Pinor Screw
1
2
3
4
5
6
7
8
9
2
1
4
9
Tape entry for Side-Mounted Gauge
Standard Gaugehead
(with negator spring motor)
Negator Cassette Gaugehead
(shown with negator cassette removed for tape installation)
Standard Gaugehead
(with negator spring motor)