EasyManuals Logo

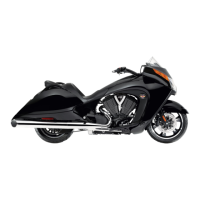
Victory 2009 VISION User Manual

Victory 2009 VISION
323 pages
To Next Page IconTo Next Page
To Previous Page IconTo Previous Page
Page #152 background imageLoading...
Page #152 background image
149
MAINTENANCE
Maintenance
6. Note the graduation mark on the rule that aligns
with the lower edge of the belt. This position
represents zero force.
7. Place the support base of the tension gauge
squarely against the lower surface of the belt as
close as possible to the rule or tape.
8. Keeping the tension gauge perpendicular to the
belt surface (Fig. 3) and parallel with its length,
push the plunger upward until the small O-ring
touches the tension gauge body.
9. Be sure the tension gauge is seated squarely
against the belt, and note the graduation mark
on the rule that now aligns with the lower edge
of the belt. This position represents 10 lbs. force.
10. To calculate belt tension (deflection) subtract
the smaller measurement from the larger
measurement and record it.
90
Fig. 3
Drive Belt
Push Inner
Plunger
visionownersmanual.book Page 149 Wednesday, February 13, 2008 4:31 PM

Table of Contents

Questions and Answers:

Question and Answer IconNeed help?

Do you have a question about the Victory 2009 VISION and is the answer not in the manual?

Victory 2009 VISION Specifications

General IconGeneral
Year2009
ManufacturerVictory
ModelVISION
CategoryTouring
Compression Ratio9.4:1
Cooling SystemAir / oil
Transmission6-speed
Final DriveBelt
Front Tire130/70-R18
Rear Tire180/60-R16
Engine TypeV-twin, four-stroke
Displacement1731 cc
Bore x Stroke101 x 108 mm
Fuel SystemElectronic Fuel Injection
Front SuspensionTelescopic fork
Rear SuspensionSingle
Front BrakesDual 300mm discs, 4-piston calipers
Rear BrakesSingle 300mm disc 2 piston caliper
Seat Height26.5 inches
Fuel Capacity22.7 liters / 6.0 US gallons
Wheelbase65.7 inches

Related product manuals