VISIONEER STROBE 500 SCANNER USER’S GUIDE
46
CHANGING THE BUTTON SETTINGS
1. Click on the OneTouch icon.
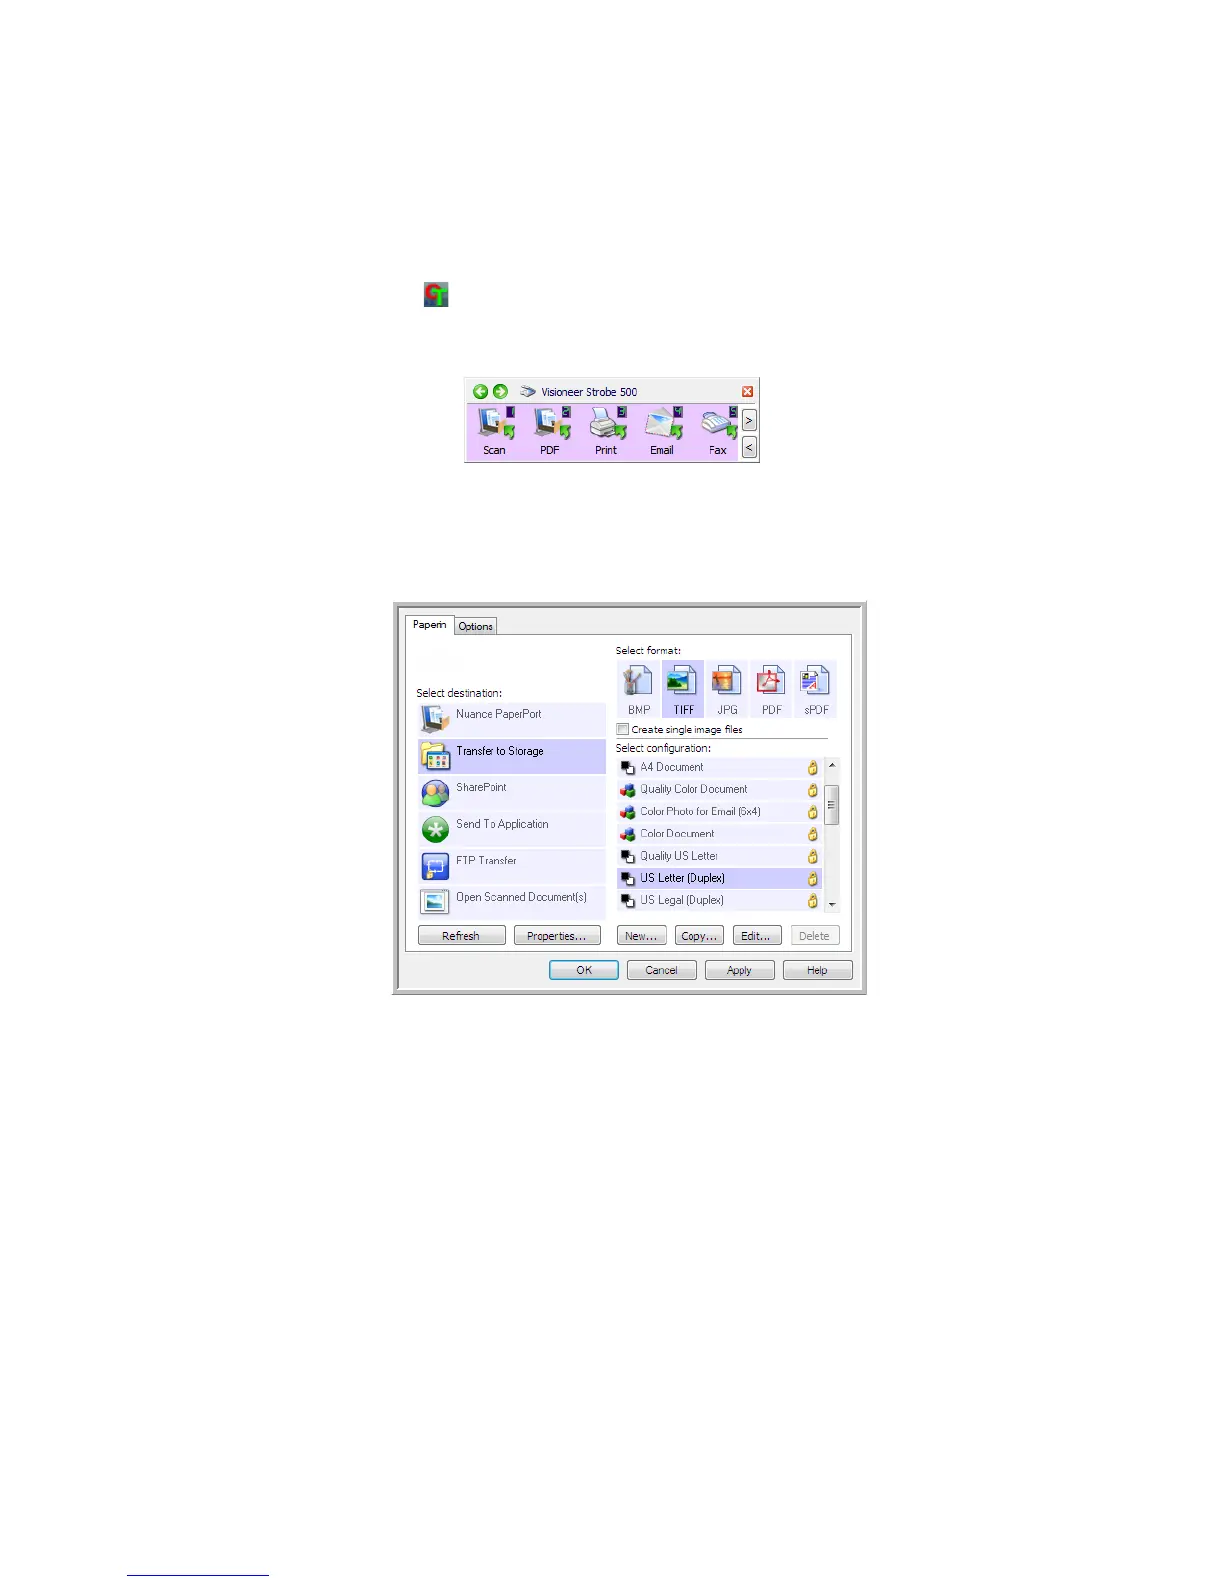
2. Right-click a button on the OneTouch Button Panel.
3. The OneTouch Properties window opens.
The One Touch Properties window will also open when you press, hold down for 3 seconds, and release a
scanner button.
Some of the options on the OneTouch Properties Window are “grayed out” and are not available, these
options are not appropriate for your scanner model.
4. Select the destination you want OneTouch to send the scanned image to in the Select destination list.
If you select a word processing program such as Microsoft WordPad or Microsoft Word that can be used for
OCR (such as TXT or RTF), the text in scanned images is automatically converted to word processing text.
5. Select a file format in the Select format panel.
The formats are based on the type of Destination Application you select. The icon names indicate their file
types. See File Formats on page 58 for more information about the available formats.
6. Select a scanning configuration in the Select configuration list.
The configuration’s basic settings include: scanning mode, resolution (dpi), page size, brightness (Br), and
contrast (Cr). To see a selected scan configuration’s settings, click its icon. Click the icon again to close the
detailed information. Refer to Scan Configurations on page 51 and Configure Before Scan on page 63 for
instructions on creating and modifying scan configurations.
7. Click on OK to save the changes.
Select the Destination
Application that will
open when you are
finished scanning. You
use the destination
application to view and
work with your scanned
images.
Select a
configuration for
scanning the item.
Select a file format
for your scanned
images.
Scanner button
configuration tab