SCANNING AND CONFIGURING ONETOUCH
77
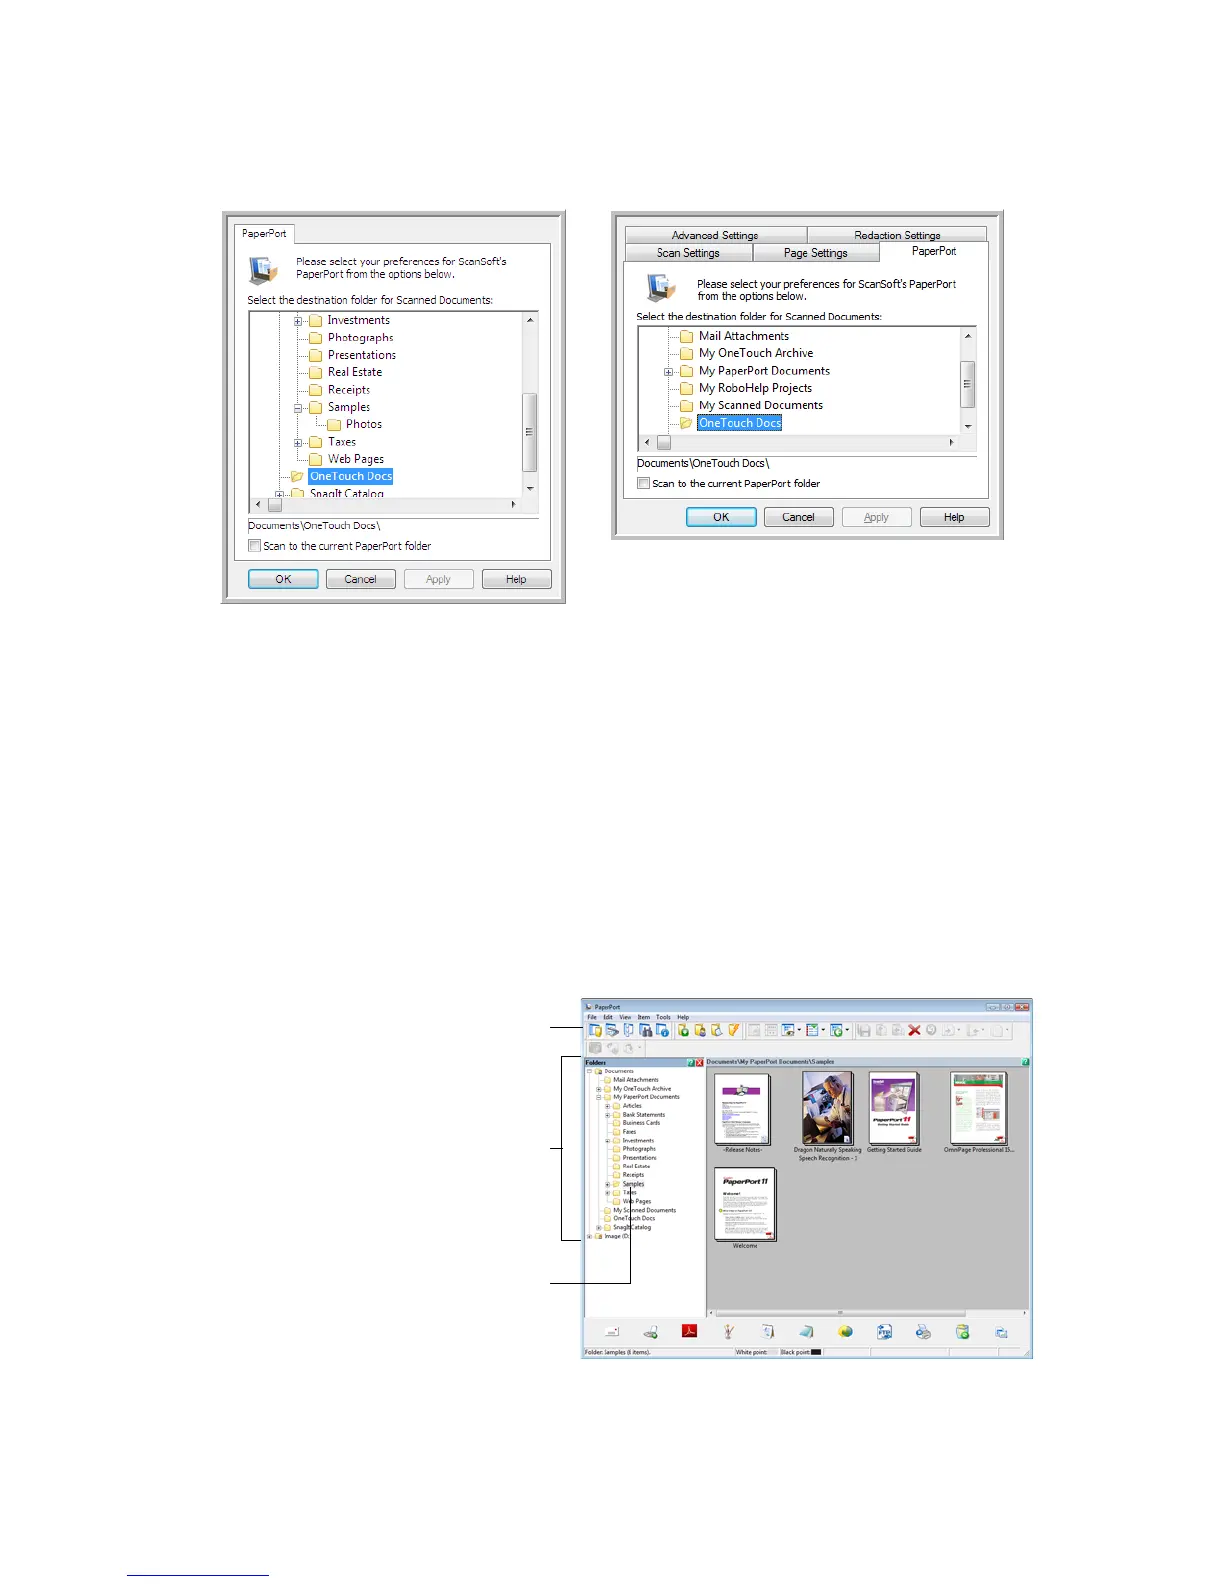
Select the destination folder for Scanned Documents
• Select a folder to send the scanned document(s) to when scanning to the PaperPort destination.
The list of folders in this window are from the PaperPort Folder Manager. Use the PaperPort Folder Manager
to add or delete folders, add other drives and network locations to this list. You cannot add new folders from
the OneTouch PaperPort configuration windows.
Scan to the current PaperPort folder
• Select this option to have the scanned document(s) sent to the currently selected folder in the PaperPort
application.
The PaperPort software must be open, before scanning, for the scans to be sent to the selected folder in the
PaperPort folder pane. If PaperPort is not open, this option is ignored and the scanned file is sent to the
folder selected in either the OneTouch Link Properties or Scan Configuration window for PaperPort.
PaperPort OneTouch Link Properties
window
Scan Configuration Properties window
- PaperPort tab
These are the folders that are available in
the OneTouch PaperPort configuration
windows. Press F1 on your keyboard to
open the PaperPort help file for
instructions on managing this folder list.
Click the folder icon to open or close the
folder list in PaperPort.
The selected folder in this list is where the
scanned file will be saved when PaperPort
is open and the OneTouch option Scan to
the current PaperPort folder is selected.