Replacing the ESI probe sample capillary 5-59
11. Slide a new GVF16 ferrule onto the PTFE liner tube.
12. Fit a new seal into the groove facing the short end of the coupling.
13. Slide the coupling—short end first—onto the capillary, followed by the
new PTFE liner tube and ferrule.
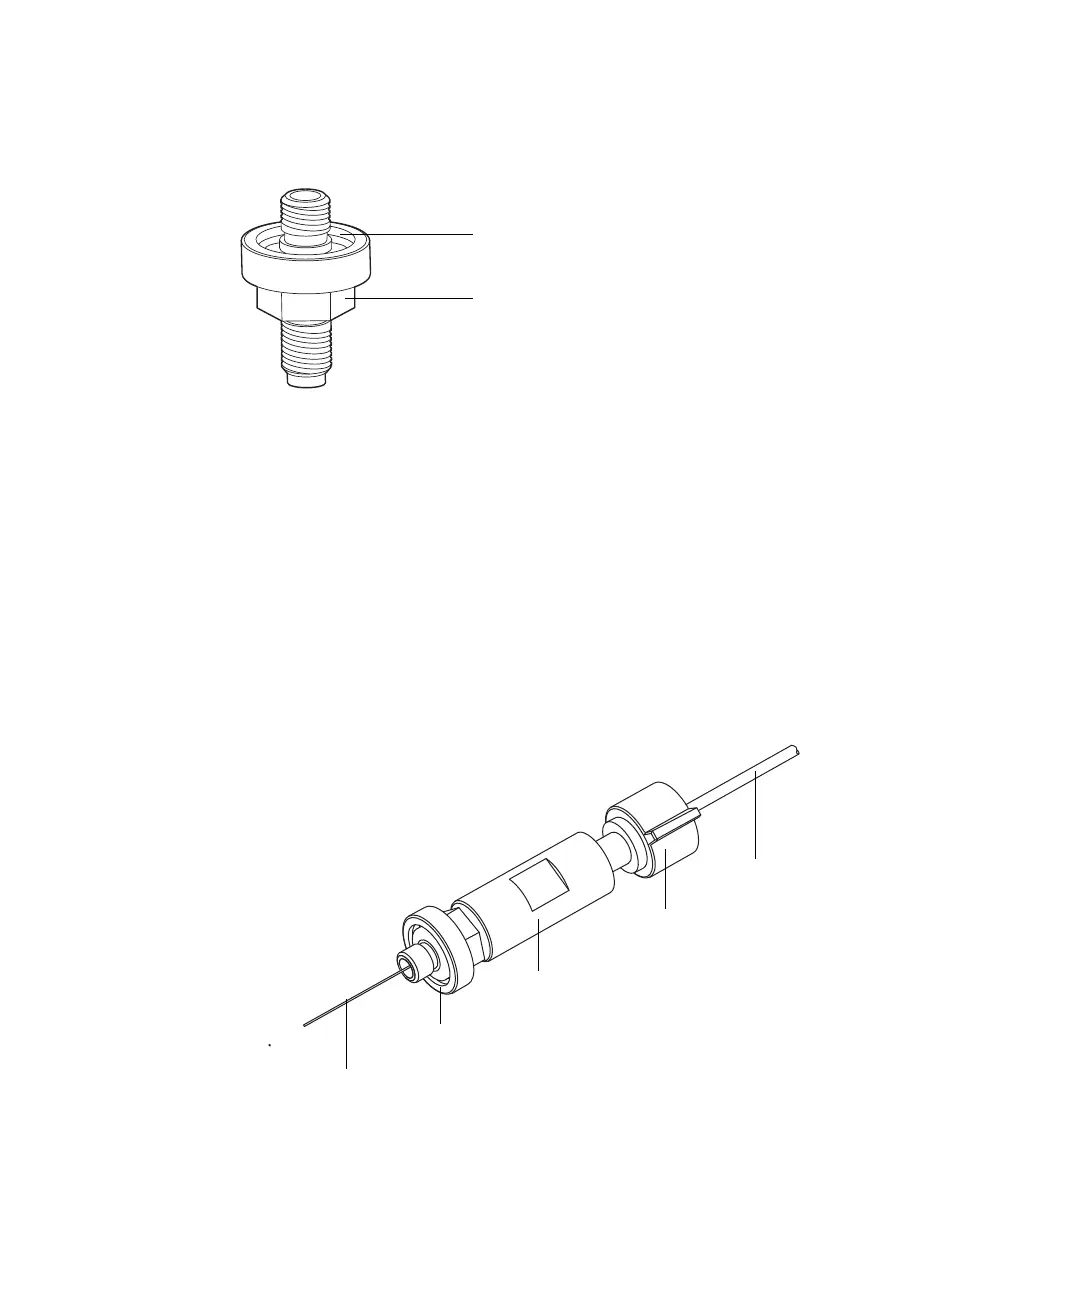
14. Push the capillary through the LC union until it can be seen in the other
end of the LC union.
15. Lightly screw the coupling into the LC union so that it does not restrict
movement of the capillary.
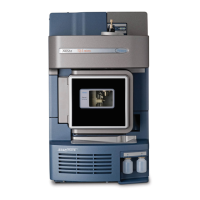
16. Slide a compression screw and ferrule onto a piece of 1/16 × 0.0025 bore
(5M) PEEK tubing and push the probe capillary back through the LC
union until the PEEK tubing butts against the stop.
Rationale: This ensures that the probe capillary is set to correct depth.
17. Tighten the coupling on the LC union so that it is snug but not tight.
18. Gently tug the capillary to make sure it remains secure.
PEEK tubing
Coupling
LC union
Compression
screw
Capillary