7. Select L1. L1 is now inserted in effect chain 1.
8. Go to the AW channel 1 CH View page (press [MONITOR]->[VIEW] and the channel 1 [SEL]
button) and click the ASSIGN button to enter the EFF. INSERT SETTING page.
9. Press the [EXTERNAL] button to turn it on.
10. Move the CURSOR to the SEND/RTN area and rotate the [DATA/JOG] dial to select SL1-1
or SL2-1 (depending on the Y56K’s installation slot) as both SEND and RTN.
11. Click OK. Y56K mono effect chain 1 is now inserted on AW channel 1.
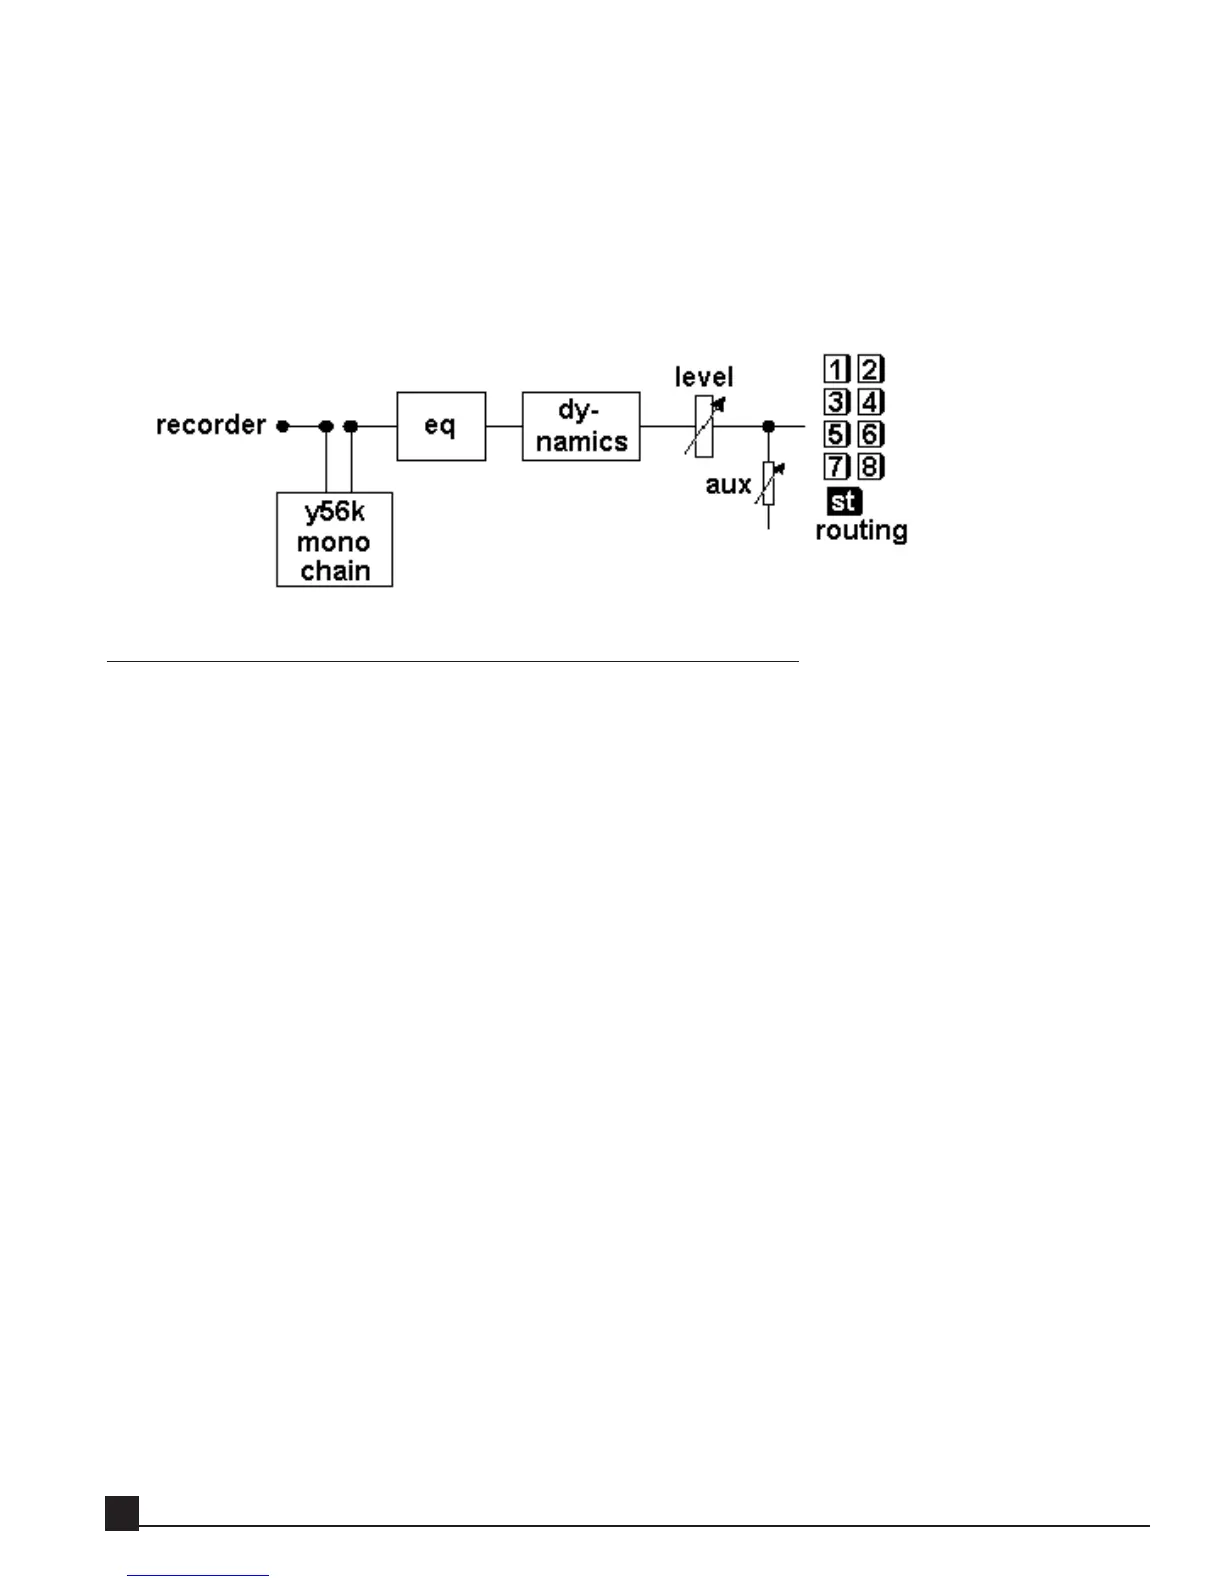
Using an effect chain as a stereo channel insert
This is the simplest way to patch a chain with one or more stereo effects into a stereo channel pair.
In the following example we’ll insert the Renaissance EQ on two linked (stereo paired) AW channels, for
instance a stereo piano track. Follow these steps to use Y56K effect chain 1/2 as a stereo channel insert for
AW channels 1&2:
1. Load a song to the AW.
2. Go to the Y56K Main page by pressing [AUX7]->[F5] if the Y56K is installed in option slot 1 or
[AUX8]->[F5] if the Y56K is installed in option slot 2.
3. If the Y56K splash screen is visible, press [ENTER] to access the Y56K Main page. Otherwise proceed to
step 4.
4. Go to the SRC column of effect chains 1/2 and verify it’s set to AW. If not, click on the button and select
AW from the popup menu.
5. Go to the GRP column of effect chains 1/2 and verify it’s set to Stereo. If not, click on the button and
select Stereo from the popup menu.
6. Go to one of the empty effect blocks on stereo effect chain 1/2 and press [ENTER] or click the mouse to
open the New Effect Menu.
7. Select REQ (Renaissance EQ). REQ is now inserted in effect chain 1/2.
8. Go to AW channel 1 CH View page (press [MONITOR]->[VIEW] and channel 1 [SEL] button).
Channel 1 is the odd channel of the pair. Click the ASSIGN button to enter the EFF. INSERT SETTING
page.
9. Press the [EXTERNAL] button to turn it on.
10. Move the CURSOR to the SEND/RTN area and rotate the [DATA/JOG] dial to select SL1-1 or SL2-1
(depending on the Y56K’s installation slot) as both SEND and RTN. Click [OK].
Y56K User Guide
20