510736456
3
EN
blueMatic EAV4 / EAV4+ Installation, Operating and
Maintenance Instructions
Aug. Winkhaus GmbH & Co. KG ∙ Berkeser Straße 6 ∙ 98617 Meiningen
T +49 369 3950 - 0 ∙ www.winkhaus.com ∙ Subject to technical changes
Frame part 1 (Figure 3.3.1-1):
• Drill a hole with a Ø 8 mm for cable through the door frame
• Pass the cable through the door frame (including cable reserves in frame!)
• Fasten the frame part 1
with the fitting screw Ø 3 x 20 mm
Frame part 2
(Figure 3.3.1-2):
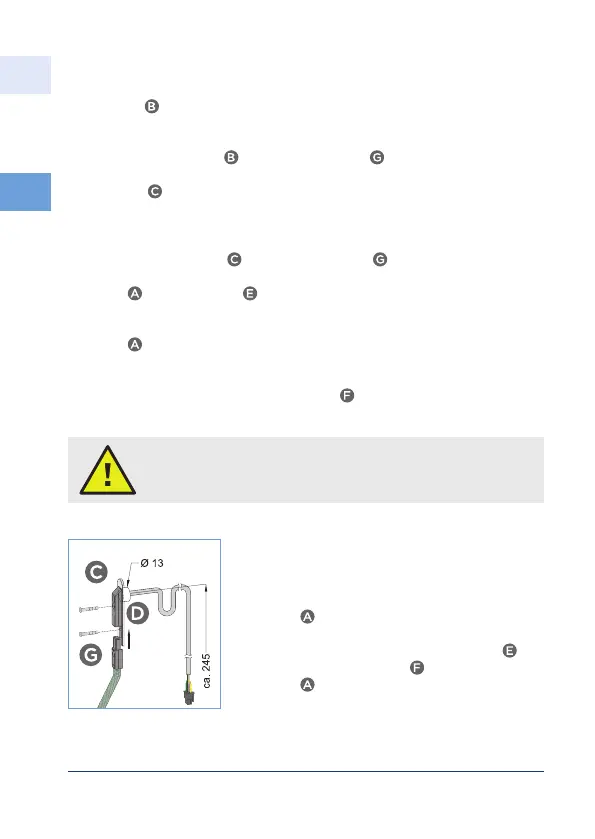
• Drill a hole with a Ø 13 mm for cable/plug through the door frame
• Pass the cable with plug for frame power supply through the door frame
(including cable reserves in frame!) use T-ABDECKUNG KÜ-T1 RT R8
• Fasten the frame part 2
with the fitting screw Ø 3 x 20 mm
Sash part
with cover plate (Figure 3.3.1-1):
• Mill slotted hole max. 95 mm and approx. 50 mm deep
Sash part without cover plate (Figure 3.3.1-3):
• Drill a hole 2 x Ø 13 mm resp. oblong hole through the euro grove (approx.
245 mm vertical under the frame part drill hole of Ø 8 mm, depends on the
profile/hinge rotation point) and for screw
pre-drill (Ø 2,5 mm)
• Attach necessary drillings (Ø 13 mm) in the
sash (e.g. in the glazing chamber)
• Pass the cable with the plug for the motor
through the door sash
• Insert the end of the spring into the sash
part
into the drilling/routing into the door
sash/cover plate are.
• And/or alternatively to the cover plate
with screw M3 x 12 mm
fasten the sash
part
with fitting screw Ø 3 x 20 mm in the
fitting groove.
Figure 3.3.1-2: Detail frame part 2
Caution! The drillings must be burr-free. The spring must be
kept under a slight pre-tension even with the door being closed
(approx. 10 mm).