6885J11
7-32
9
8
7
6
5
4
3
2
1
Clamp bracket and swivel bracket
Installing the PTT unit (ET)
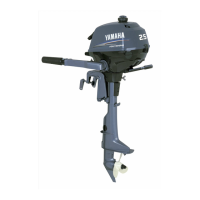
1. Fully tilt the outboard motor up, and then
support it with the tilt stop lever 1.
w
9 When installing the PTT unit without
removing the power unit, be sure to sus-
pend the outboard motor. Otherwise, the
outboard motor could suddenly fall and
result in injury.
9 After tilting the outboard motor up, be
sure to support it with the tilt stop lever.
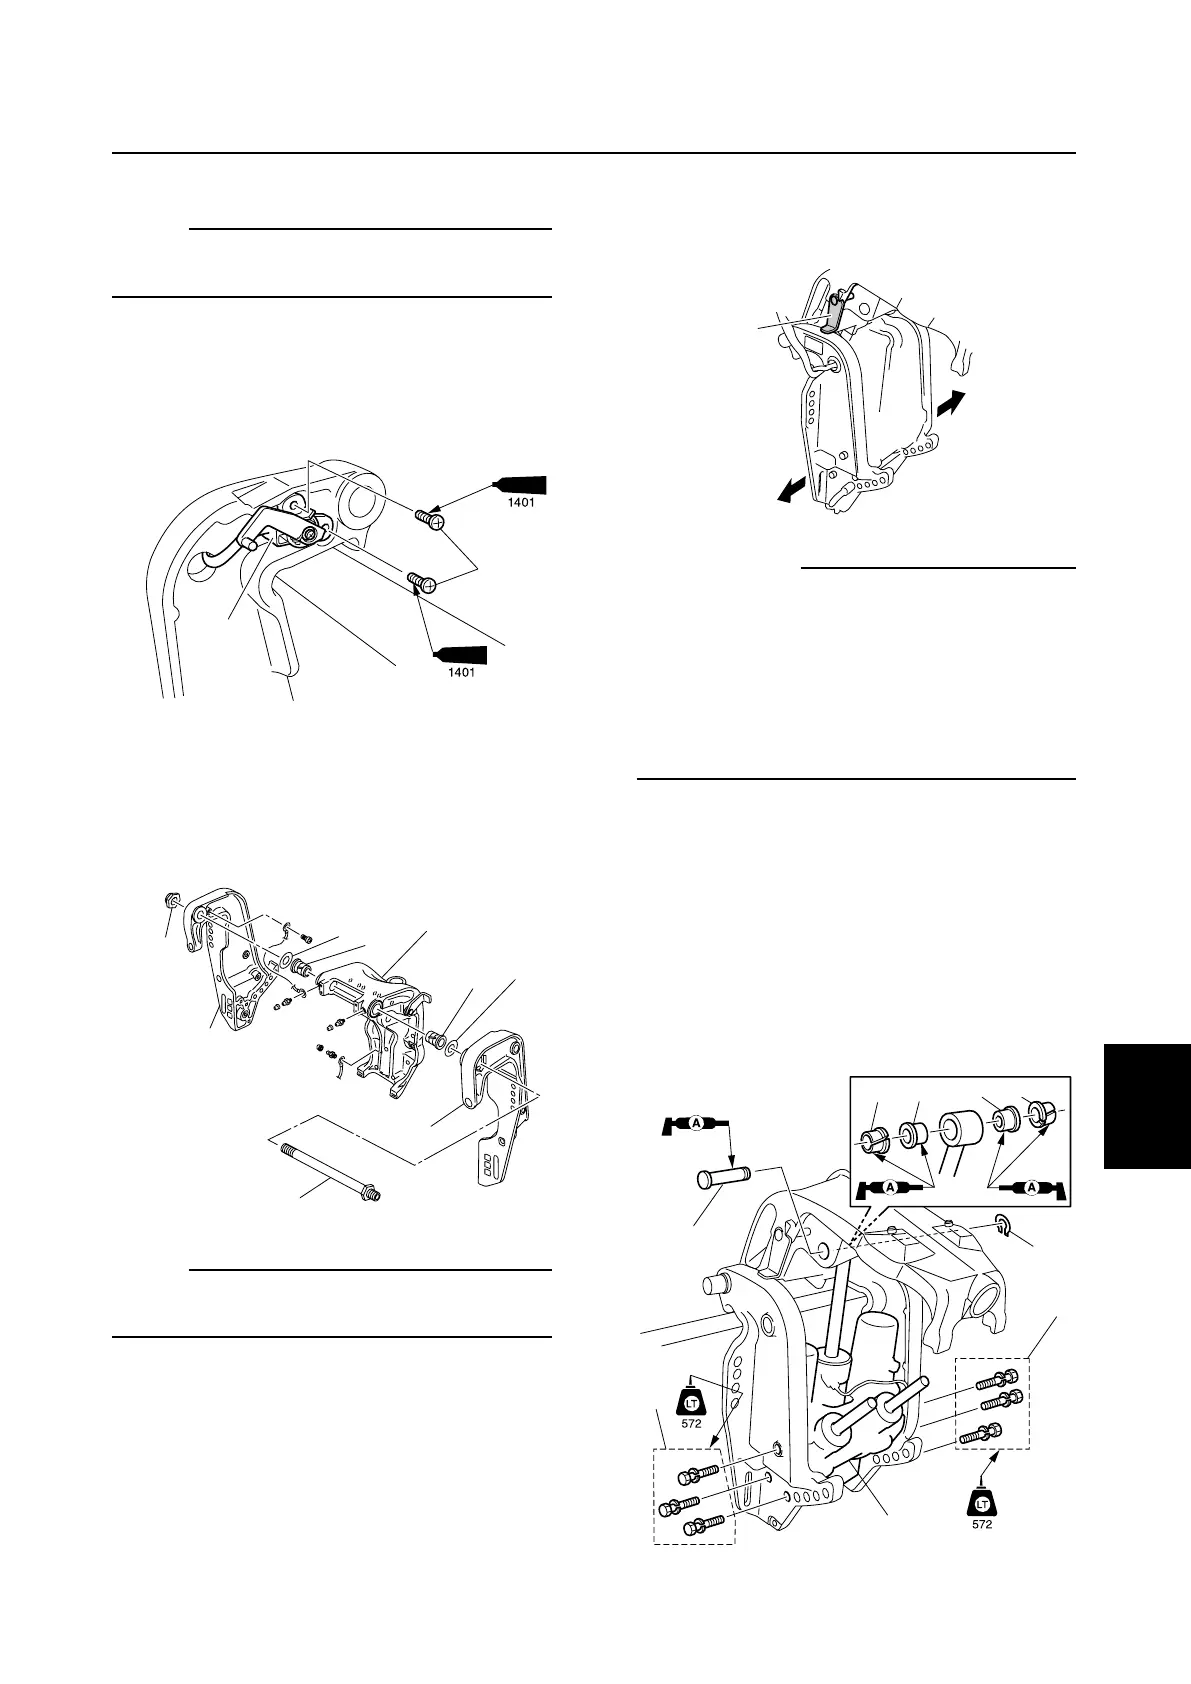
2. Install the bushing 2 and 3.
3. Lift the PTT unit 4 up and install the PTT
unit mounting bolts 5, and then tighten
them.
4. Install the tilt ram upper end into the swiv-
el bracket with the pin 6 and circlip 7.
Assembling the swivel bracket (ET)
NOTE:
To assemble the swivel bracket, refer to page
7-24.
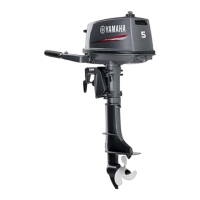
Installing the clamp bracket (ET)
1. Install the trim sensor 1, and then tight-
en the screws 2.
2. Install the bushings 3 into the swivel
bracket 4, then install the swivel bracket
4, washers 5, clamp brackets 6, and
through tube 7.
NOTE:
Adjust the trim sensor cam after installing the
PTT, refer to page 7-33.
3. Install the self-locking nut 8 temporarily.
4. Install the ground lead between the
clamp brackets and the swivel bracket.
6885J11_07a 07.10.12 15:16 Page 35
 Loading...