3D Systems, Inc.
50
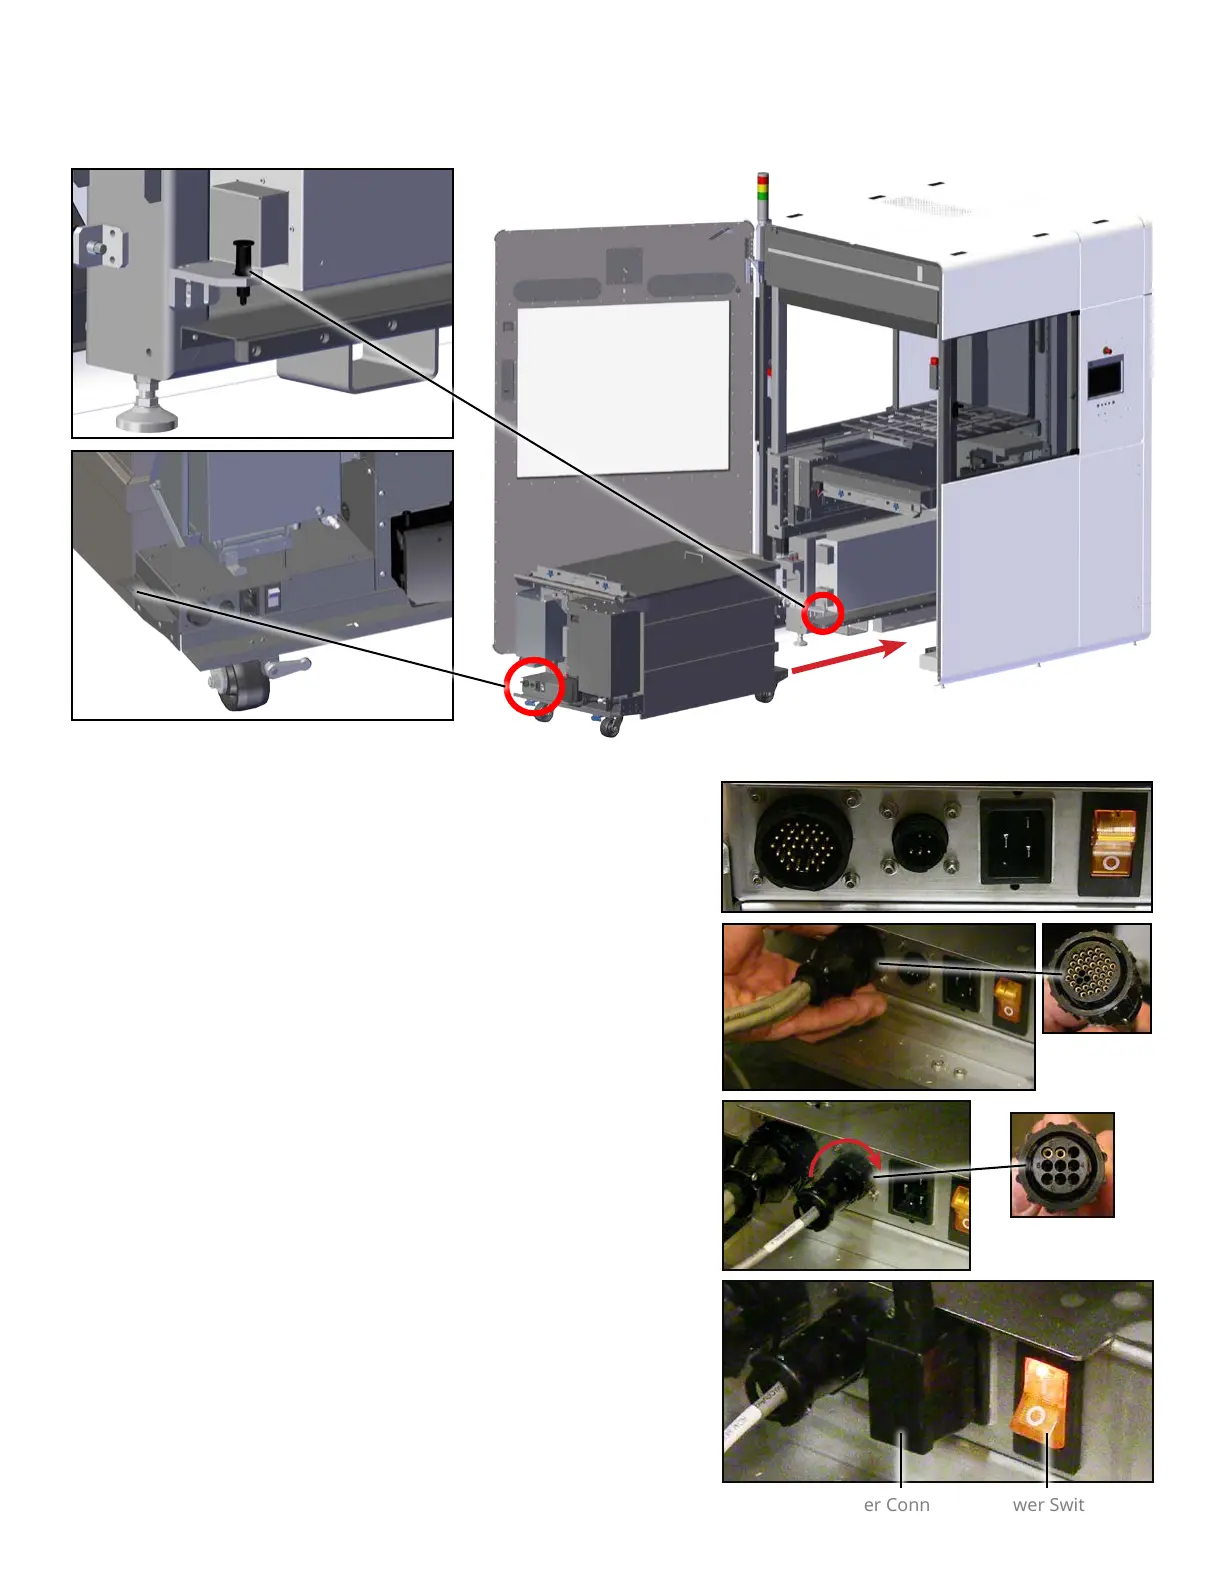
MDM Connections
Power Connector Power Switch
I/O Connector
Serial Connector. Turn
collar to lock.
3. Unlock the brakes on the MDM wheels and slowly roll the MDM into the machine.
4. Roll the MDM into the print chamber until the locking pin (located on the bottom-left of the inside of the print chamber)
is lined up with the bracket on the MDM. Turn the pin until it sets into the bracket. The bracket has a hole for the pin to set
into. When the locking pin attaches properly, the MDM will also hit the bumper at the back of the machine.
Locking pin
MDM bracket
for locking pin
Push MDM into chamber and secure
locking pin and MDM bracket
5. Once the MDM is in the machine, connect the cables on the front of
the MDM as shown.
6. Plug the I/O Connector into the rst input. The I/O connector is the
large circular plug with the bundled gray wires.
7. Plug the Serial Connector into the second input. Secure the
connection by turning the collar on the connector clockwise.
8. There is a black, three-pronged power cord that plugs into the IEC
socket. This connection provides power to the heater function of the
MDM, allowing the material to heat up.
9. After the connections are nished, ip the power switch to the UP
position to enable power to the MDM.
10. On the UI, go to the Heater Settings Screen to verify that the
temperature of the MDM is 28 °C (+/- 3 °C). Refer to the section,
“Heater Settings Screen” on page 39 for details on the screen
functionality.