3D Systems, Inc.
60
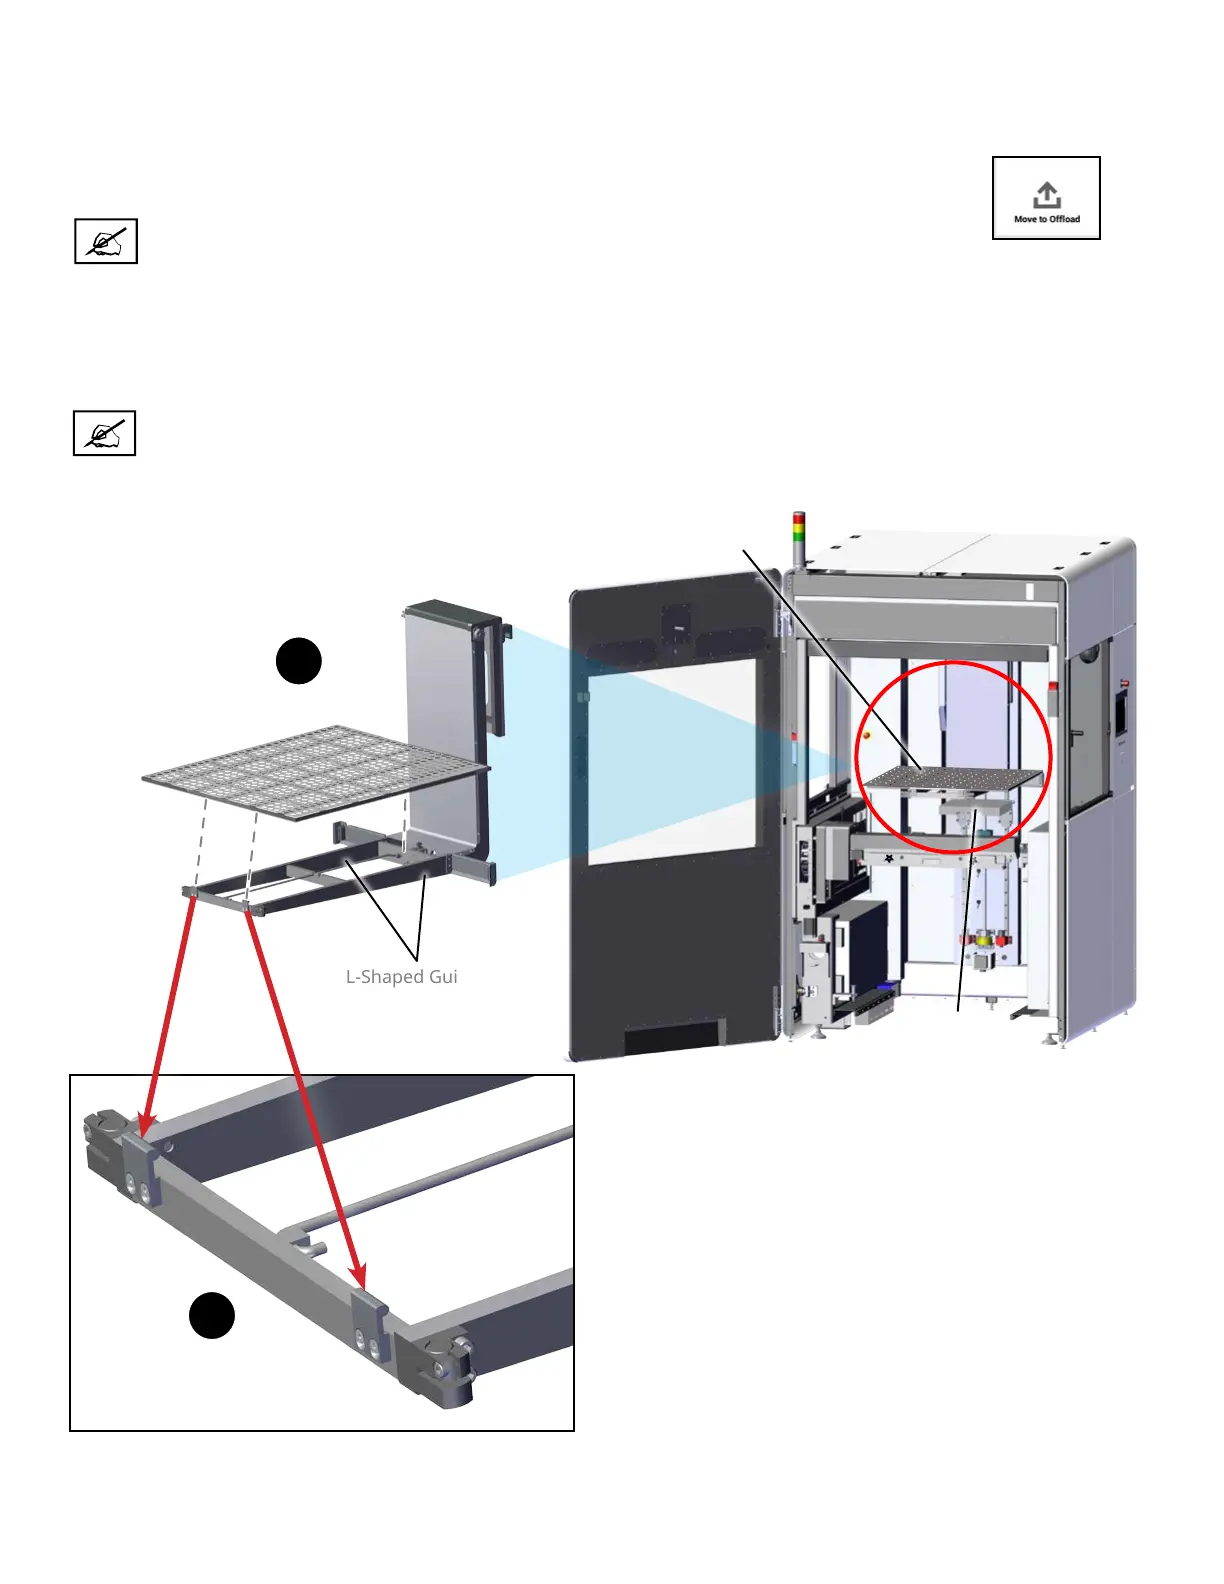
INSTALLATION OF PRINT PLATFORM WITHOUT OFFLOAD CART
Verify that the MDM is installed in the printer before starting this process. Wear nitrile gloves when handling the print pad to
prevent material exposure to your skin.
1
2
Print Pad inside Print Chamber
(MDM not shown for clarity, but should be installed)
L-Shaped Guides
Front print pad notched guides
1. Verify that the elevator is at its ooad position. If necessary, move it to its ooad position by selecting
the Move to Ooad button on the Elevator/Leveler screen under the Tools menu.
2. Place the print pad between the L-shaped guides (1) towards the rear of the print chamber.
3. Pull the print pad forward against the print pad notched guides at the front (2).
4. Make sure that the front edge of the print pad engages with the notched print pad guides.
5. Move the elevator to the Start position by pressing Move to Start on the Elevator/Leveler screen under the Tools menu.
Elevator
Platform
Print Pad
NOTE: If this is right after a build, you may get the warning message, “Print applicator is not
at home position.” If so, press Print Applicator > Move to Home.
NOTE: While starting a print job will automatically move the build platform home, it is best
to manually home the elevator after installing to prevent bubbles and other defects in the
vat resin.