3D Systems, Inc.
63
2
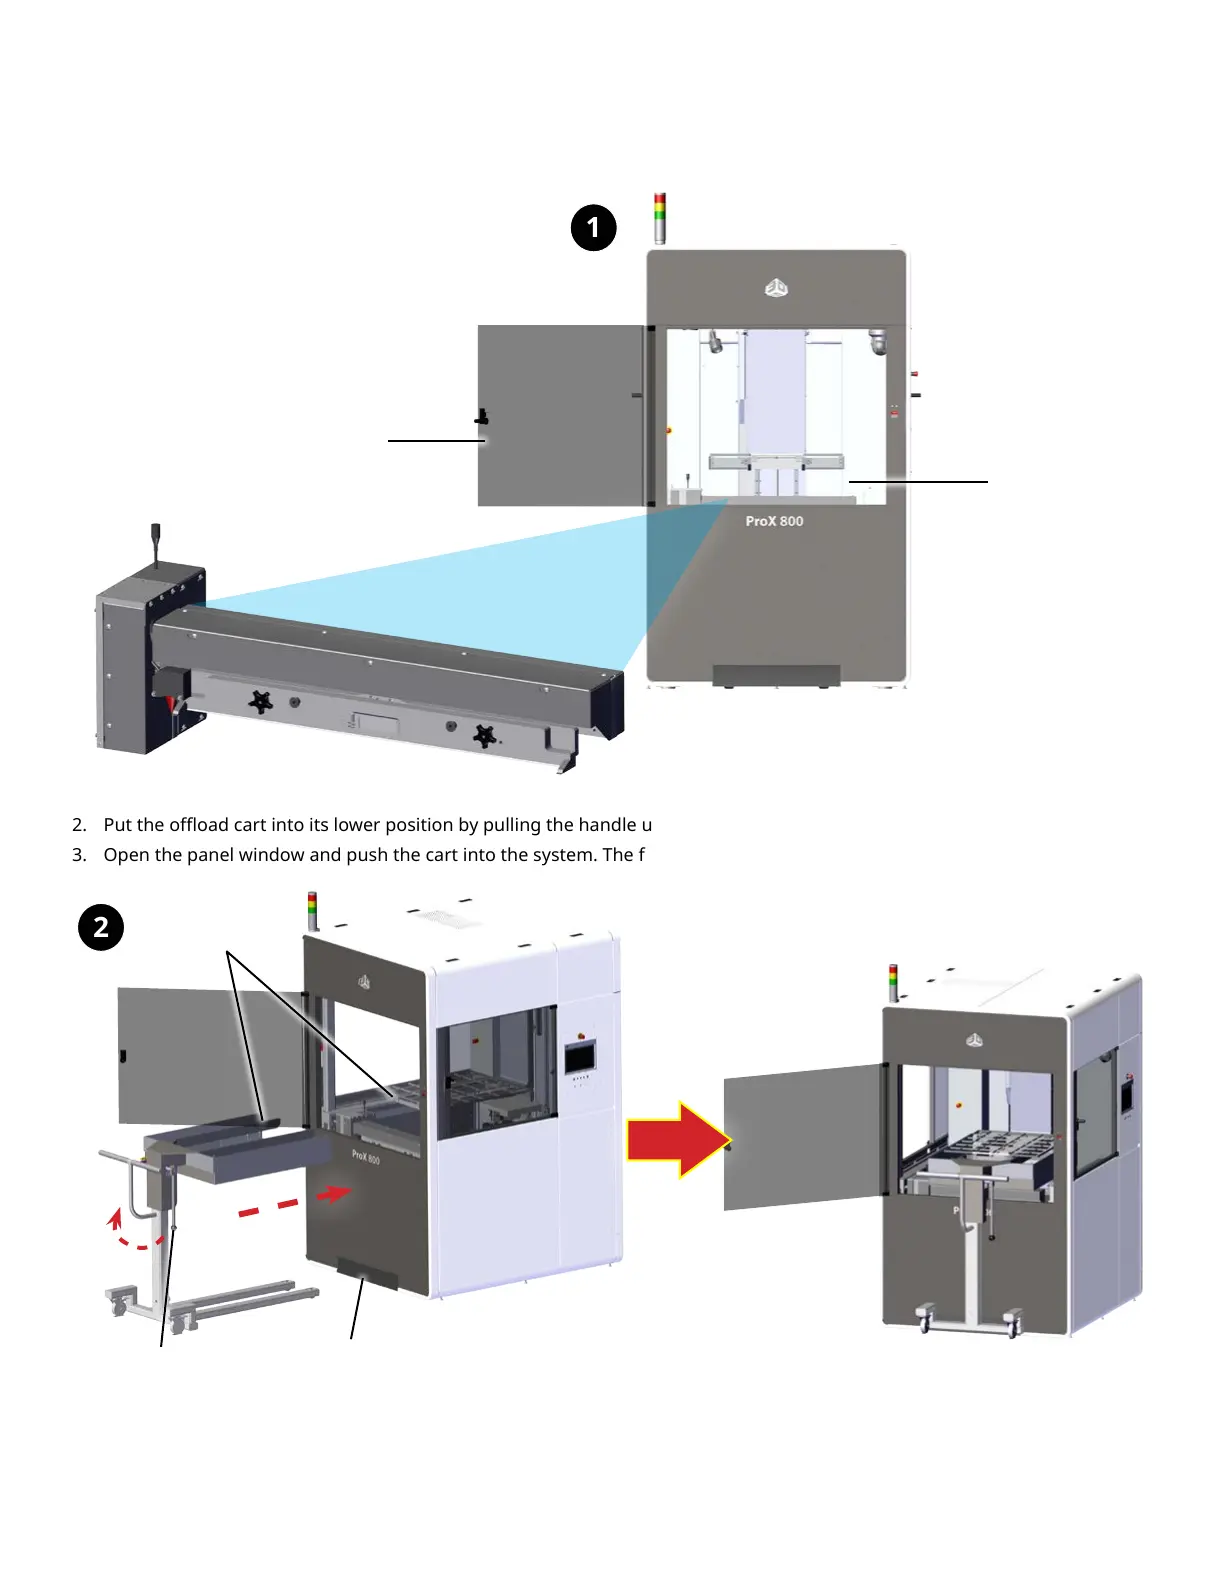
2. Put the ooad cart into its lower position by pulling the handle up (2).
3. Open the panel window and push the cart into the system. The forks of the cart will slide underneath the print pad (2).
When the print pad is in the ooad position, the latches for the print pad will be disengaged.
4. Push the adjustment lever on the cart to the down position to lift the print pad off of the elevator
5. Using the handles on the cart, carefully pull the print pad out of the machine. To remove build parts from the platform,
follow the steps outlined in the section Post Processing of Build Parts.
1
Remove Print Platform With Ooad Cart
1. The default ooad position for the system with a cart should be set higher than one without a cart. Allow part(s) to drain
over vat for 30 minutes. Ensure there is enough room to slide the ooad cart under the print pad without touching the
print applicator assembly (1). To reset the ooad position, see the section, “Setting the Ooad Position.”
Slide bottom of cart into entryway
Pull adjustment lever up
Cart inserted into system
Slide cart forks
under print pad
Space for cart
Print applicator
assembly
Open door for
access