3D Systems, Inc.
57
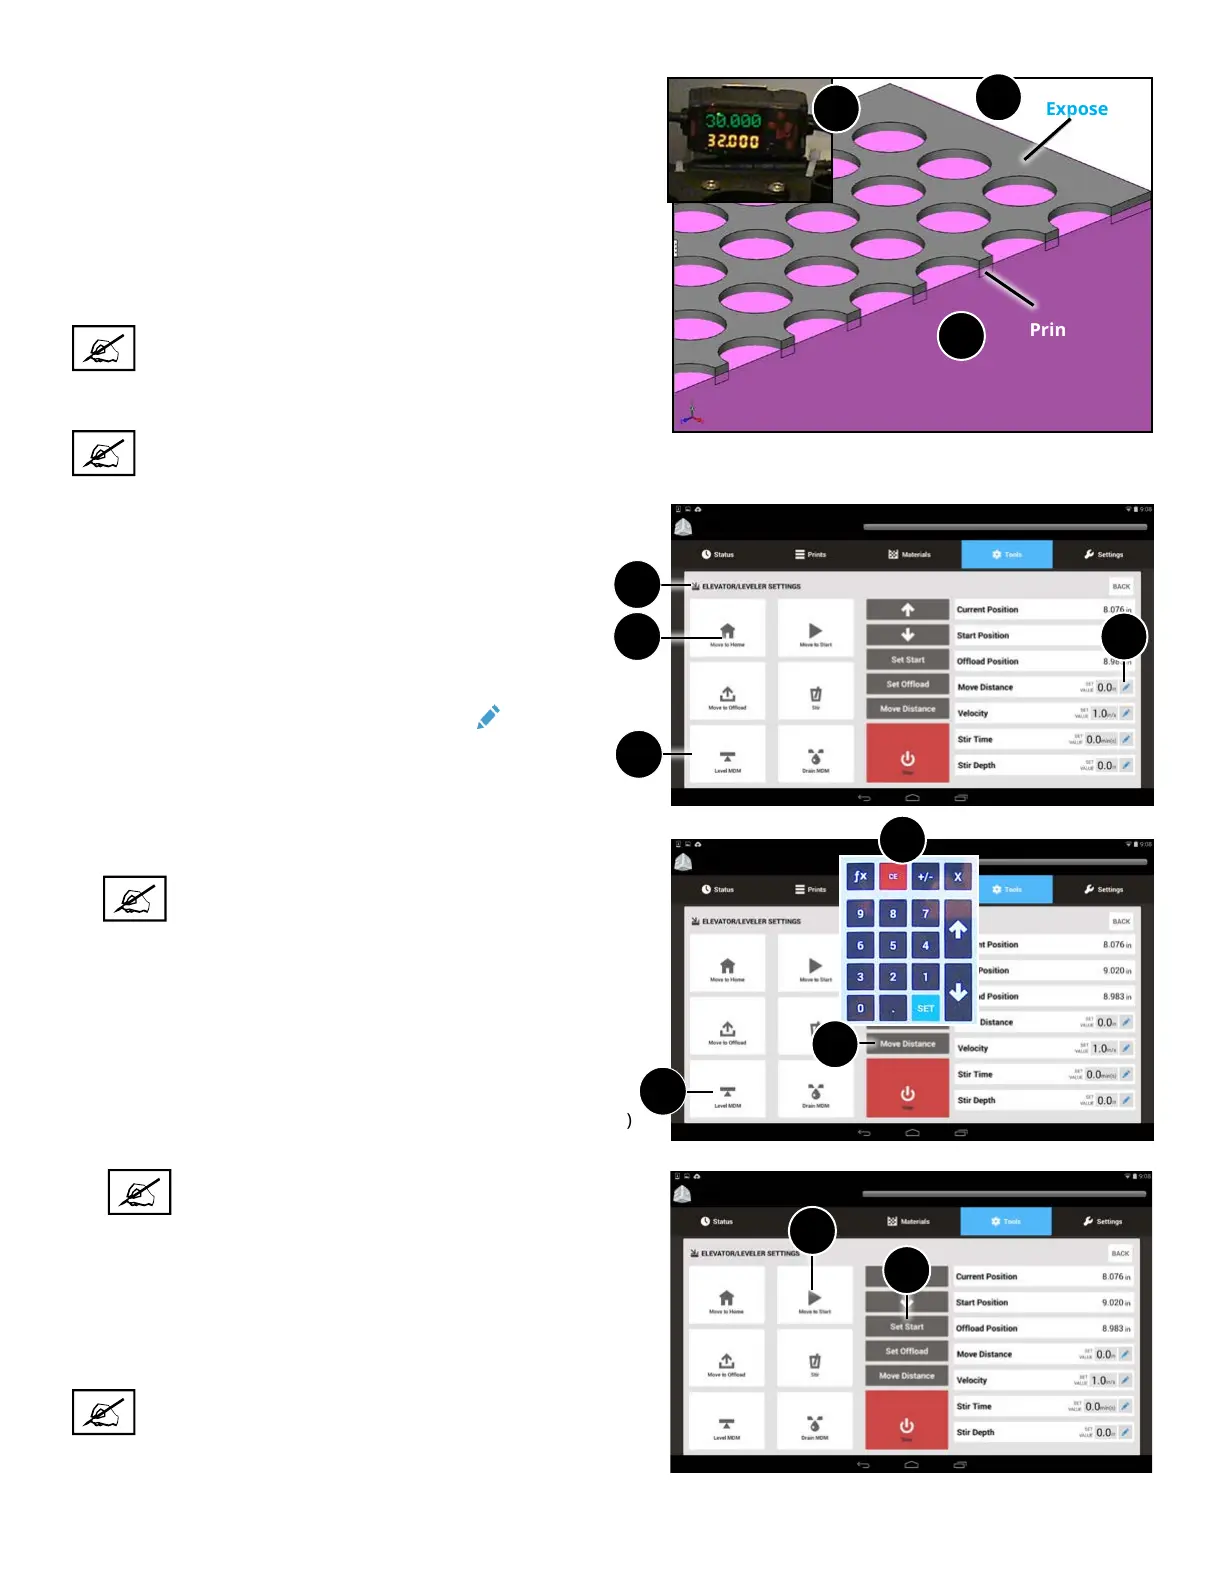
Print Pad
Exposed
Print Pad
Submerged
Build Material
Setting the Start Position
The Start Position is the position of the print pad when the machine
is set up for optimal printing success.
The start position will need to be set when the printer is rst set up
or when any of the following conditions exist:
a. The top of the print pad is not exposed.
b. The bottom of the print pad is not submerged.
c. The Omron Sensor does not read approximately 30.000 (+/-
0.001).
NOTE: See illustrations of the locations of these items in
the section, “ProX 800 Printer - Inside View” on page 18.
If any one of these conditions exists, the Start Position must be set.
NOTE: You should be able to see the entire print pad
including all the holes. If any holes are completely
submerged and cannot be seen, the Start Position needs
to be set.
To Set the Start Position:
C
A
ProX 800
B
ProX 800
4
NOTE: If the Start Position is not set, the elevator
will move to the original default Start Position
during printing.
Any time the print pad is removed and reinstalled, it is advised
that Move to Start (9) be selected and the MDM leveled (by
pressing the Level MDM button) to make sure that all settings
have been retained for optimal printing. If not, you will need to
repeat the preceding steps to reset your Start Position.
NOTE: After setting the Start Position, there may be
bubbles in the MDM. Bubbles must be removed before
printing. To remove bubbles, follow the instructions in
the next section.
ProX 800
5. Type in the value you wish to move the print pad, for
example,
.1 > Set (5).
NOTE: If at any time the print pad needs to be moved
in the other direction you can enter a negative value
using the following sequence: Value (.1) > - (minus
sign) > Set. This will move the print pad down instead
of up.
6. Select the Move Distance Button (6). Continue to move the
elevator until conditions (a) and (b) (listed above) are cleared.
7. Select Level MDM (7)
8. If any of the three conditions still exist, repeat Steps 4 and
7.
Once the conditions have been cleared, press the Set Start (8)
button to set this position.
1
2
3
1. Navigate to the Tools > Elevator/Leveler Settings
Screen (1).
2. Press the Level MDM button (2).
3. Select Move to Start (3). Wait for the elevator to move
to the current start position.
4. In the Move Distance eld, select Edit
(4).
8
9
7
5
6