3D Systems, Inc.
59
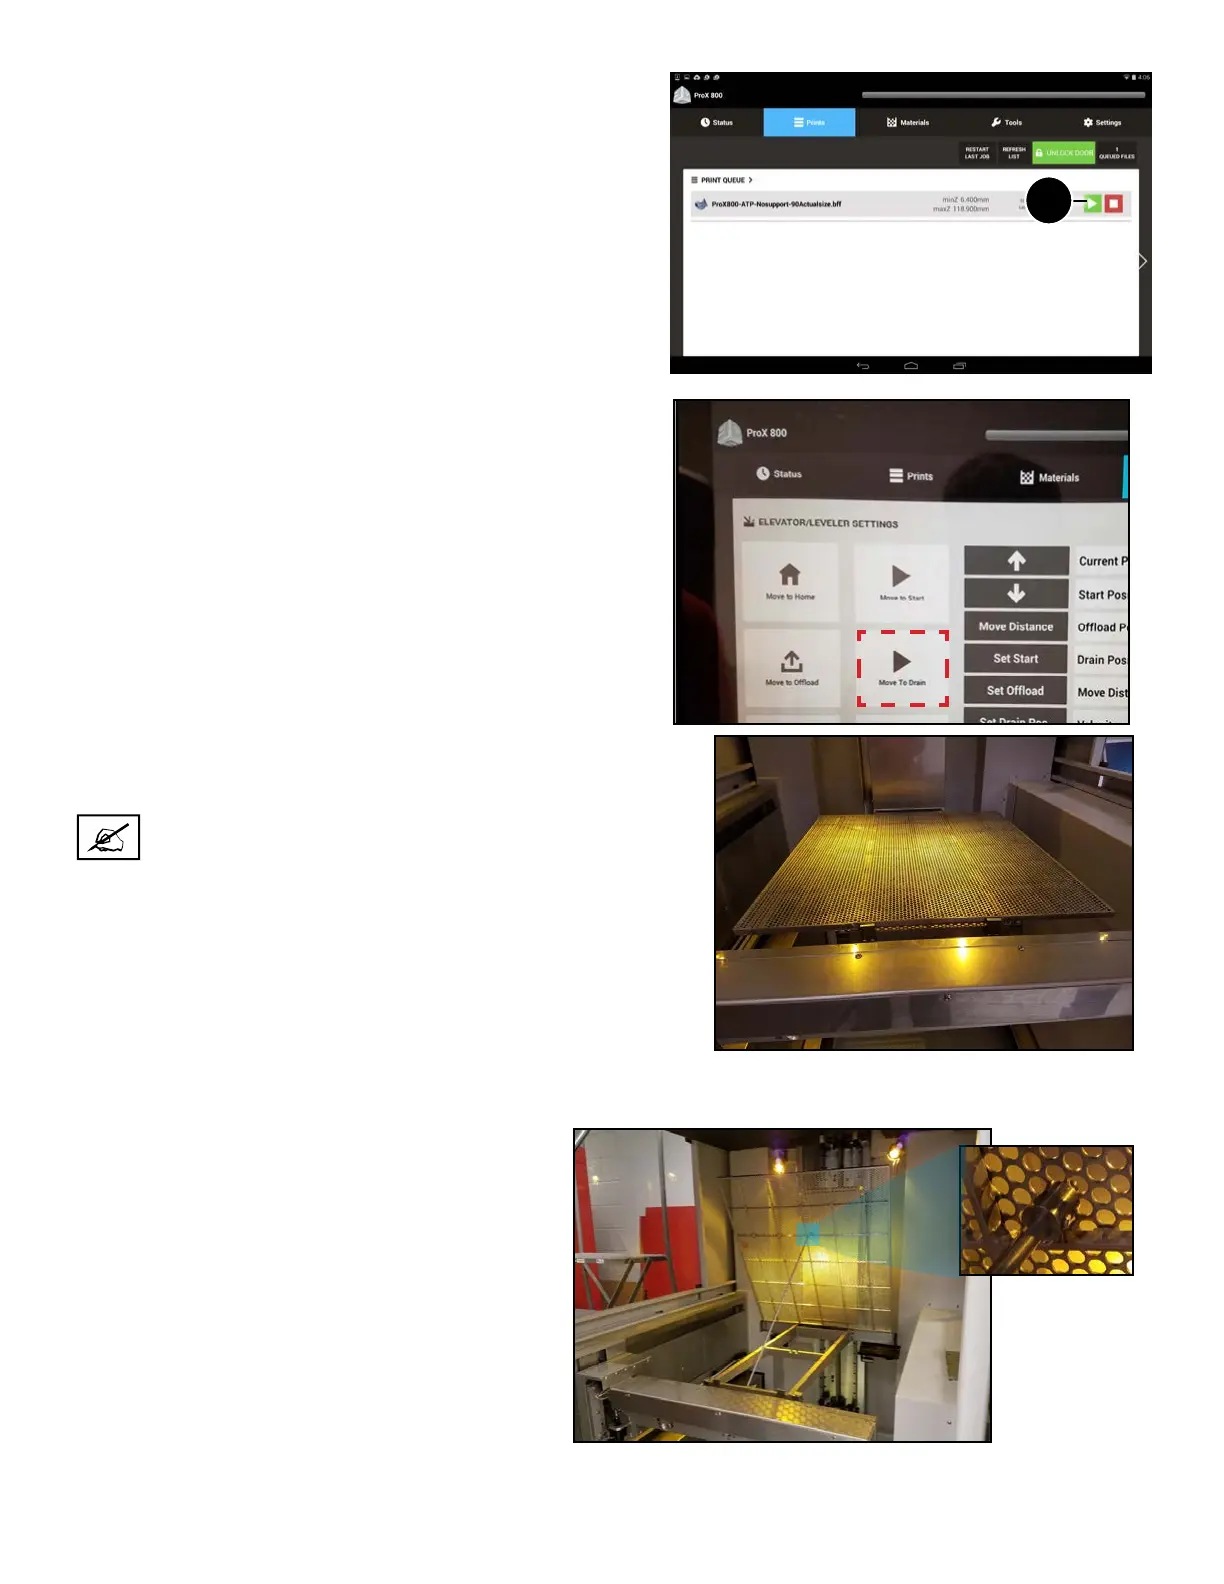
5. Press the Play button next to the desired .bff le, or wait for the
le to pop up in the top left corner and then tap the Play button
(4).
6. The printer goes through a series of checks and processes when
a print is started:
• Checks material level
• Checks elevator position
• Homes the elevator, if necessary
• Moves elevator to start position
7. Observe the rst few layers of the print to ensure that the
part(s) are adhering to the print pad. You can see which layer
the machine is printing by looking at the Status Screen.
4
Drain the Build Platform
When the build is done, it is necessary to let excess resin drain
off the part(s). To drain the resin, do the following:
1. If your part has not auto-drained after nishing, you must go
to Tools > Elevator/Leveler Settings > Move to drain.
2. Once the build platform is moved to drain level, leave it at
(Figure 1) to drain the part(s) for about 30 minutes.
3. After 30 minutes, you may use the arm located
under the build platform to tilt it in order to drain
resin from any trapped volume (Figure 2).
Figure 1 - Draining build platform in at position (pictured
without build parts)
Figure 2 - Draining build platform in tilted position (pic-
tured without build parts)
arm ts in build
platform hole
NOTE: Be sure drain level is just above resin. If drain
level is set too high, resin drops could splash resin in
the MDM, causing spillage.