3D Systems, Inc.
70
Reboot the Computer
If it becomes necessary to reboot the computer, press the PC Reset button on the electrical panel. See the section “ProX 800
Printer - Inside View” on page 18 for an illustration.
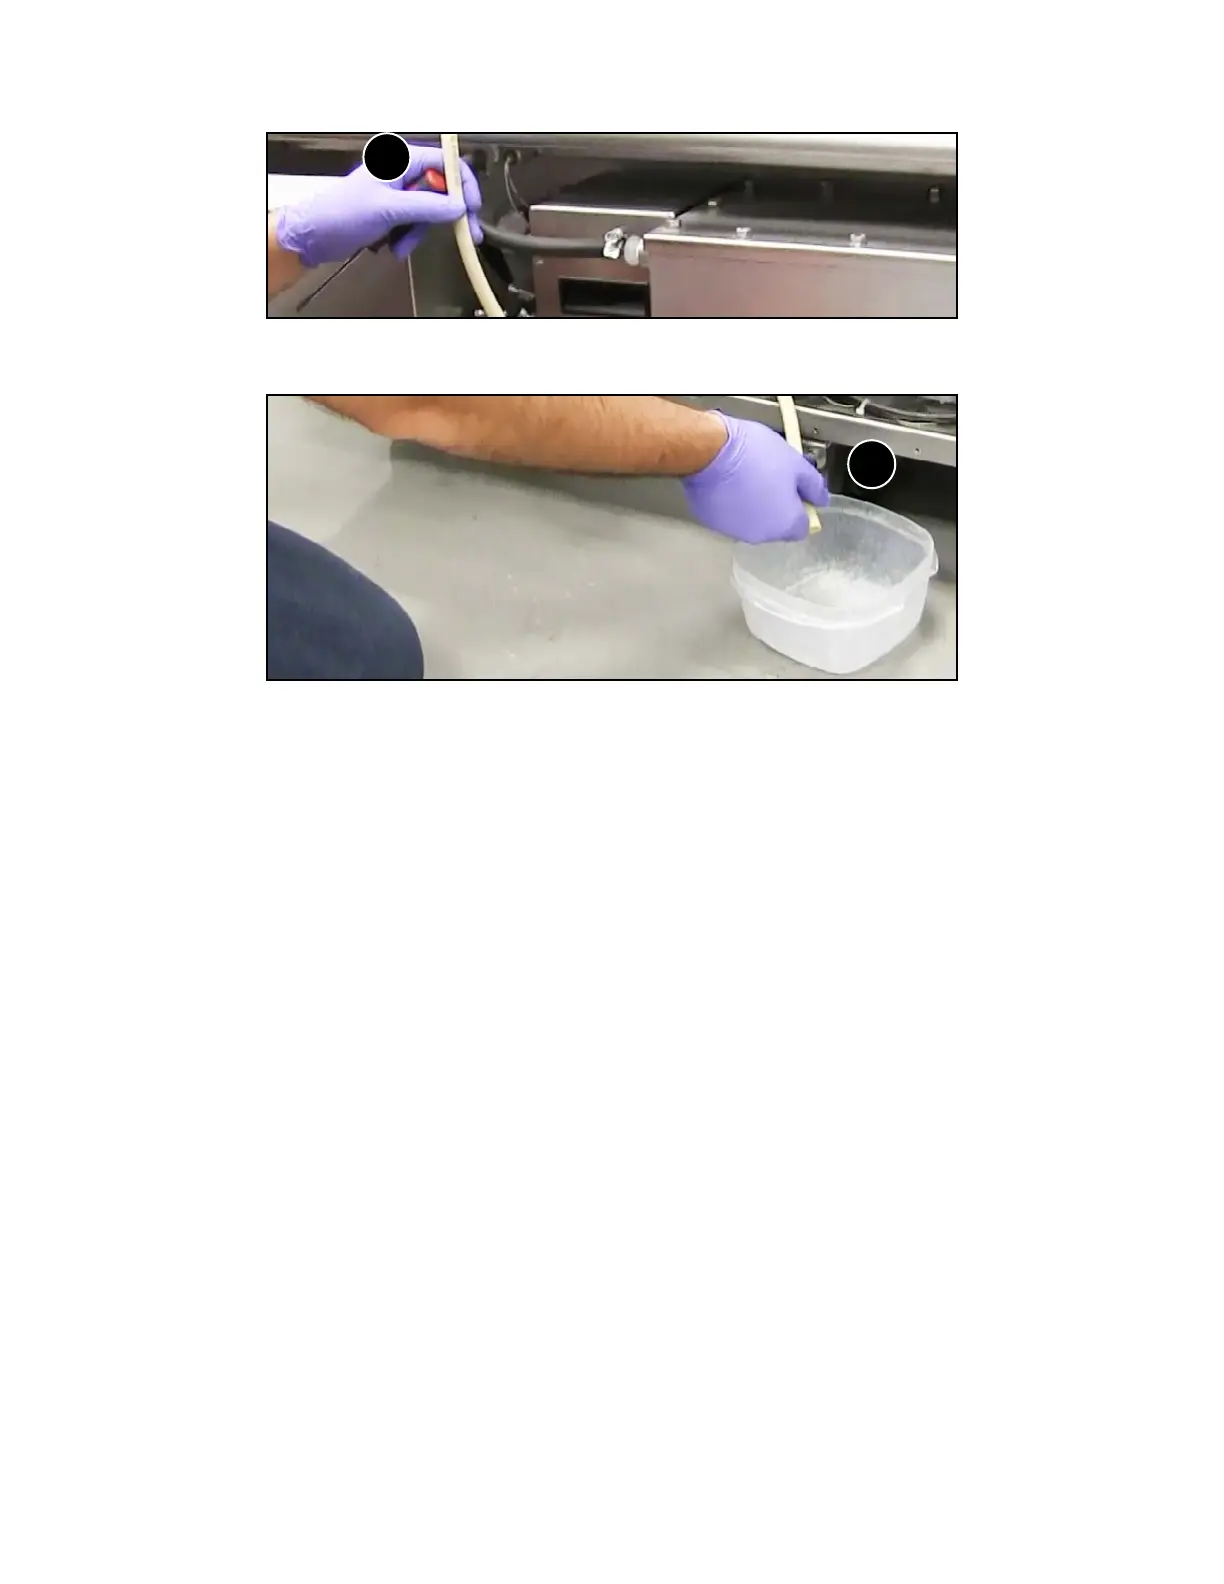
8. Remove the upper part of the hose from the connector and hold it in a vertical position (9). Stretch the hose to its full length.
Let the print material drain from the hose into the drip container (10).
Remove top of hose from connector and hold vertically
Let print material drain from hose into the drip container
9
10
9. Dispose of the hose and excess print material according to any applicable regulations.
10. Replace with the new hose, connecting it as the original hose was:
• Slide hose clamps onto each end of the hose.
• Connect the top part of the hose to the connector and fasten the hose clamp.
• Insert the hose into the pump mechanism and close the pump cover.
• Reinstall zip ties.
• Reattach bottom portion of hose and fasten hose clamp.
• Clean up any spilled print material.
• Open valve on the lower hose connection by turning counterclockwise.