3D Systems, Inc.
58
Selecting a Print Job and Printing the Part
1. A print job can be started either from the home status page or
by selecting the Prints menu (1).
1
1
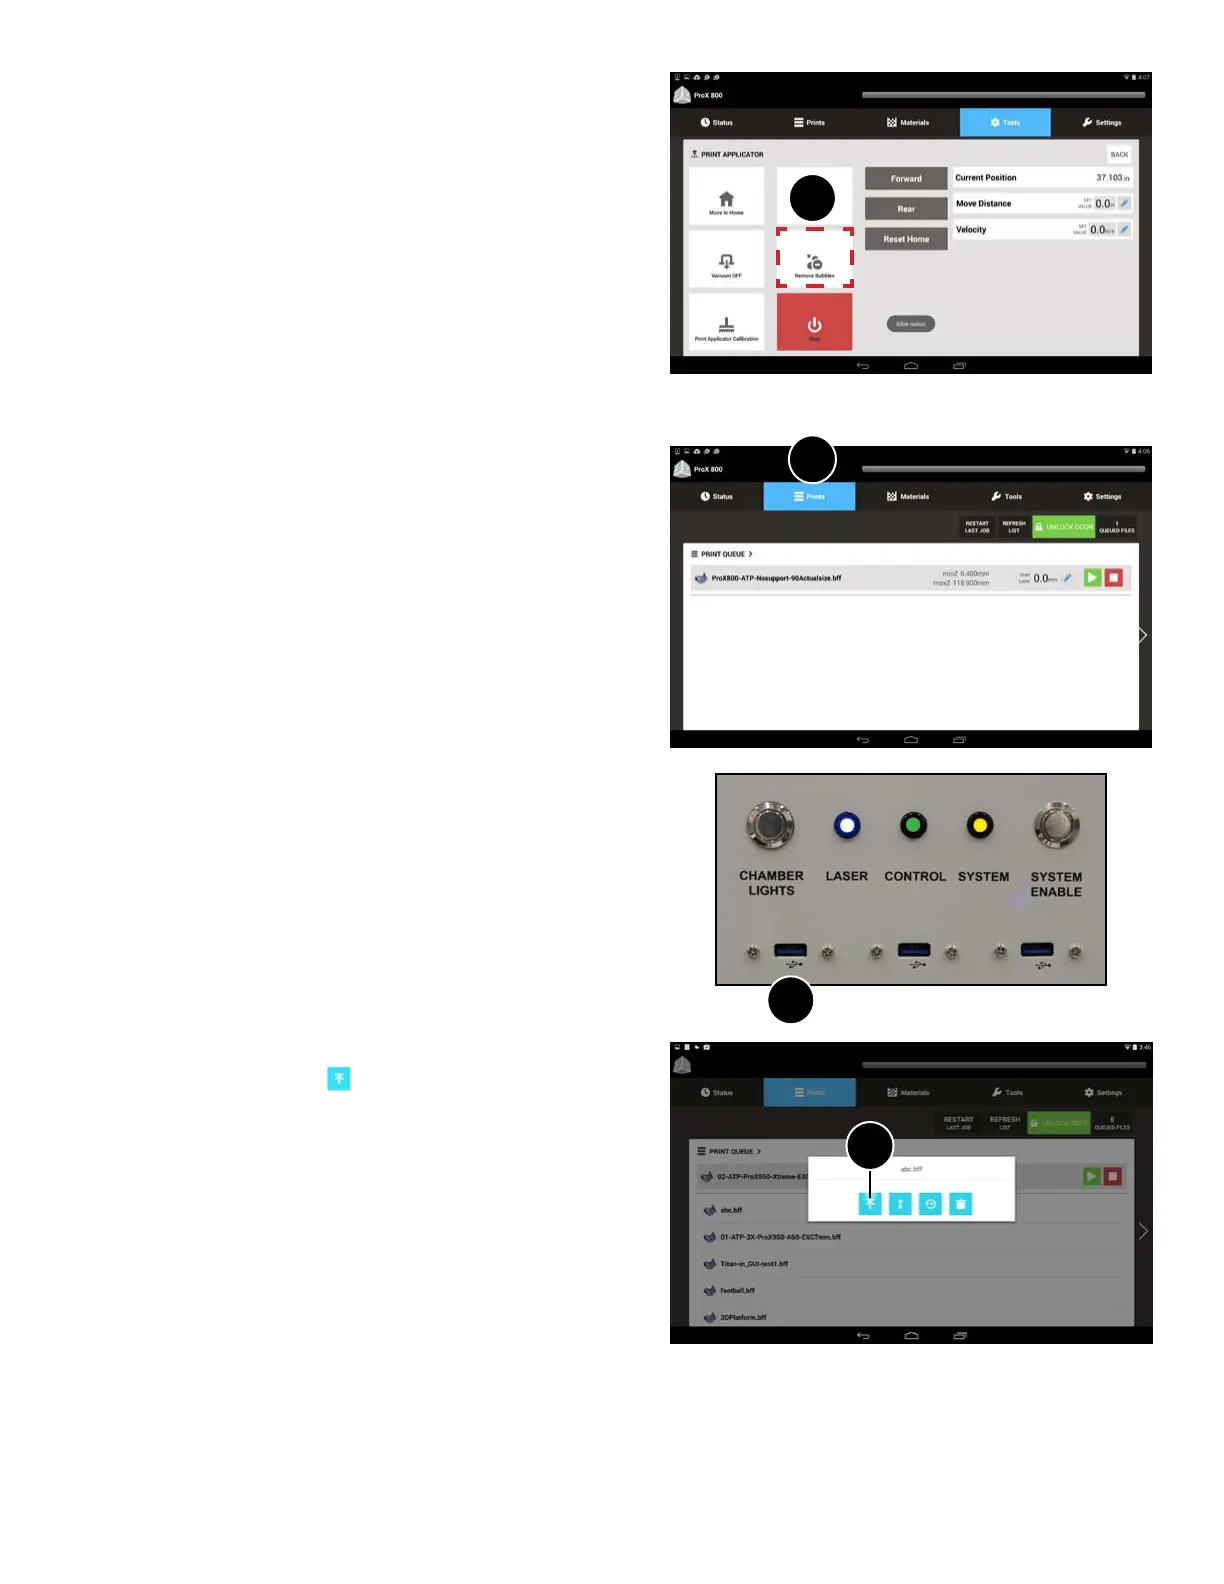
2
2. If a le needs to be loaded, either insert a USB drive into the
port below the touch screen (2) or transfer the le from the
3D Manage application to the printer. Refer to the 3D Manage
documentation for instructions.
3. If a USB drive has been inserted, all .bff les will pop up on the
screen. Select the le you wish to print and press the Submit
button. The le selected should be loaded in the Print Queue.
ProX 800
4. If the le is not in the top position, tap the le to highlight it,
then tap the Jump to Top
button to move the le to the top
of the queue (3).
3
Removing Bubbles
If bubbles appear in the material, they must be removed prior to
starting a print. Follow these steps to remove the bubbles:
1. Navigate to the Tools menu.
2. Select Remove Bubbles (1).
3. Wait while an automated procedure manipulates the hardware to
remove the bubbles.
Once the automated procedure has been completed, the printer is
ready to print.