473D SYSTEMS, INC. PN:80-D27 Rev.B
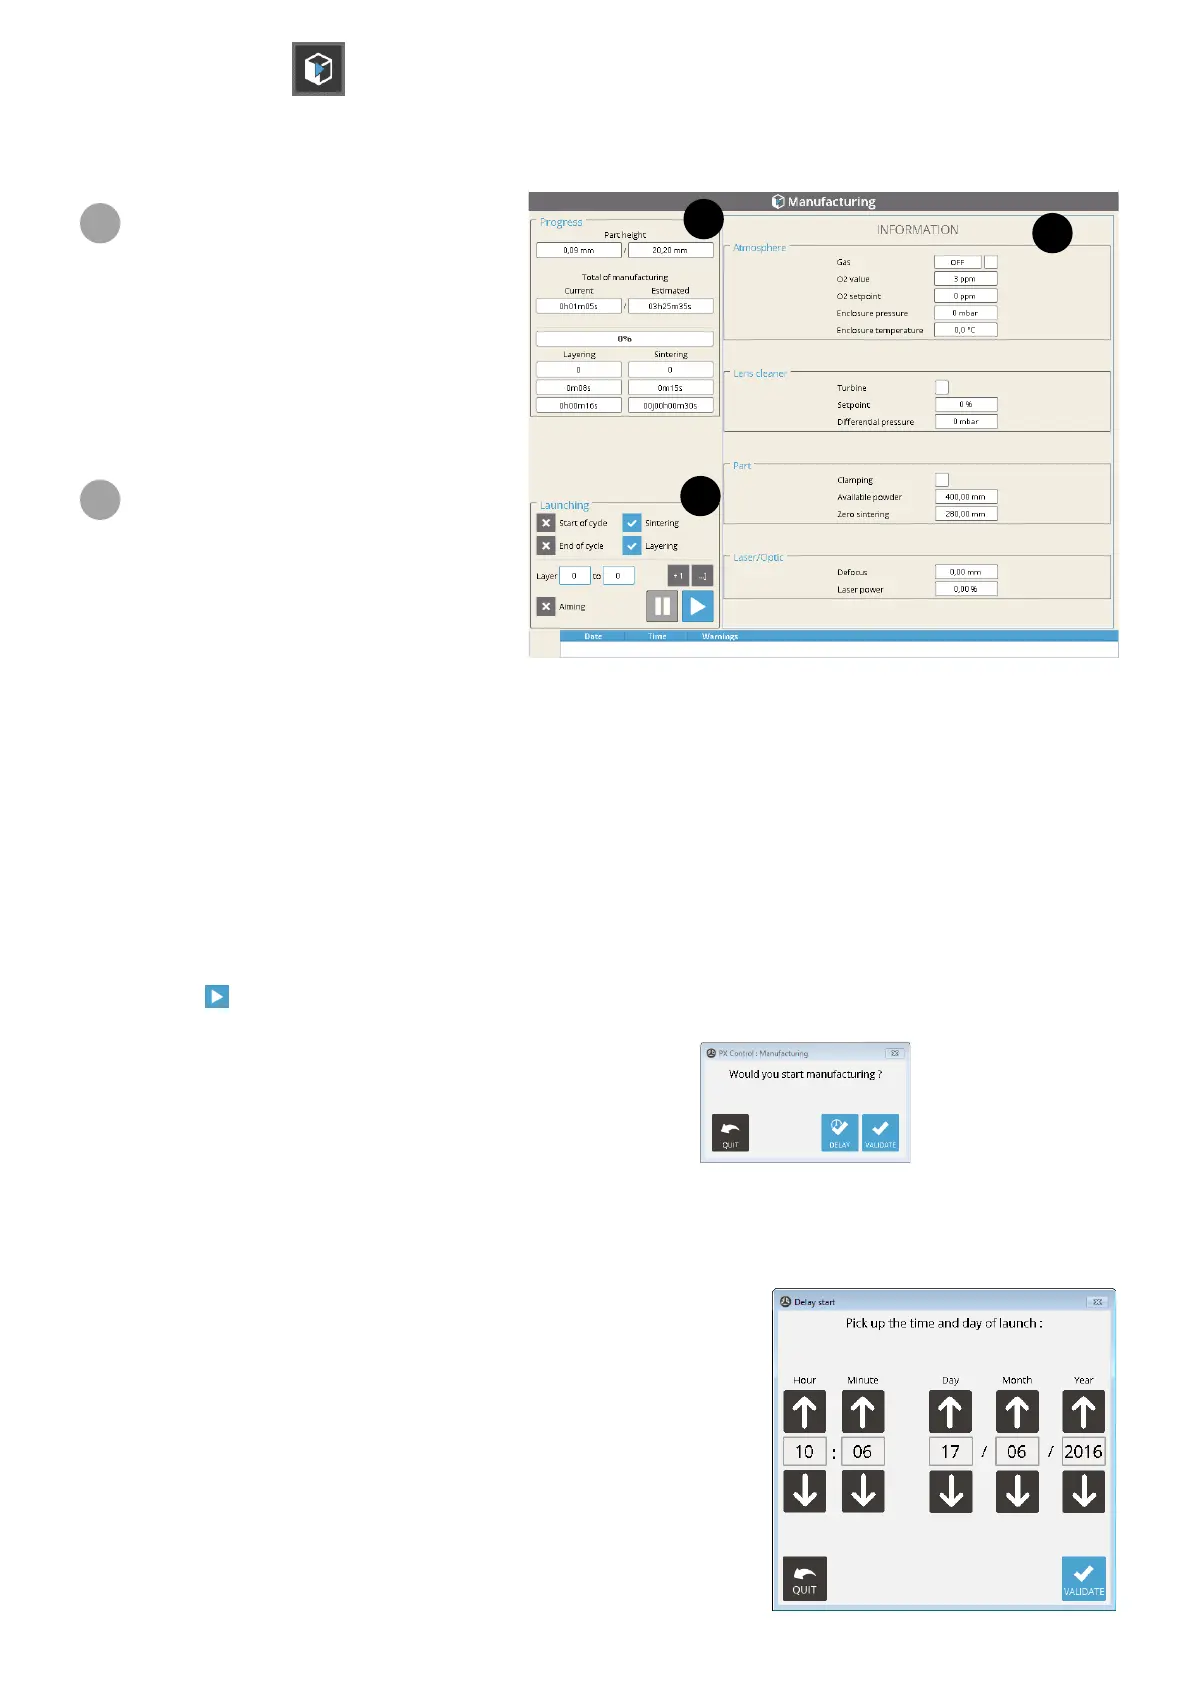
Manufacturing menu
This menu allows the user to start the manufacturing process (layering and sintering), and also to see the progress. It
consists of four parts.
Consult the section "Start a manufacturing process" on page 63 for details on basic rules of starting a job.
1
2
3
1
Progress area
• Current / Project part height (mm)
• Current / Estimated manufacturing time (hours) ,
• Manufacturing progress in %,
• Layering : the current number, the duration of
the current layering, and the total layering time,
• Sintering : the current number, the duration of
the current sintering, and the total sintering time.
2
Launching area
• Selection of the Sart/End cycles:
• Start of cycle : executes actions of the “Start
cycle” sequence (i.e gas regulation, clamping
ON...).
• End of cycle : executes actions of the “End
cycle” sequence (i.e recycling ON, clamping
OFF...).
• Selection of the Layering/Sintering process:
• Sintering : activates sintering for the selected cycle.
• Layering : activates layering for the selected cycle.
• Selection of the layers:
• Layer “_start_“ to “_end_“ : The numbers of the rst and last layer must be indicated. Click on the corresponding
eld to complete them (a numeric keypad will display).
• The button “+1” increases the _start_ layer by one and duplicate this value for the _end_ layer (useful when
producing the rst layers step-by-step). The button “ …]” increases the _start_ layer by one, and automatically ll
the _end_ layer with the Maximum layer value.
• The button “Aiming” sets the laser in no-power mode : the laser will sinter (without power) with a red beam.
• The button
allows user to start the job (according to the selections Start/End cycle and Layering/Sintering). When
activated, the conrmation window appear :
Click on Validate to conrm, or Quit to cancel.
Delay start function
The delay start function offers the possibility to start the selected cycles at a specic time. If selected, the user can program
the next start within the setting window:
Click on Validate to conrm, or on Quit to cancel.