573D SYSTEMS, INC. PN:80-D27 Rev.B
MACHINE PREPARATION
Loading the feeding piston
Operations described below complement and follow on from the Preparation Assistant "Step 3 : Loading powder" on page
41.
WARNING: REACTIVE POWDERS
THE MANUFACTURING CHAMBER MUST BE INERT BEFORE POWDER MANIPULATION (O
2
LEVEL 1%
MAXIMUM).
Before the rst use of metal powder, ensure absence of humidity in the powder, which would affect its ow. That is why
sifting and oven drying are strongly recommended.
Implement the following operations :
• Sieve the fresh powder once,
• Place the fresh powder into a large tray in order to obtain a thin layer (maximum 4cm),
• Place the tray in the oven at 70°C for 24 hours, in order to dry the powder out completely. As a good practice, shake
the powder delicately from time to time in order to speed up the process of moisture loss,
• Sieve the powder again.
WARNING: REACTIVE POWDERS
DO NOT HEAT THE POWDER IN CASE THE OVEN IS NOT INERT. FLAMMABLE POWDERS ARE PROVIDED IN
SEALED INERT PACKAGING FREE OF HUMIDITY.
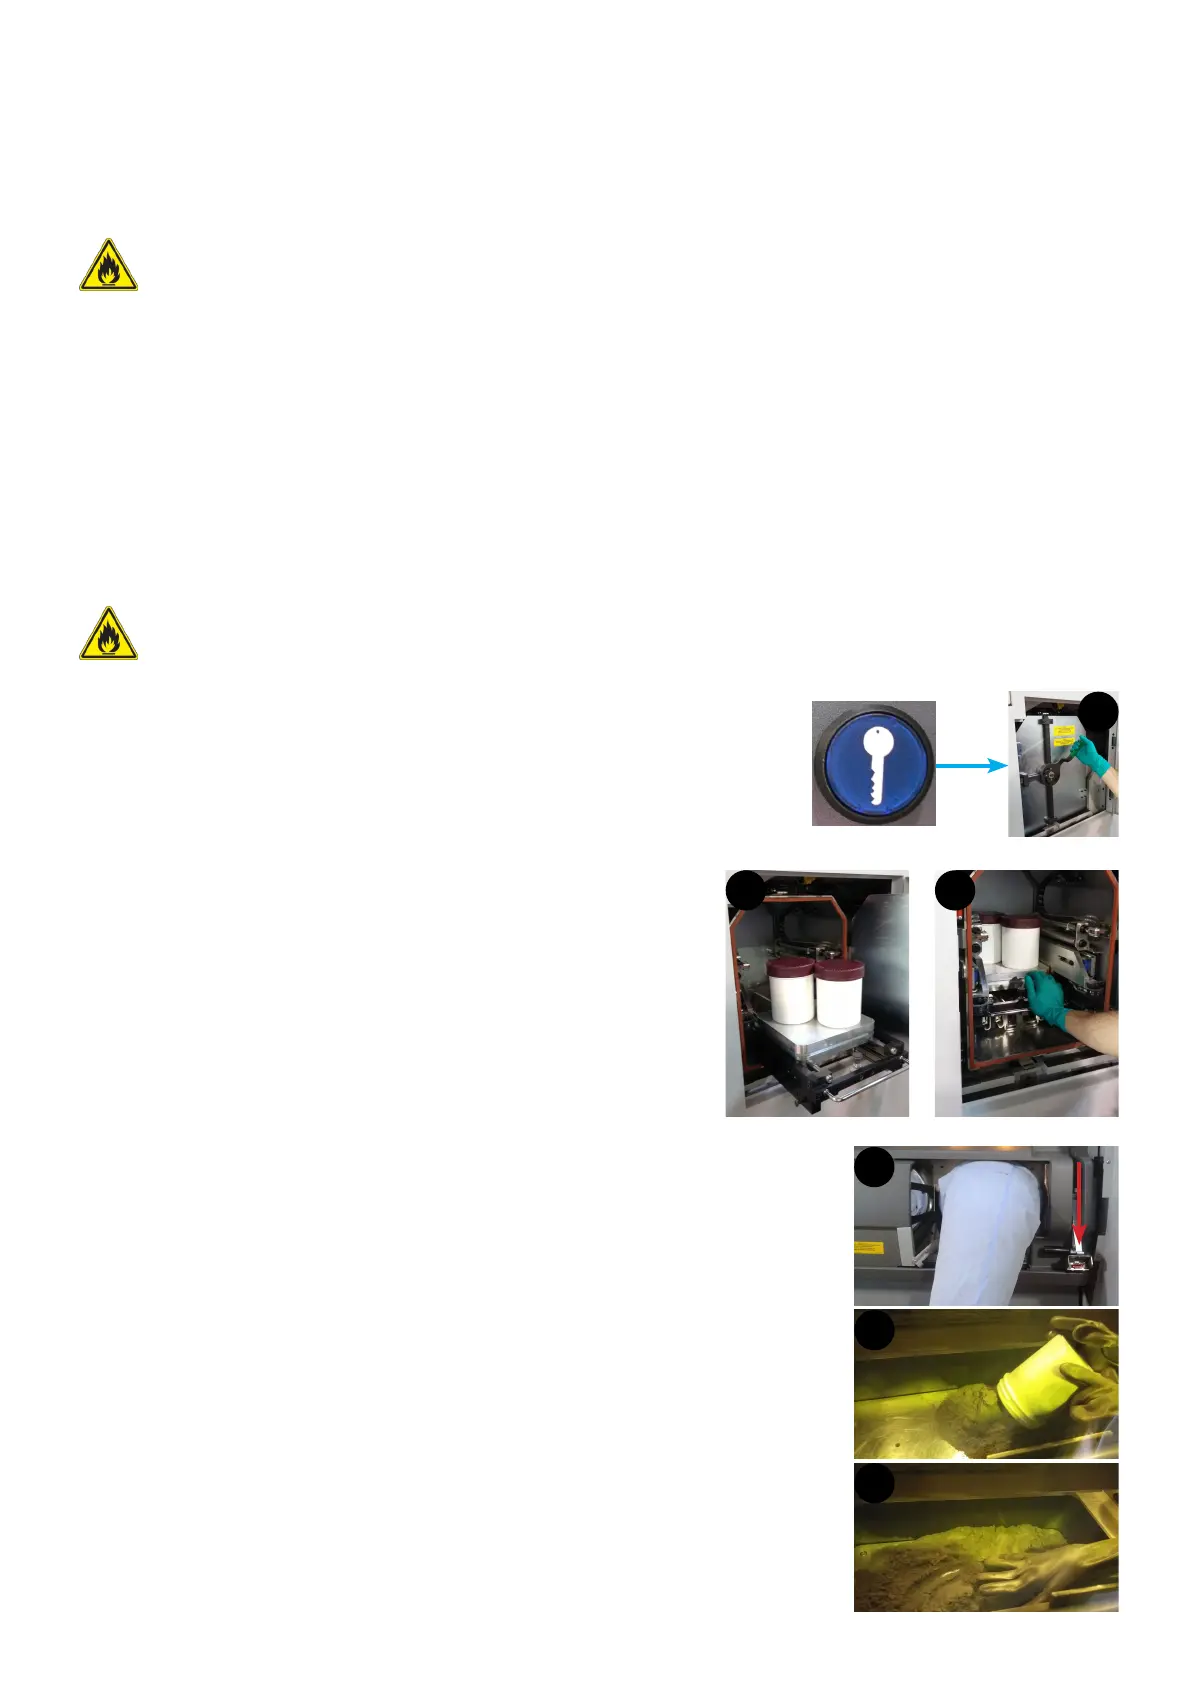
1. Press the unlock door button. The door is still locked during the next 10 seconds.
After the 10 seconds, open the airlock door (1).
2. Pull the carriage and put the powder cans on a whole plate (2) (see "Plate
preparation and loading" on page 58 for details on how to prepare
the whole plate). Make sure to put the cans fully inside the whole plate
surface.
3. Push the carriage inside the airlock (3) and close the airlock door.
4. Start the Loading powder cans cycle on the control panel (see "Step 3 : Loading
powder" on page 41). The cans will be placed automatically on the sintering piston.
5. Position the feeding piston.
6. Press the unlock door button.
7. Lower the lever, open the sliding door and then the gloves door (4).
8. Pour (5) and smooth (6) the powder in the feeding piston.
9. Put the empty cans on the plate.
10. Close the gloves door.
11. Lock the door.
12. Move down the tamping piston.
13. Raise the feeding piston to tamp the powder.
14. Move up the tamping piston.
15. Start the Unloading powder cans cycle on the control panel (see "Step 3 : Loading
powder" on page 41). The cans will be placed automatically on the airlock.
16. To continue loading powder with other cans, then repeat from the step 1.
1
10s
2 3
5
6
4