Disassembly/Assembly
Guidelines
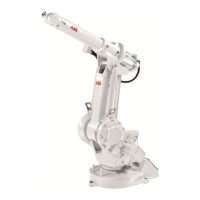
IRB 6400
Page 9 - 1
Axis 6 Guidelines
MOTOR & GEAR REDUCTION UNIT ASSEMBLY Removal
NOTE: It is not necessary to remove wrist
assembly from tube shaft to remove axis 6
motor and gear reduction unit assembly.
NOTE: Axes 4, 5, & 6 are either all ELMO
motors or all Siemens motors. If replacing
motor, do not mix manufacturers.
1. TURN OFF MAIN ELECTRICAL DISCONNECT SWITCH AND LOCK IT
IN THE OFF POSITION.
WARNING! BE SURE ELECTRICAL DISCONNECT SWITCH IS
OFF AND LOCKED IN OFF POSITION!
2. DISCONNECT THE UPPER PART OF UPPER CABLE (U14) THAT
CONNECTS TO THE WRIST AXIS 6:
a. Remove screws (U4) and access cover (U5).
b. Remove screws (U6) and access cover (U7).
c. Remove cover on back of motor.
d. Disconnect plugs R4.MP6, R4.PTC6, & R4.FB6.
e. Remove screws on cable cover on left side of Axis 6 motor.
f. Remove screws (U17) from cable.
g. Carefully route cables through casting and allow to hang free.
3. DRAIN OIL FROM WRIST ASSEMBLY (U10) as outlined in Section 4.
4. REMOVE COVER (W68):
a. Remove screws (W70) with washers (W69).
b. Remove cover (W68) and gasket (W67).
5. REMOVE BEARING (W6):
a. Remove screws (W3).
b. Remove bearing retainer (W5) with help of M8x65 pin screws.
c. Remove bearing (W6).
d. Remove spacer (W7).
6. REMOVE FLANGE (F20):
E
E
REFERENCE DRAWINGS
Exploded Views:
Assemblies:
3HAA 0001-GX ( pg 13-18)
REQUIRED TOOLS
“U” (pg 9-5, 12-4)
Hand Tools
“W” (pg 9-6, 12-5)
3HAA 0001-AAH ( pg 13-13)
3HAB 4172-1 ( pg 13-22)
ABB #3HAA 7601-043
ABB #3HAA 7601-047
M8x65 Screws (2)
“F” (pg 9-7, 12-6)

 Loading...