Disassembly/Assembly
Guidelines
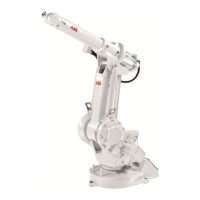
IRB 6400
Page 5 - 5
Axis 1 Guidelines
GEAR REDUCTION UNIT (S59) Removal
1. TURN MAIN ELECTRICAL DISCONNECT SWITCH OFF AND LOCK IT
IN THE OFF POSITION.
WARNING! BE SURE ELECTRICAL
DISCONNECT SWITCH IS OFF AND LOCKED IN
OFF POSITION!
2. REMOVE AXIS 1 MOTOR (S16) as outlined on page 5 - 1.
3. REMOVE COVER (B9):
a. Remove screws (B8).
b. Remove cover (B9).
c. Remove air hose, if installed to cover.
4. DISCONNECT AIR HOSE & UNPLUG CONNECTOR R2.SMB:
a. Remove screws (S12).
b. Pull measure card unit (S10) out, rotate down and back, and use
two screws (S12) to temporarily hold in place against frame hous-
ing (S21).
c. Unplug connector R2.SMB (X2) at serial measuring board on
measure card unit (S10).
d. Disconnect air hose in the base casting, near the axis 1 motor.
5. SLIDE CABLE GUIDE RAIL (B16) OUT OF WAY:
a. Remove screw (B13) and washer (B15) on right side that is hold-
ing cable guide rail (B16).
b. Just loosen screw (B13) on left side. Leave it engaged to hold
plate (B23) in place.
c. Slide cable guide rail (B16) away from cable to provide for work-
ing room and clearance to remove cable.
6. DISCONNECT LOWER CABLE (B18) FROM SUPPORT RAIL:
a. Rotate robot forward.
b. Remove screws (B20) and washers (B19) holding lower cable
(B18) to support rail. Screws are Locktited.
REFERENCE DRAWINGS
Exploded Views:
“B” (pg 5-17,12-1)
“S” (pg 5-18,12-2)
Assemblies:
3HAB 4161-4 (pg 13-1)
Hand Tools
REQUIRED TOOLS
3HAB 4162-2 (pg 13-23)
3HAA 0001-AAS (pg 14-A)
3HAB 4248-2 (pg 14-G)
E
E

 Loading...