Disassembly/Assembly
Guidelines
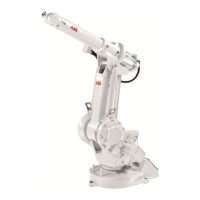
IRB 6400
Page 9 - 3
Axis 6 Guidelines
MOTOR & GEAR REDUCTION UNIT ASSEMBLY Installation
NOTE: Axes 4, 5, & 6 are either all ELMO
motors or all Siemens motors. If replacing
motor, do not mix manufacturers.
WARNING! BE SURE ELECTRICAL DISCONNECT SWITCH IS
OFF AND LOCKED IN OFF POSITION!
1. MOUNT PINION (F15) ON MOTOR SHAFT:
a. Insert an M8x120 threaded pin screw into threaded hole in center
of motor shaft.
b. Insert pinion (F15) onto shaft and press on by threading an M8
nut with washer onto pin screw.
c. Remove M8x120 pin screw.
d. Apply Loctite 242 to screw (F16) and insert. Torque 16 ft-lb.
2. MOUNT GEAR REDUCTION UNIT (F17):
a. Lightly grease O-Ring (F14) and set in place.
b. Set gear reduction unit (F17) into mounting position on motor
drive (F10). Rotate so screw hole and magnetic oil plug come in
the right position.
c. Insert screws (F23) with washers (F22). Torque 26 ft-lb.
3. MOUNT FLANGE (f20):
a. Lightly grease O-Ring (F18) and set in place.
b. Light grease O-Rings (F19) and set in place.
c. Set flange (F20) in place on gear reduction unit (F17).
d. Insert and tighten screws (F21).
E
E
REFERENCE DRAWINGS
Exploded Views:
Assemblies:
3HAA 0001-GX ( pg 13-18)
REQUIRED TOOLS
“U” (pg 9-5, 12-4)
Hand Tools
“W” (pg 9-6, 12-5)
3HAA 0001-AAH ( pg 13-13)
3HAA 0001-GX ( pg 13-21)
3HAA 0001-AAS ( pg 14-A)
3HAB 4254-2 ( pg 14-J)
Torque Wrench (10-70 Nm)
M8x120 Screw
M8 Hex Nut
M8 Washer
Loctite 242

 Loading...