Maintenance
7.17 Checking and Adjusting the Drive Belts
88
Operator’s Manual | SM100 | 5100064108 | 08/2022 | [en-US]
Fig.73: V-belt location
Checking the cooling fan V-belt
1. Open the hood.
2. Check the belt (1) tension using a belt tension gauge or by pressing the
belt down with your thumb. Check the tension in whichever position (A,
B, or C) is most accessible.
Fig.74: Belt tension check positions
3. Check the tension values in the applicable table below.
Note: A “used” V-belt is a belt that has been used on a running engine
for five minutes or more.
4. Check the belt condition.
5. Adjust the tension or replace the belt as needed.
New V-belt Tension
A B C
8–12 mm (5/16–7/16 in.) 5–8 mm (3/16–5/16 in.) 7–11 mm (1/4–7/16 in.)
Used V-belt Tension
A B C
10–14 mm (3/8–1/2 in.) 7–10 mm (1/4–3/8 in.) 9–13 mm (5/16–1/2 in.)
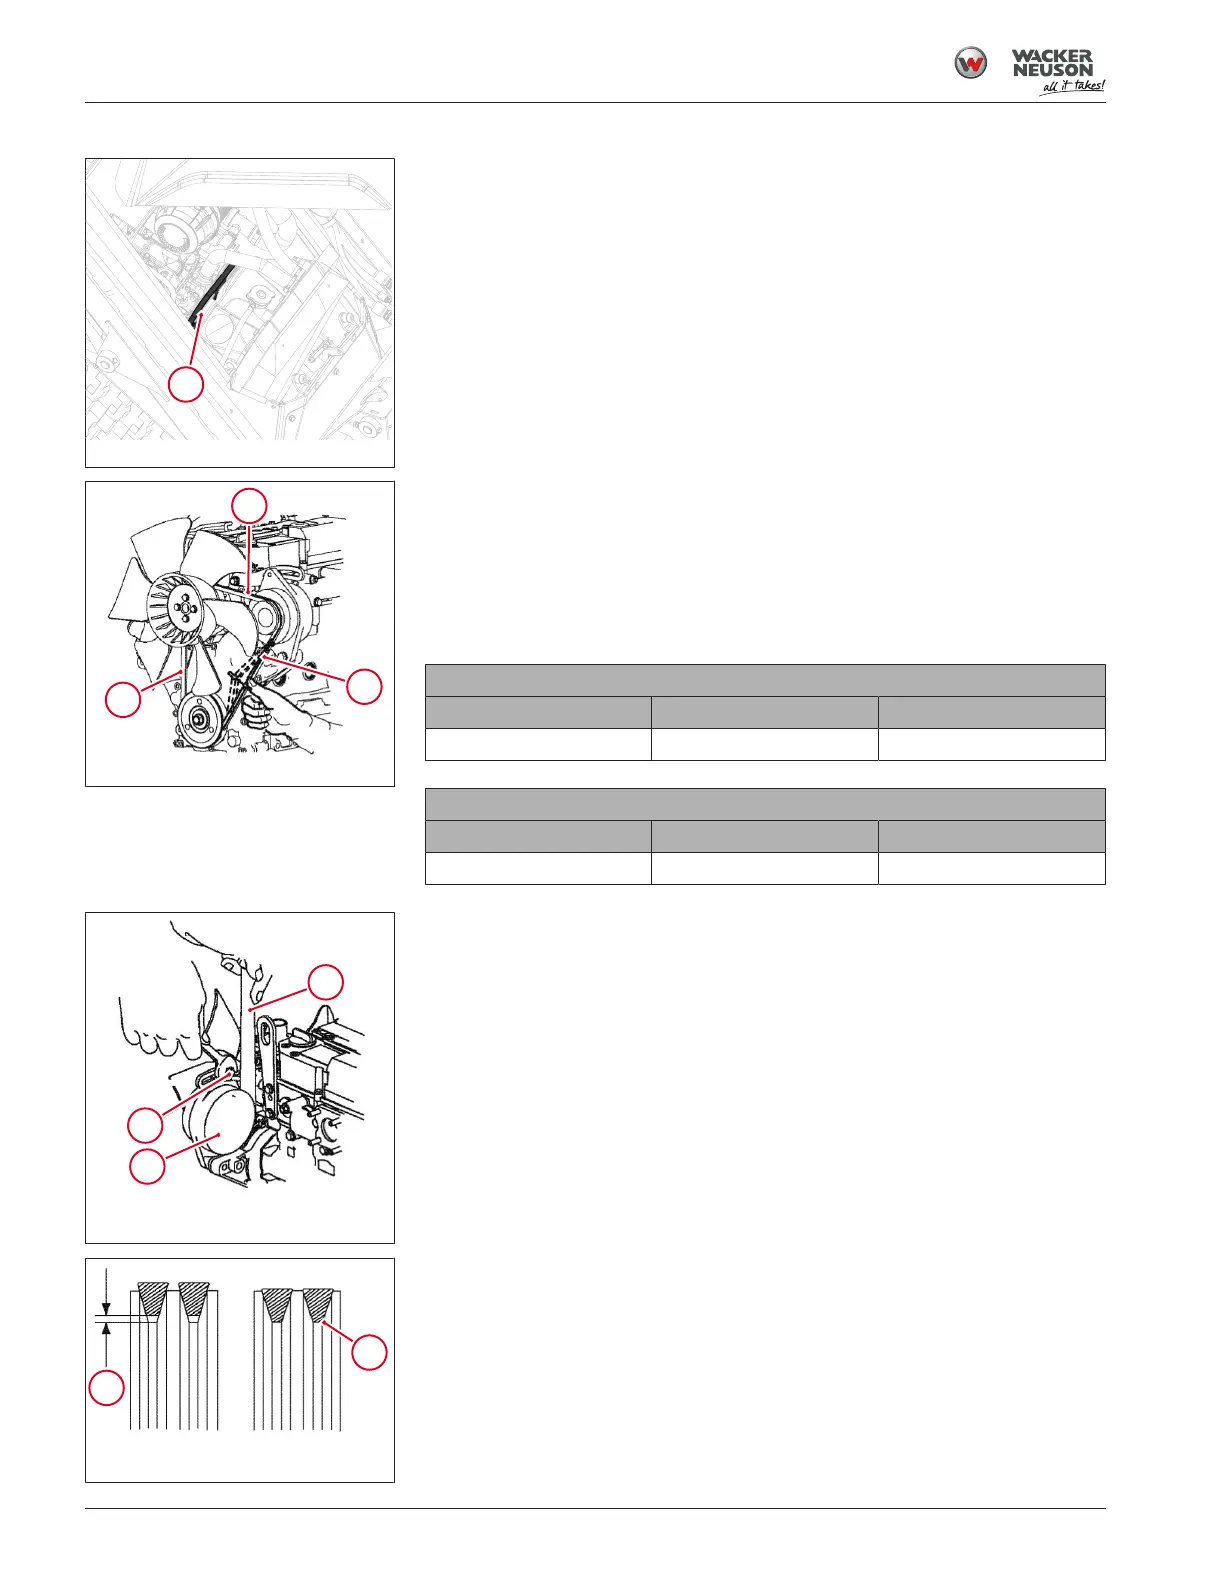
Fig.75: Cooling fan V-belt adjust-
ment
Adjusting the cooling fan V-belt
1. Loosen the alternator adjusting bolt (2) and any other related fasteners.
2. Adjust the belt tension by pivoting the alternator (3) in or out using a
pry bar (4).
3. Tighten the alternator adjusting bolt and related fasteners and check
the belt tension.
Fig.76: Clearance between V-belt
and pulley groove
4. Repeat these steps until you achieve the desired belt tension.
ð There must be clearance (5) between the V-belt and the bottom of
the pulley groove. If there is no clearance (6) between the V-belt and
the bottom of the pulley groove, replace the V-belt.
5. After adjusting the tension, run the engine for at least 5 minutes. Check
the tension again using the specifications for a used V-belt.
 Loading...