Chapter 3 Methods and Mappings74
USG-CUS-059 Rev05MassARRAY® Nanodispenser RS1000 v2.1 User Guide
For Research Use Only. Not for use in diagnostic procedures.
3.5 Creating a custom mapping file
Custom mappings can also be created and are useful, for example, when you want to:
• Transfer only a portion of a microtiter plate to part of a SpectroCHIP Array
• Dispense to multiple pads from the same microtiter plate well (for example, a
calibrant-only SpectroCHIP Array)
A mapping specifies the instrument pin array format, number and type of SpectroCHIP
Arrays, number and type of microtiter plates, and how the plate wells are mapped to
SpectroCHIP Array pads (which plate well is dispensed to each SpectroCHIP Array pad).
The Nanodispenser RS1000 has several predefined mappings for common types of
dispensing runs. This section explains how to create a custom mapping.
NOTE
Using a stylus to tap the touchscreen makes specifying the mapping easier. A stylus is supplied
with the instrument. It looks similar to a pen, except the tip is rounded plastic instead of an ink
point. You can use a similar implement as a stylus. However make sure that it has a rounded, non-
scratching point to avoid damaging the touchscreen. Do NOT use a pen or pencil.
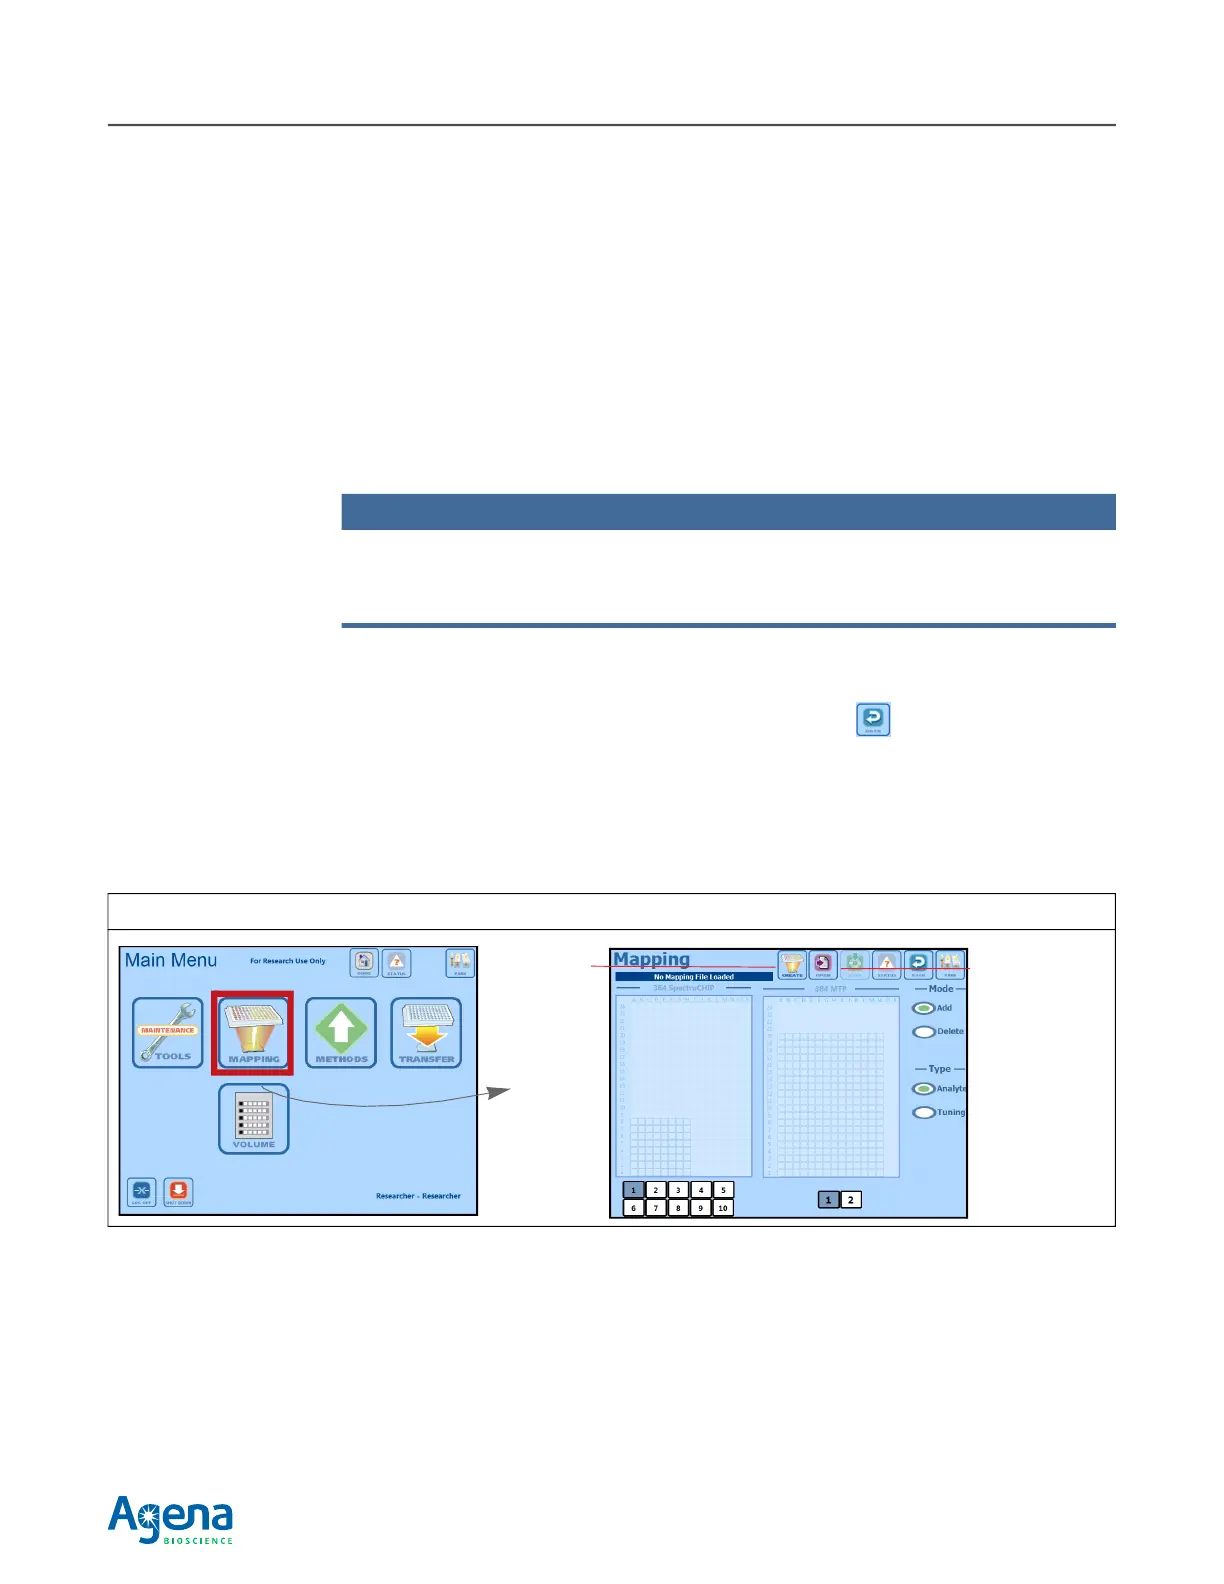
1. Tap MAPPING on the Main Menu (Figure 3.22).
If you are not on the Main Menu, tap the BACK button on any screen.
2. To modify an existing mapping file: Tap the OPEN button in the Mapping screen
(Figure 3.22). Select a mapping file from the list that appears. The file settings are
displayed in the screen.
To set parameter values from scratch: Tap the Create button in the Mapping screen
(Figure 3.22).
Specify microtiter
plate, pin array, and
SpectroCHIP Array
format
1. Select the appropriate microtiter plate (MTP) type, SpectroCHIP Array format, and pin
format (Figure 3.23).
Figure 3.22 Selecting the Mapping Screen
Tap to select
and open an
existing
mapping file
for
modification.
Tap to create
a new
mapping file.