10 Maintaining the VI
To Install a Capillary Column with the Volatiles Interface
Maintaining Your GC 169
9 Insert the column into the interface and finger-tighten the column nut.
10 Adjust the column (not the septum) position until the septum is snug against the bottom of
the nut.
11 Tighten the column nut an additional 1/4 to 1/2 turn with a wrench so that the column
cannot be pulled from the fitting with gentle pressure.
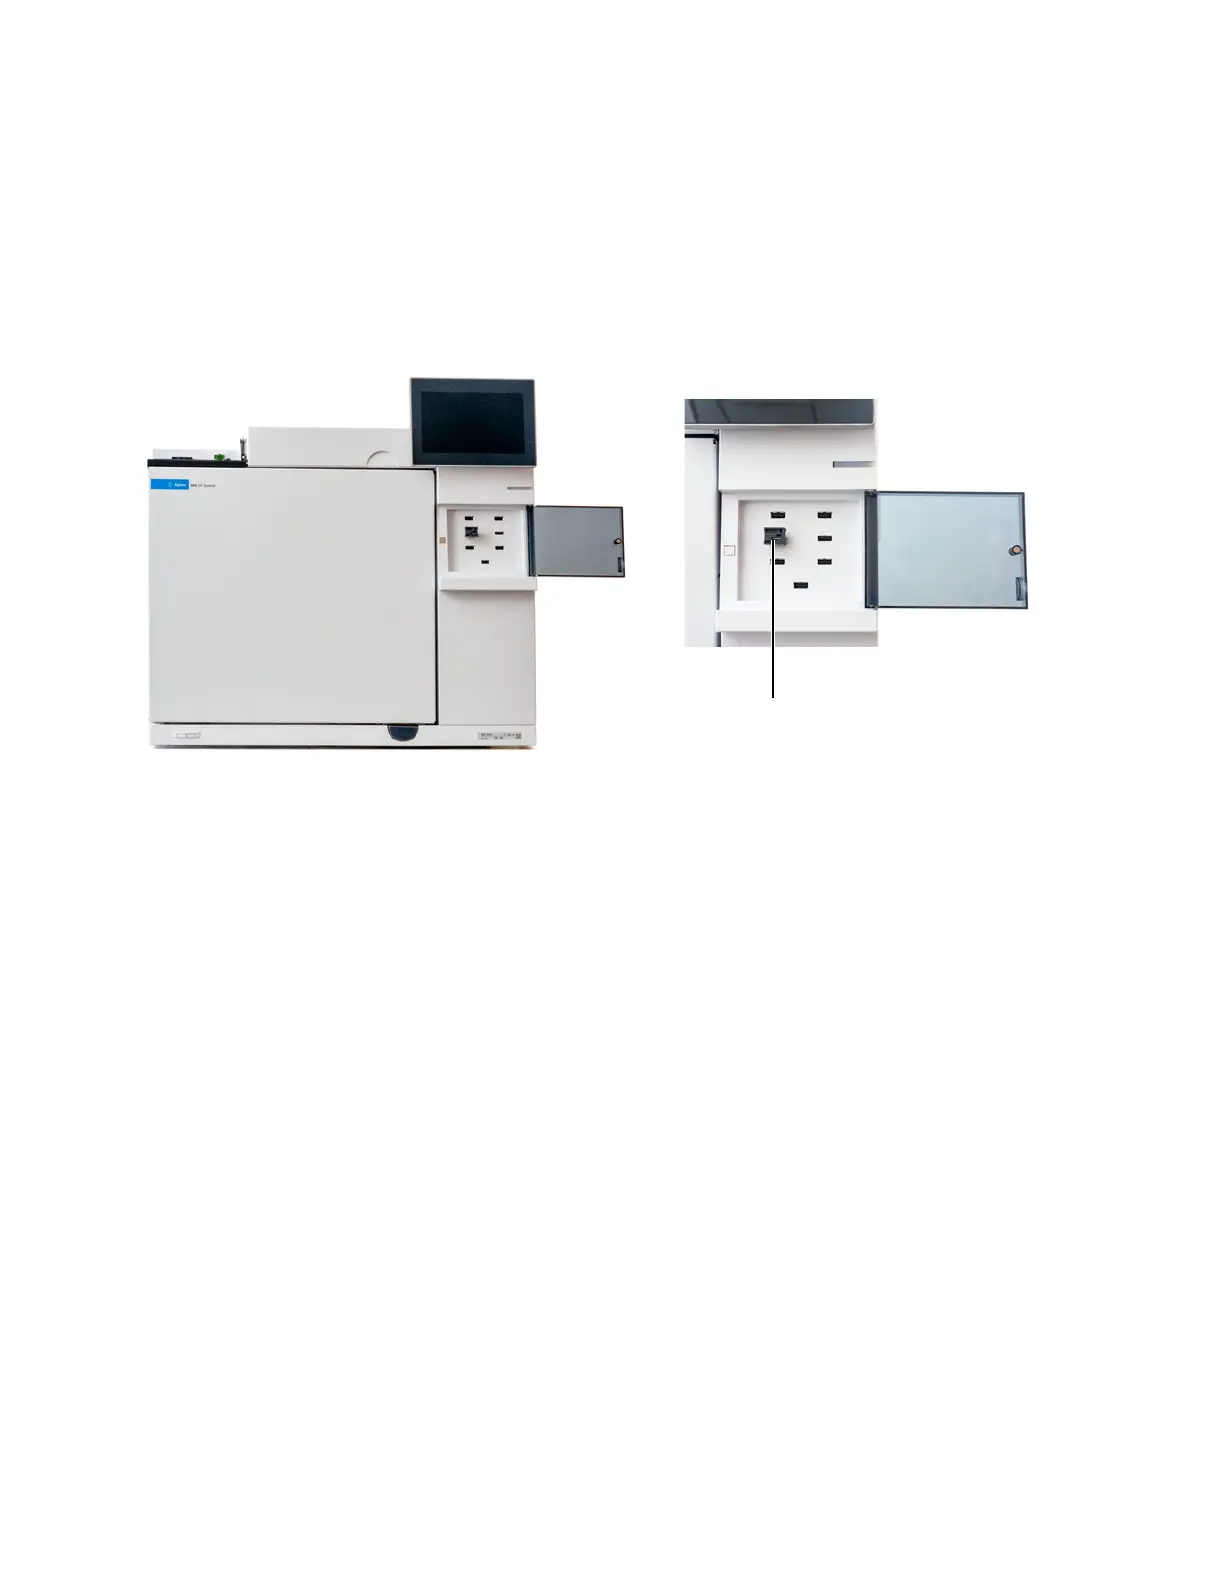
12 Plug in the new column’s Smart ID key. See Figure 37.
Figure 37. Insert Smart ID key
13 Configure the new column.
14 With the sample transfer line attached and the column attached to the inlet and detector,
establish a flow of carrier gas through the transfer line. Purge as recommended by the
column manufacturer.
15 Condition the column per the manufacturer’s recommendation. See To Condition a
Capillary Column.
16 Install the column into the detector.
• To Install a Capillary Column in the FID
• To Install a Capillary Column in the NPD
• To Install a Capillary Column in the TCD
• To Install a Capillary Column in the ECD
• To Install a Capillary Column to the FPD+
17 Exit maintenance mode. Select Maintenance > Instrument > Perform Maintenance >
Maintenance Mode > Finished.
18 After the column is installed at both inlet and detector, establish a flow of carrier gas and
purge as recommended by the column manufacturer.
19 Restore the analytical method.
• For FPD+, immediately turn off the flame.
• For NPD, immediately turn off the bead.

 Loading...


