Publication 1756-UM523F-EN-P - December 2006
Update Modules and Redundant Systems 137
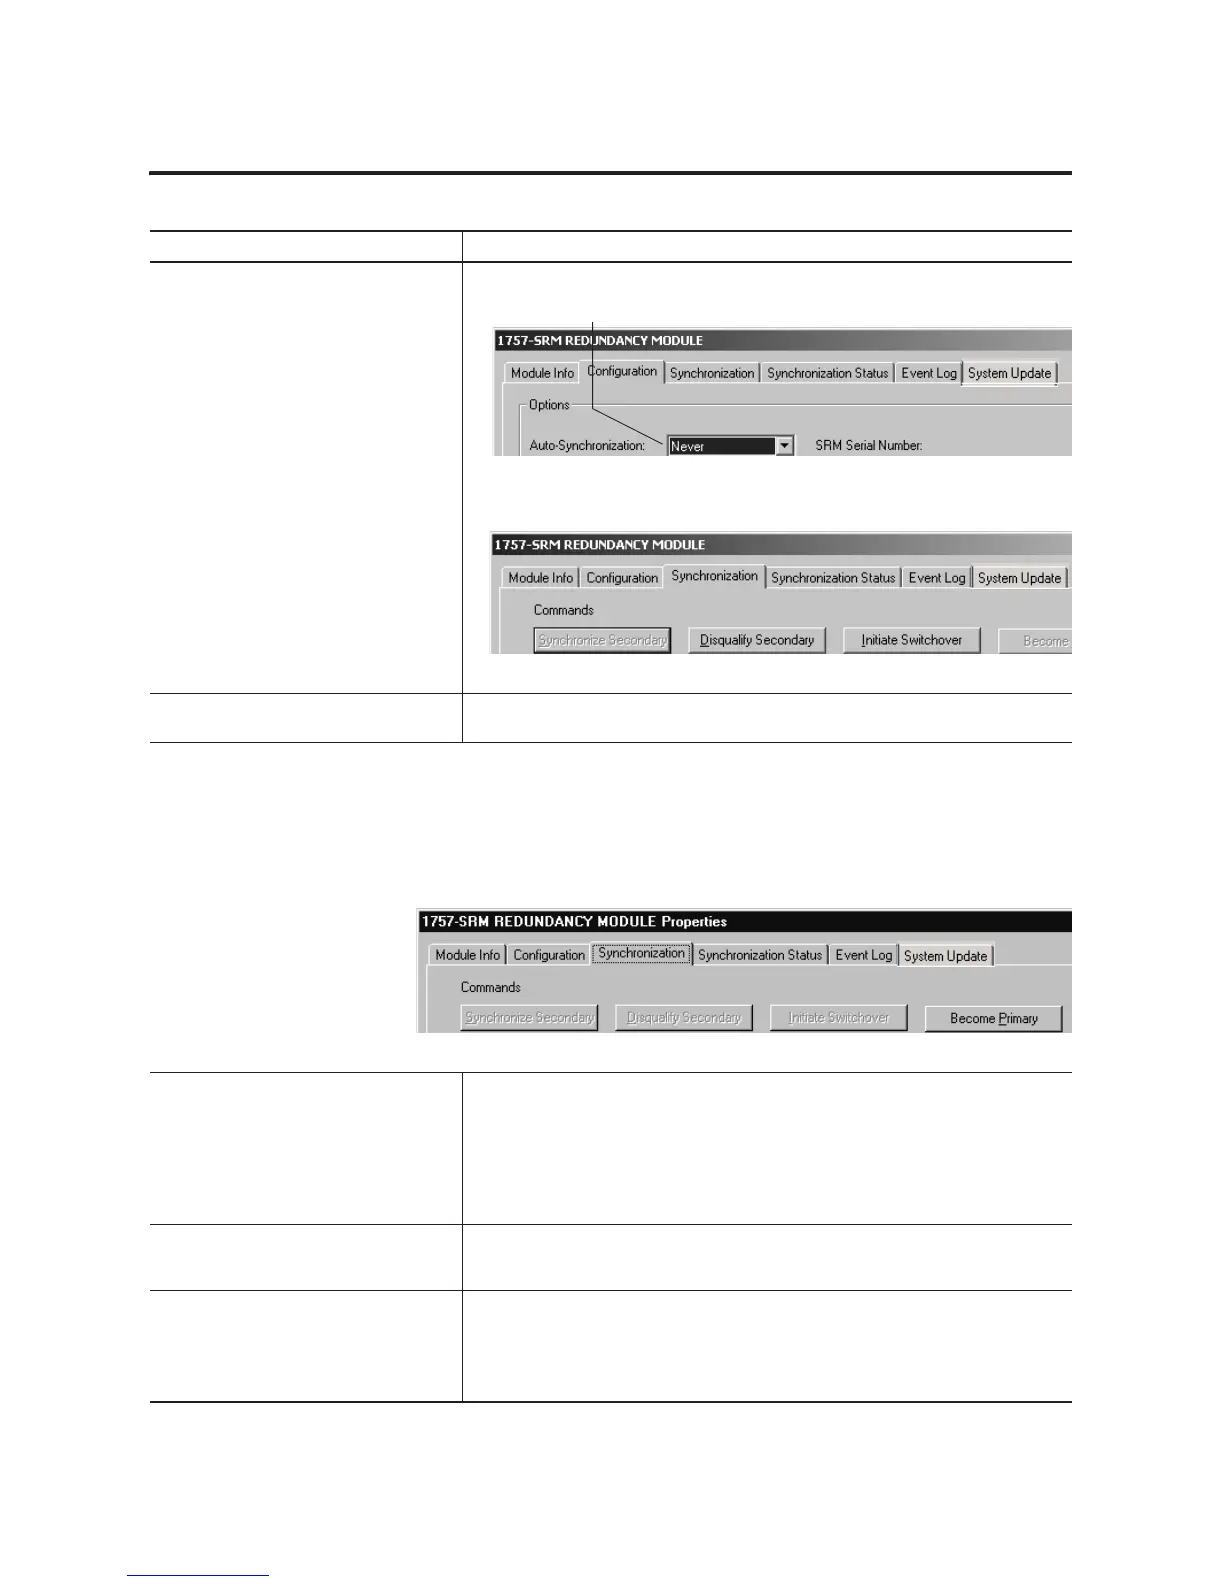
3. Disqualify the secondary chassis, A. Click Configuration.
B. Set Auto-Synchronization to Never.
C. Choose Apply and then Yes to confirm.
D. Click Synchronization.
E. Choose Disqualify Secondary and then Yes to confirm.
4. Upgrade the required firmware of the
secondary chassis.
See the ControlLogix Controller and Memory Board Installation Instructions, publication
1756-IN101.
5. Make the secondary controller the new
primary controller.
A. Start RSLogix 5000 software.
B. Download the project to the secondary controller.
C. When it is safe to stop the system, change the primary controller to Program Mode.
D. Turn off power to the primary chassis.
E. Go to the 1757-SRM properties of the secondary chassis.
F. Choose Become Primary.
6. Clear the fault of the new primary
controller.
A. In RSLogix 5000 software, go online to the new primary controller.
B. The controller is faulted. When a disqualified secondary controller becomes a primary
controller, the controller experiences a major fault.
C. From the Communications menu, choose Clear Faults.
D. To start control of the process, from the Communications menu, choose Run Mode.
7. Upgrade the other redundant chassis. A. Turn on power to the other redundant chassis.
B. Upgrade the required firmware of the chassis.
8. Change the Auto-Synchronization Option
to Always.
A. Open the SRM configuration tool for the primary chassis.
B. On the Configuration tab, change the Auto-Synchronization option to Always.
C. Choose OK.
Action Details
 Loading...