ZA-X BAG0235.4
4. On the field, measure the exact calibration
distance. Mark the beginning and end
points (Fig. 67).
5.
Drive the exact calibration distance from the
beginning to the end point under field condi-
tions, i.e. with the specified constant work-
ing speed. While doing so, at the exact be-
ginning point of the calibration distance,
open the lateral slider (Fig. 64/4) of the out-
let chute all the way using the rope (Fig.
64/5) (pull it as far as it will go) and close it
at the end point (when you let go of the
rope, the springs (Fig. 64/6) pull the lateral
slider into closed position.
6. Weigh the fertiliser in the collection bucket.
67
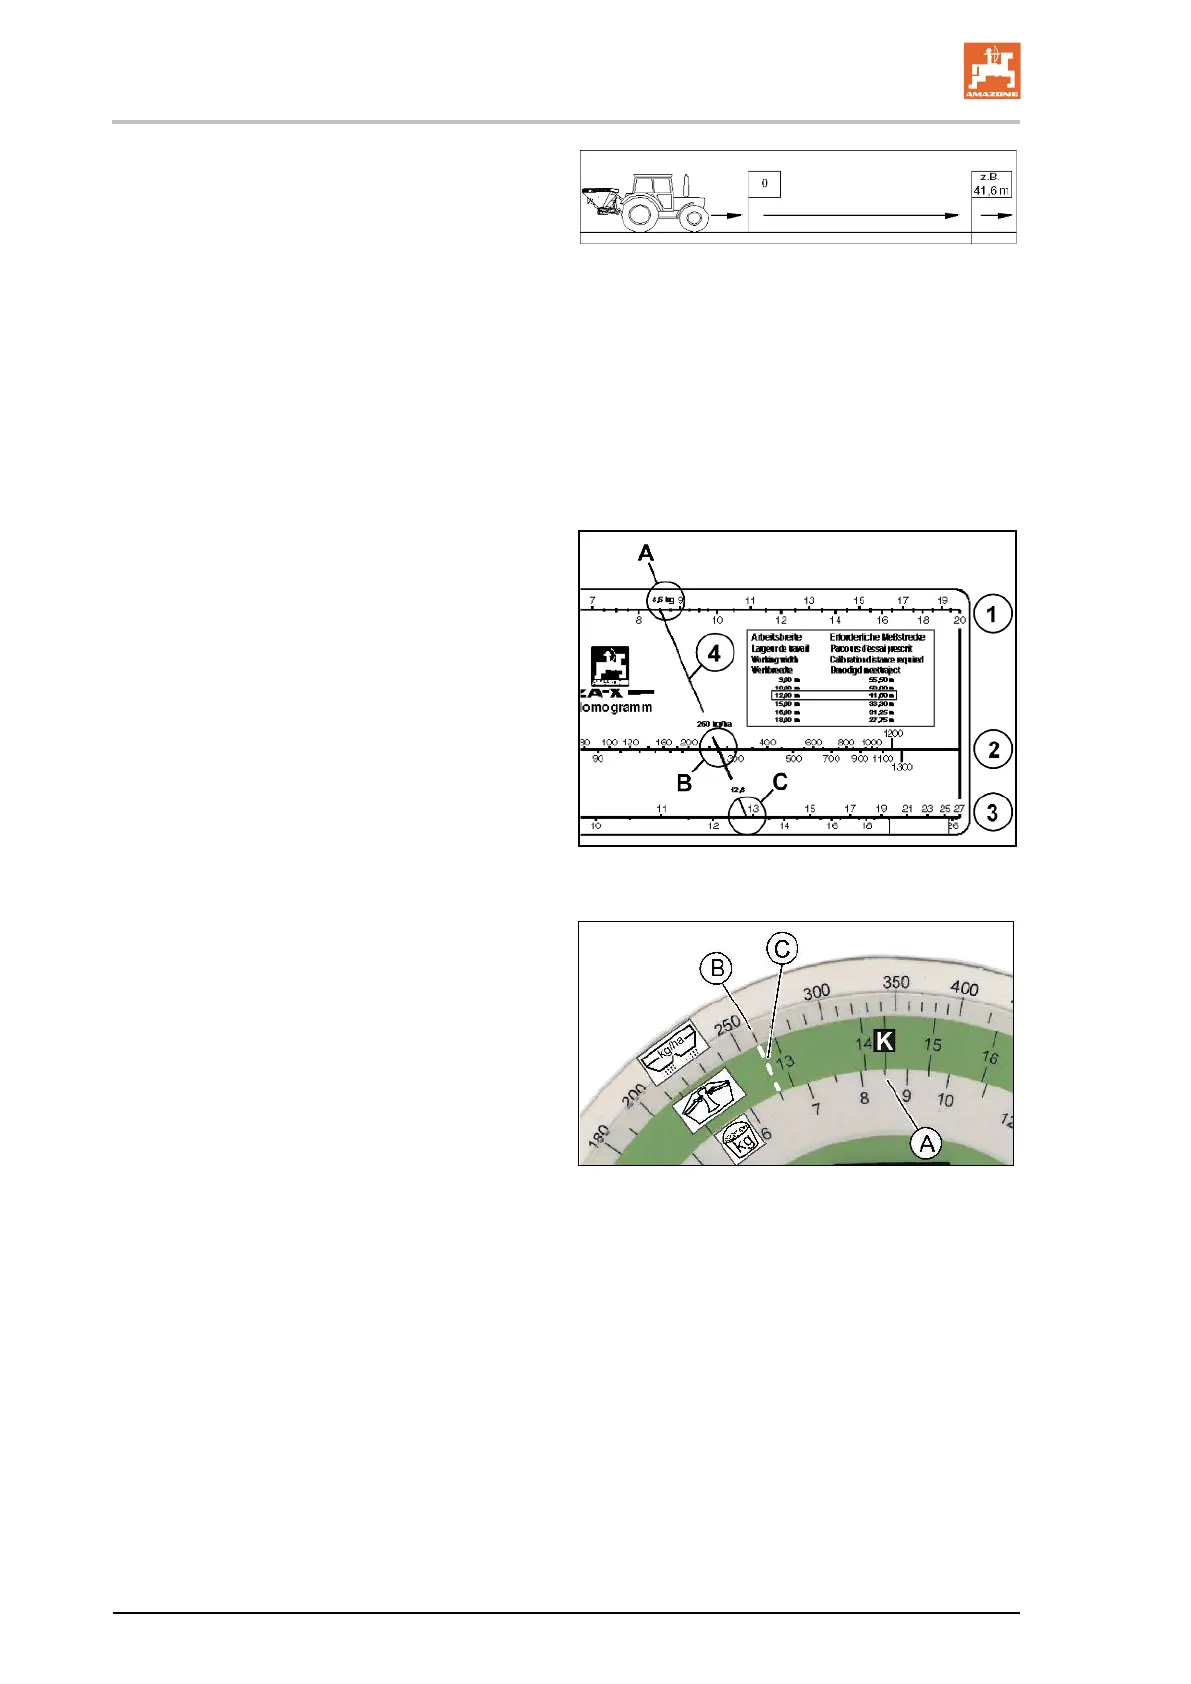
7. Find the number 19 lb (8.5 kg), find the
numeric value (A) on the upper scale (Fig.
68/1). For the desired spread rate 232 lb/ac
(260 kg/ha) find the numeric value (B) on
the middle scale (Fig. 68/2). Lay a straight
connecting line through points A and B. On
the bottom scale (Fig. 68/3), the extension
of the connecting line shows the numeric
value (C) for the required slider position,
which here is 12.8.
68
8. Look for the numerical value 8.5 (A) for the
amount of fertilizer [kg] collected and com-
pare with position K of the coloured scale.
9. Look for the desired spread rate 232 lb/ac
(260 kg/ha) (B) on the scale and read-off
the shutter position 12.8 (C) required.
69