Touch Panel Accessories
20
NXD/T-1200V Wall/Flush Mount Touch Panel
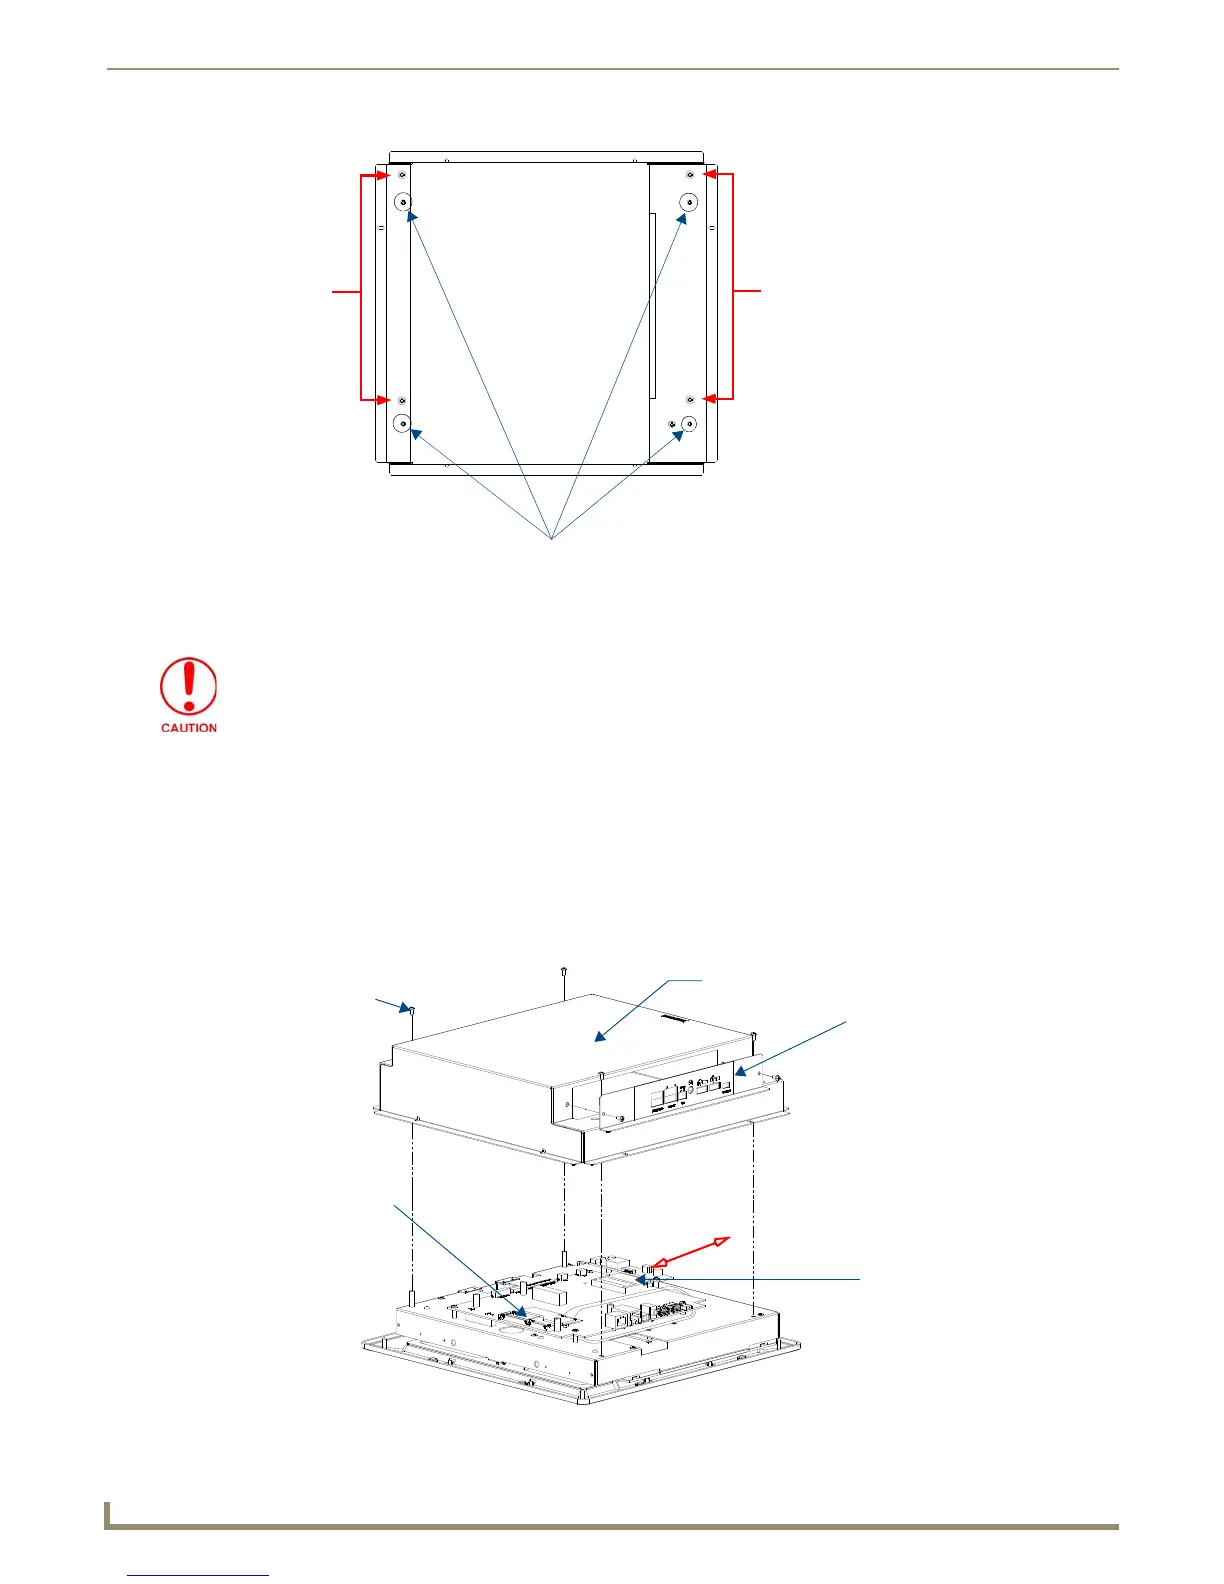
5. Unscrew the four pan-head Housing Screws from the rear of the NXD unit (FIG. 23) and gently remove the outer
housing. These four screws secure the back box to the internal panel casing.
Step 2: Install the new 802.11g mini-PCI Wireless card (NXD)
Complete the procedures outline within Step 2: Install the 802.11g mini-PCI Wireless Card section on page 16 and then
continue with the following step.
Step 3: Install the new Compact Flash Memory card (NXD)
Complete the procedures outline within Step 3: Install the Compact Flash Memory Card upgrade section on page 17 and
then continue with the following step.
FIG. 23 Location of the securing screws on an NXD panel
Unscrew these four Housing Screws
DO NOT
these
DO NOT REMOVE
REMOVE
panel
securing
screws
these panel
securing screws
to remove the back box. These make direct
contact with the black outer housing.
DO NOT REMOVE THE PANEL SECURING SCREWS. These screws secure the
LCD to the metallic casing.
FIG. 24 Location of the Compact Flash card and I/O plate on NXD
Outer Housing
Compact Flash card
I/O connector
plate
NXA-PCI80211G
wireless card
location
Four Pan-head
Housing
Screws

 Loading...


