Touch Panel Accessories
27
NXD/T-1200V Wall/Flush Mount Touch Panel
Reading NXT-CHG LED Indicator
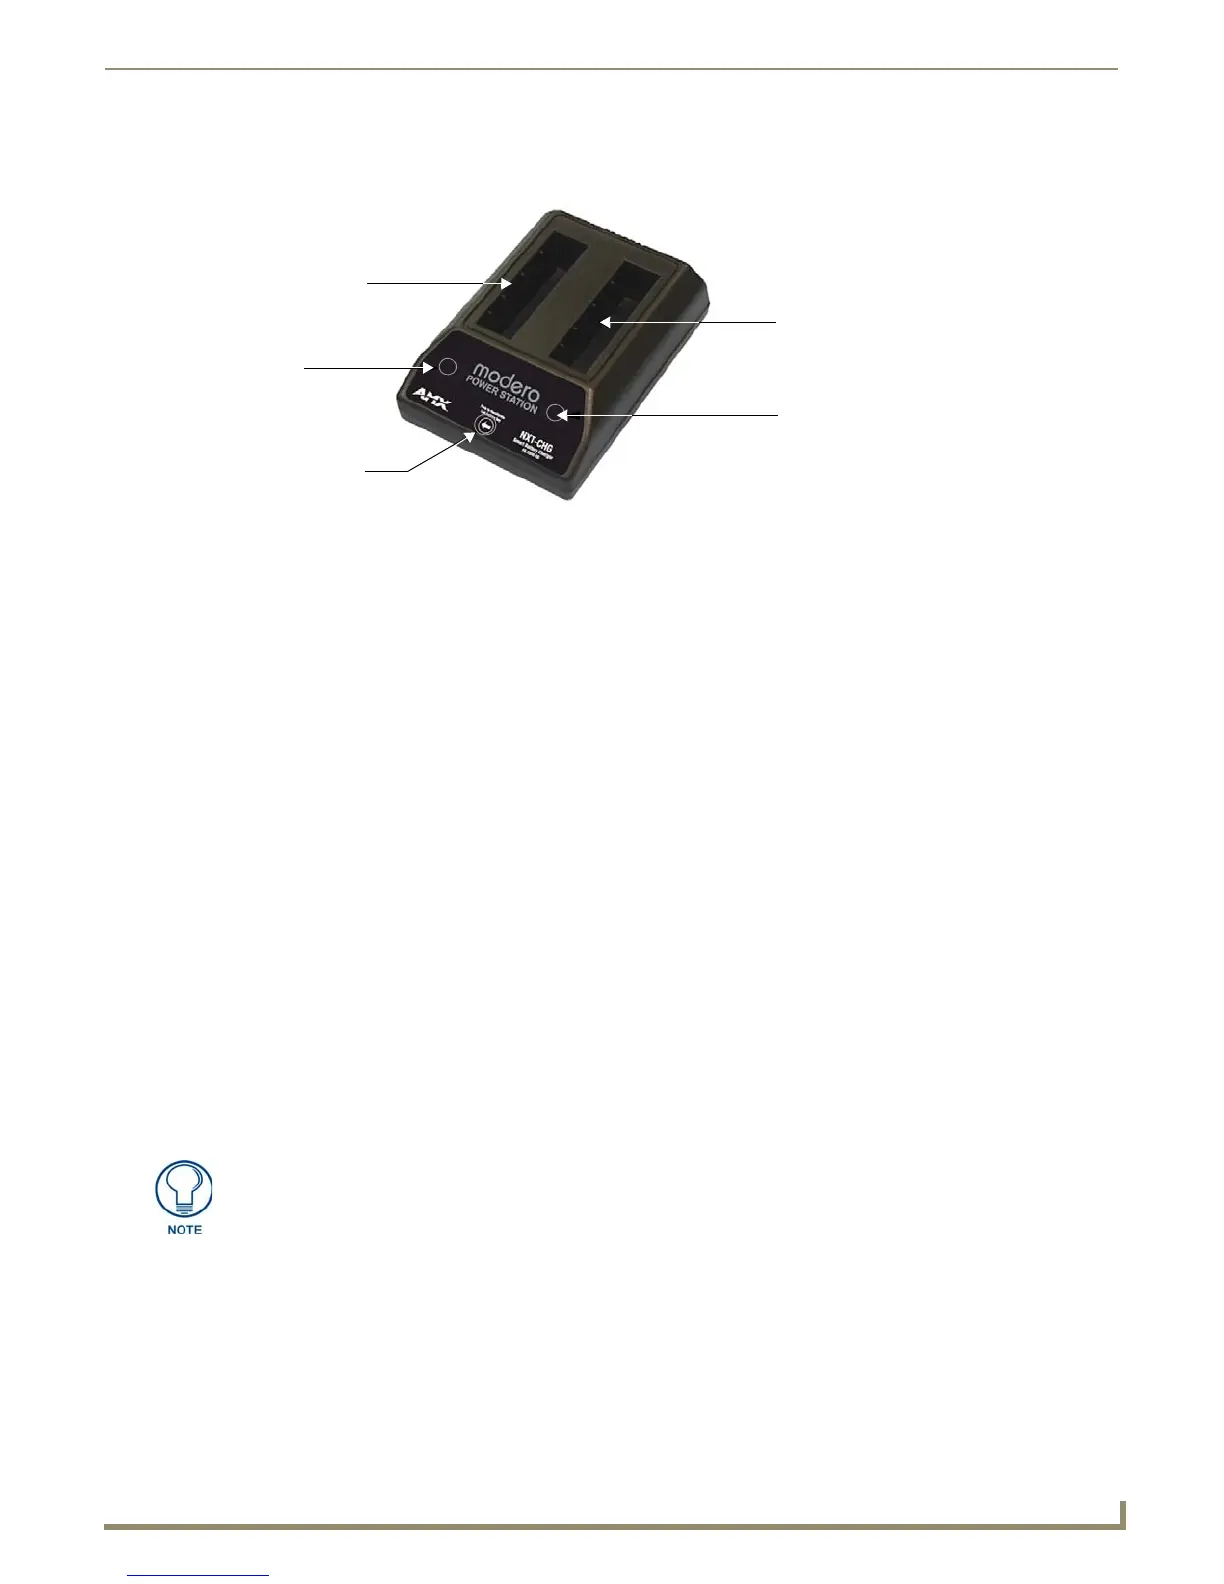
FIG. 32 shows the components on the NXT-CHG Smart Battery Charger.
There is one LED indicator on the front of each battery slot that indicates the status of that slot. The blink patterns for
these LEDs are described in the following table:
Charging the NXT-BP batteries using the NXT-CHG
1.
Review the Checking the NXT-BP battery charge section on page 23 to confirm the percentage of charge remaining
on the batteries.
2. Provide power to the charger (as outlined in the Powering the NXT-CHG section on page 26).
3. Align the battery connector with the corresponding charge slot within each of the two NXT-CHG slots.
4. Firmly insert the battery into the desired slot until the battery is both securely located within the slot and there is
activity from the corresponding Slot LED. Refer to the Reading NXT-CHG LED Indicator section on page 27
section for LED information.
Recalibrating the batteries
The recalibration process increases the accuracy of the battery charge level. Recalibration of the batteries is only done
upon request from the Modero on-screen Battery Base page. Refer to the Battery Base Page section on page 89 for more
detailed Battery Base page information.
1. Place the selected battery securely into Slot 1 (left slot) until there is activity on the Slot 1 LED.
2. Push the Recalibration pushbutton (located between the two slots) to initiate recalibration in the left bay only.
FIG. 32 Component locations on the NXT-CHG
• Off: No battery detected.
• Green Flashing: Fast charging.
• Green Solid: Fully charged.
• Yellow Flashing: Recalibration in process.
• Yellow/Green: Recalibration complete.
• Yellow Solid: Standby (waiting for other battery to charge).
• Red Flash: Error (problem with either the battery connection to the internal slot, or with the battery
itself).
Slot 1
LED
Slot 2
LED
Recalibrate
Pushbutton
Slot 1
Slot 2
(recalibration)
Recalibration can only be done with Slot 1 on the NXT-CHG.

 Loading...


