Upgrading Modero Firmware
73
NXD/T-1200V Wall/Flush Mount Touch Panel
4. Click the Communications Settings button to open the Communications Settings dialog.
5. Click on the NetLinx Master radio button (from the Platform Selection section) to indicate you are working with a
NetLinx Master (such as the NXC-ME260/64 or NI-Series of Integrated Controllers).
6. Click on the TCP/IP radio button (from the Transport Connection Option section) to indicate you are connecting to
the Master through an IP Address.
7. Click the Edit Settings button (on the Communications Settings dialog) to open the TCP/IP Settings dialog
(FIG. 75). This dialog contains a series of previously entered IP Address/URLs and their associated names, all of
which are stored within Studio and are user-editable.
8. Click the New button to open the New TCP/IP Settings dialog where you can enter both a previously obtained
DHCP or Static IP Address and an associated description for the connection into their respective fields.
9. Place a checkmark within the Automatically Ping the Master Controller to ensure availability radio box to make
sure the Master is initially responding online before establishing full communication.
10. Click OK to close the current New TCP/IP Settings dialog and return to the previous TCP/IP Settings dialog where
you must locate your new entry within the List of Addresses section.
11. Click the Select button to make that the currently used IP Address communication parameter.
12. Click OK to return to the Communications Settings dialog and place a checkmark within the Authentication
Required radio box if your Master has been previously secured with a username/password.
13. Click on the Authentication Required radio box (if the Master is secured) and then press the User Name and
Password button to open the Master Controller User Name and Password dialog.
14. Within this dialog, you must enter a previously configured username and password (with sufficient rights) before
being able to successfully connect to the Master.
15. Click OK to save your newly entered information and return to the previous Communication Settings dialog where
you must click OK again to begin the communication process to your Master.
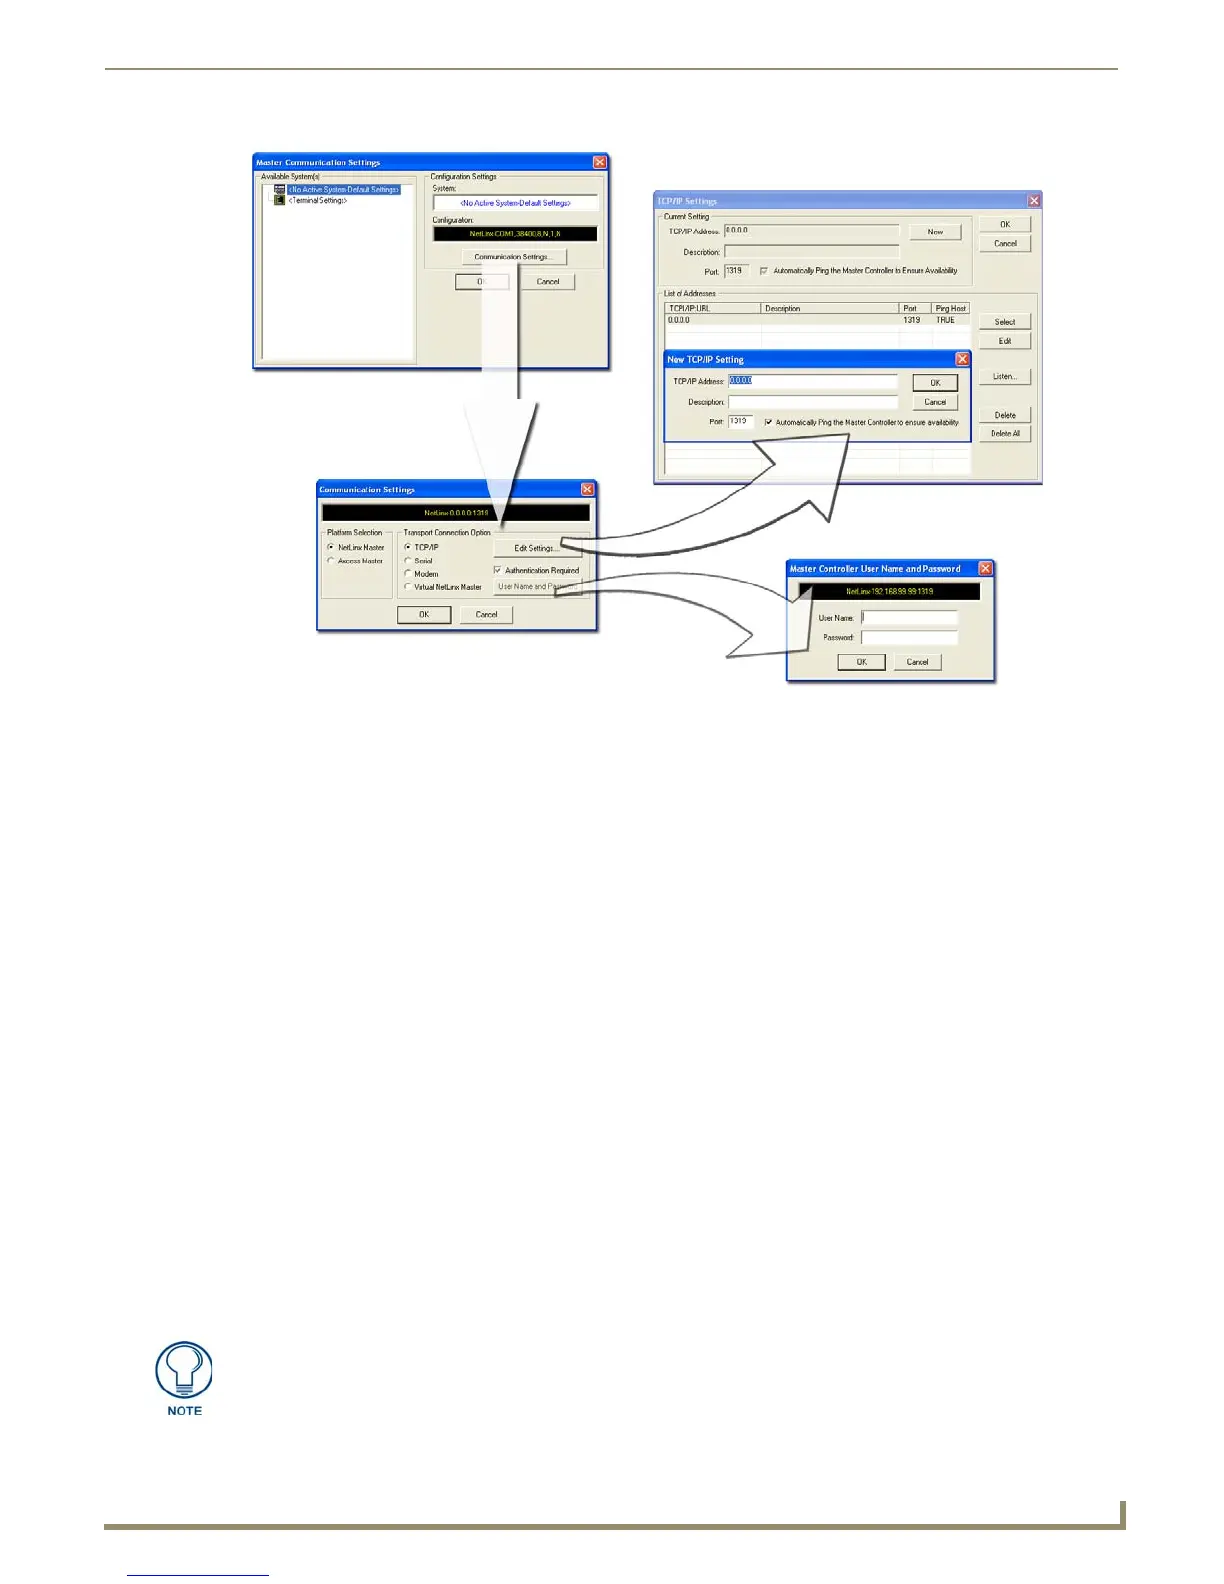
FIG. 75 Assigning Communication Settings and TCP/IP Settings
If you are currently connected to the assigned Master, a popup asks whether you
would want to temporarily stop communication to the Master and apply the new
settings.

 Loading...


