HA-8180V 4-13
5 Remove air from the column by priming.
a Press and wait about 30 seconds.
• Fluid pumping starts, and liquids and bubbles overflow from the connection between the column and push screw.
• Priming is complete (in about 30 seconds) when bubbles are no longer formed and only liquid overflows.
b With liquid overflowing from the IN side, securely tighten the IN side push screw by hand and immediately wrap
the OUT side of the column with tissue paper.
• Liquid will overflow from the OUT side of the column.
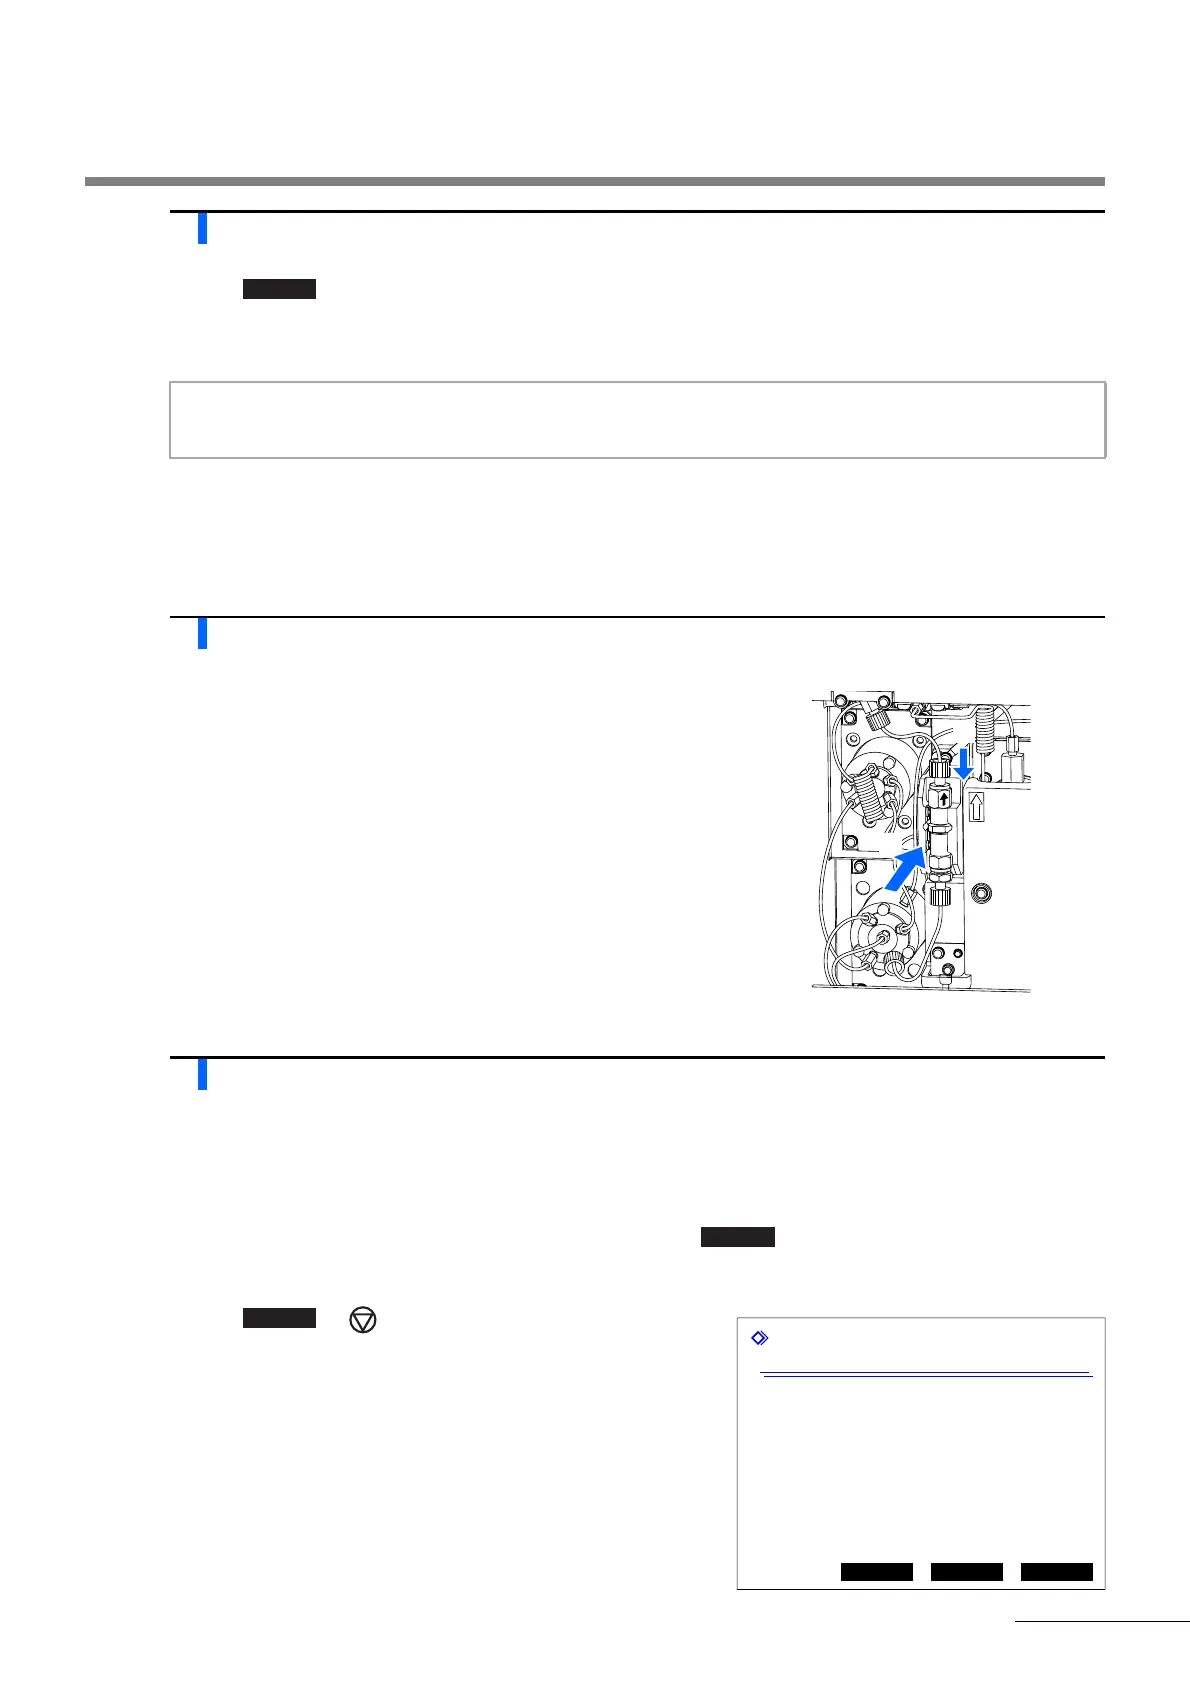
6 Tighten the column fully.
a Connect the push screw to the OUT side of the column.
• Insert the tube of the push screw into the column until the tube
stops, and then securely tighten the push screw by hand.
b Remove the tissue paper.
c Install the column into the column holder.
7 Check for liquid leaks.
a Check that liquid does not leak from the connections on the IN and OUT sides of the column.
• Retighten the push screws if liquid leaks.
b Press or when the appropriate column pressure
appears on the display.
• Fluid pumping will stop.
Slightly loosen the push screw if liquid does not overflow from the connection.
Fluid pumping stops in 10 minutes. To pump more fluid, press . The instrument will continue to pump
the fluid for another 10 minutes.
Reset
Column
10"00
(2500) 15.0 kg/cm2
Pumping fluid ...
Attach push screw to the bottom
first, then to the top.
Once installed, close the
front cover and press [Finish].
Suspend Reset Finish
An appropriate column pressure is near the “Column Pressure
(MPa or kg/cm
2
)” written on the “CERTIFICATE OF QUALITY”
that comes with the column.
4.2 Replacement of Consumables
 Loading...