Home
Arkray
Measuring Instruments
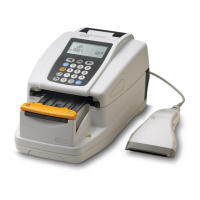
ADAMS A1C HA-8180V
Arkray ADAMS A1C HA-8180V User Manual
5
of 1
of 1 rating
246 pages
Give review
Manual
Specs
To Next Page
To Next Page
To Previous Page
To Previous Page
Loading...
HA-8180V
3-40
Chapter 3 Auxiliary Operations
3.8.3
Printing Reag
ent Informatio
n
Reagent information can be printed out as follows:
•
At the beginning of batches
•
On individual measuremen
t result reports
REFER
ENC
E:
Printed report example: See “2.9.7. Calibra
tion Results Report” on page 2-49 and “6.1.6. Reagen
t Information
Report” on page 6
-8.
146
148
Table of Contents
1 Premise
2
2 Introduction
3
3 Symbols
4
4 Caution Labels
5
5 Table of Contents
8
Chapter 1 Before Use
14
1.1 Overview
15
1.1.1 Main Functions
15
1.1.2 Features
16
1.1.3 Specifications
18
1.1.4 Measurement Principle
19
1.2 Unpacking
20
1.2.1 Instrument
20
1.2.2 Sampler
21
1.2.3 Accessories
21
1.2.4 Rack Set
22
1.2.5 Accessory Case
23
1.2.6 Tool Kit
24
1.3 Part Names and Functions
25
1.3.1 Front and Right Side Views
25
1.3.2 Rear View
28
1.4 Installation
29
1.4.1 Precautions in Instrument Installation
29
1.4.2 Unlocking the Instrument
30
1.4.3 Attaching the Sampler
32
1.4.4 Checking the Tubes of the Drain Pinch Valves
35
1.4.5 Setting Up Eluents and Hemolysis Washing Solution
36
1.4.6 Connecting the Drain Tubes
39
1.4.7 Connecting Peripheral Devices
41
1.4.8 Connecting the Power Cord
42
1.5 Starting Up
43
1.5.1 Turning On the Power for the First Time
43
1.5.2 Installing the Column
44
1.5.3 Setting Up the Instrument
46
1.5.4 Turning Off the Power
47
1.6 Relocation
48
1.6.1 Precautions in Instrument Relocation
48
1.6.2 Draining Fluid from the Tubes
49
1.6.3 Unplugging the Power Cord
50
1.6.4 Disconnecting the Tubes, Sensor Cord and Cables
51
1.6.5 Detaching the Sampler
52
1.6.6 Relocating the Instrument
53
1.7 Basic Operations
54
1.7.1 Components on the Operator Panel
54
1.7.2 Basic Operations
55
Chapter 2 Measurement
58
2.1 Before Measurement
59
2.1.1 Measurement Procedure
59
2.1.2 Sample Containers
60
2.1.3 Sample Racks
61
2.2 Measurement Precautions
64
2.2.1 Precautions for Operation
64
2.2.2 Eluents
65
2.2.3 Hemolysis Washing Solution
66
2.2.4 Column
67
2.2.5 Samples
68
2.3 Preparation for Measurement
69
2.3.1 Checking Liquid Waste and Consumables
69
2.3.2 Startup
69
2.4 Measurement Mode Selection (Variant or Fast)
71
2.5 Normal Measurement
73
2.5.1 Preparing Samples
73
2.5.2 Measuring Samples
79
2.5.3 Viewing Measurement Results in Detail
81
2.6 STAT Measurement
83
2.6.1 Measuring a Sample During Normal Measurement
83
2.6.2 Measuring a Sample During Standby
87
2.7 HbA1C Control Measurement
89
2.7.1 Quality Control
89
2.7.2 Control Measurement
89
2.8 HbA1C Calibration
94
2.8.1 Performing Automatic Calibration
94
2.8.2 Setting the Calibration Coefficients
99
2.9 Displayed and Printed Reports
101
2.9.1 Displayed Results Report
101
2.9.2 Chromatogram Report
102
2.9.3 List of Measurement Results
103
2.9.4 List of Abnormal Results
104
2.9.5 List of Barcode Errors
104
2.9.6 History of Warning/Error/Trouble
105
2.9.7 Calibration Results Report
106
Chapter 3 Auxiliary Operations
108
3.1 Main Menu Screen
109
3.2 Measurement Counter Setup
113
3.3 Measurement Conditions
114
3.3.1 Setting the User-specified Coefficients
114
3.3.2 Setting the Timer Conditions
115
3.3.3 Setting the Timer
116
3.3.4 Configuring the Measurement Numbering Method
118
3.3.5 Setting the HbA1C Measurement Conditions
120
3.4 Measurement Results
122
3.4.1 Printing/Transmitting Results
122
3.4.2 Reviewing Results
125
3.4.3 Deleting Results
128
3.5 Initial Settings
129
3.5.1 Setting the Date and Time
129
3.5.2 Setting Up the Printer
130
3.5.3 Setting Up External Output
131
3.5.4 Adjusting the Beeper Volume
131
3.6 Print
132
3.6.1 Printing History of Warning/Error/Trouble
132
3.6.2 Printing a List of Barcode Errors
133
3.6.3 Printing a List of Abnormal Results
134
3.6.4 Printing Calibration Result Report
135
3.6.5 Printing the Current Parameter Settings
135
3.7 Diagnosis
136
3.7.1 Testing the Whole Flow System
136
3.7.2 Testing Individual Flow Circuit
137
3.7.3 Printing Accuracy Control Reports
138
3.7.4 Printing Optical Unit Monitoring Results
139
3.7.5 Performing Check Measurement for the Analysis Section
140
3.7.6 Testing HbA1C Reproducibility (Whole Blood Sample)
141
3.7.7 Testing HbA1C Reproducibility (Hemolysis Sample)
143
3.8 Reagent Information Settings
145
3.8.1 Setting Reagent Information When Replacing the Reagents
145
3.8.2 Setting Reagent Information After Replacing the Reagents
145
3.8.3 Printing Reagent Information
147
Chapter 4 Maintenance
148
4.1 Frequency of Maintenance
149
4.2 Replacement of Consumables
150
4.2.1 Replacing the Eluent Packs
150
4.2.2 Replacing the Hemolysis Washing Solution Bottle
154
4.2.3 Replacing the Printer Paper
157
4.2.4 Replacing the Column
158
4.2.5 Replacing the Piercing Nozzle/Cleaning the Nozzle Washing Block
162
4.2.6 Replacing the Mesh Filters of the Reagent Nozzles
168
4.2.7 Replacing the Tubes of the Drain Pinch Valves
171
4.3 Washing and Cleaning
173
4.3.1 Discarding Liquid Waste
173
4.3.2 Automatically Washing the Tubes
173
4.3.3 Automatically Washing the Tubes After Measurement
175
4.3.4 Cleaning the Piercing Nozzle
177
4.3.5 Cleaning the Sample Tube Spinning Unit
179
4.3.6 Cleaning the Dilution Container and Washing Container
181
4.3.7 Cleaning the Parts of the Dilution and Washing Containers
184
4.3.8 Disinfection
187
4.4 Priming
188
4.5 Recording Maintenance
189
4.5.1 Recording the Date of Maintenance
189
4.5.2 Viewing Maintenance History
190
4.6 Before/After Extended Periods of Disuse
191
4.6.1 Preparing the Instrument Before Extended Periods of Disuse
191
4.6.2 Starting Up the Instrument After Extended Periods of Disuse
198
Chapter 5 Troubleshooting
200
5.1 If a Warning Occurs
201
5.1.1 From Warning Occurrence to Remedy
201
5.1.2 Causes and Remedies
202
5.2 If an Error Occurs
208
5.2.1 From Error Occurrence to Remedy
208
5.2.2 Causes and Remedies
209
5.3 If Trouble Occurs
211
5.3.1 From Trouble Occurrence to Remedy
211
5.3.2 Causes and Remedies
212
5.4 Abnormal Result Messages
219
5.5 If This Happens
221
5.5.1 If the Instrument Does Not Start Up (Replacing Fuses)
221
5.5.2 Replacing the Column Tubes
223
5.5.3 If Eluent Packs Are Incorrectly Attached
226
Chapter 6 Appendix
228
6.1 Printed Report Examples
229
6.1.1 Current Parameter Settings
229
6.1.2 Accuracy Control Reports
231
6.1.3 Optical Unit Monitoring Results
232
6.1.4 Analysis Section Check Measurement Results
233
6.1.5 HbA1C Reproducibility Test Results
234
6.1.6 Reagent Information Report
235
6.2 Glossary
236
6.3 Performance Characteristics
239
6.3.1 Analytical Performance
239
6.3.2 Clinical Performance
240
6.4 Index
241
5
Based on 1 rating
Ask a question
Give review
Questions and Answers:
Need help?
Do you have a question about the Arkray ADAMS A1C HA-8180V and is the answer not in the manual?
Ask a question
Arkray ADAMS A1C HA-8180V Specifications
General
Brand
Arkray
Model
ADAMS A1C HA-8180V
Category
Measuring Instruments
Language
English
Related product manuals
Arkray ADAMS A1c
288 pages
Arkray AUTION MAX AX-4030
206 pages
Arkray AUTION ELEVEN AE-4022
161 pages
Arkray SPOTCHEM EZ SP-4430
139 pages
Arkray SPOTCHEM EL
91 pages
Arkray HA-8190V
288 pages
 Loading...