DDT; Reviewed:
SPOC 10/18/2017
Solution & Interoperability Test Lab Application Notes
©2017 Avaya Inc. All Rights Reserved.
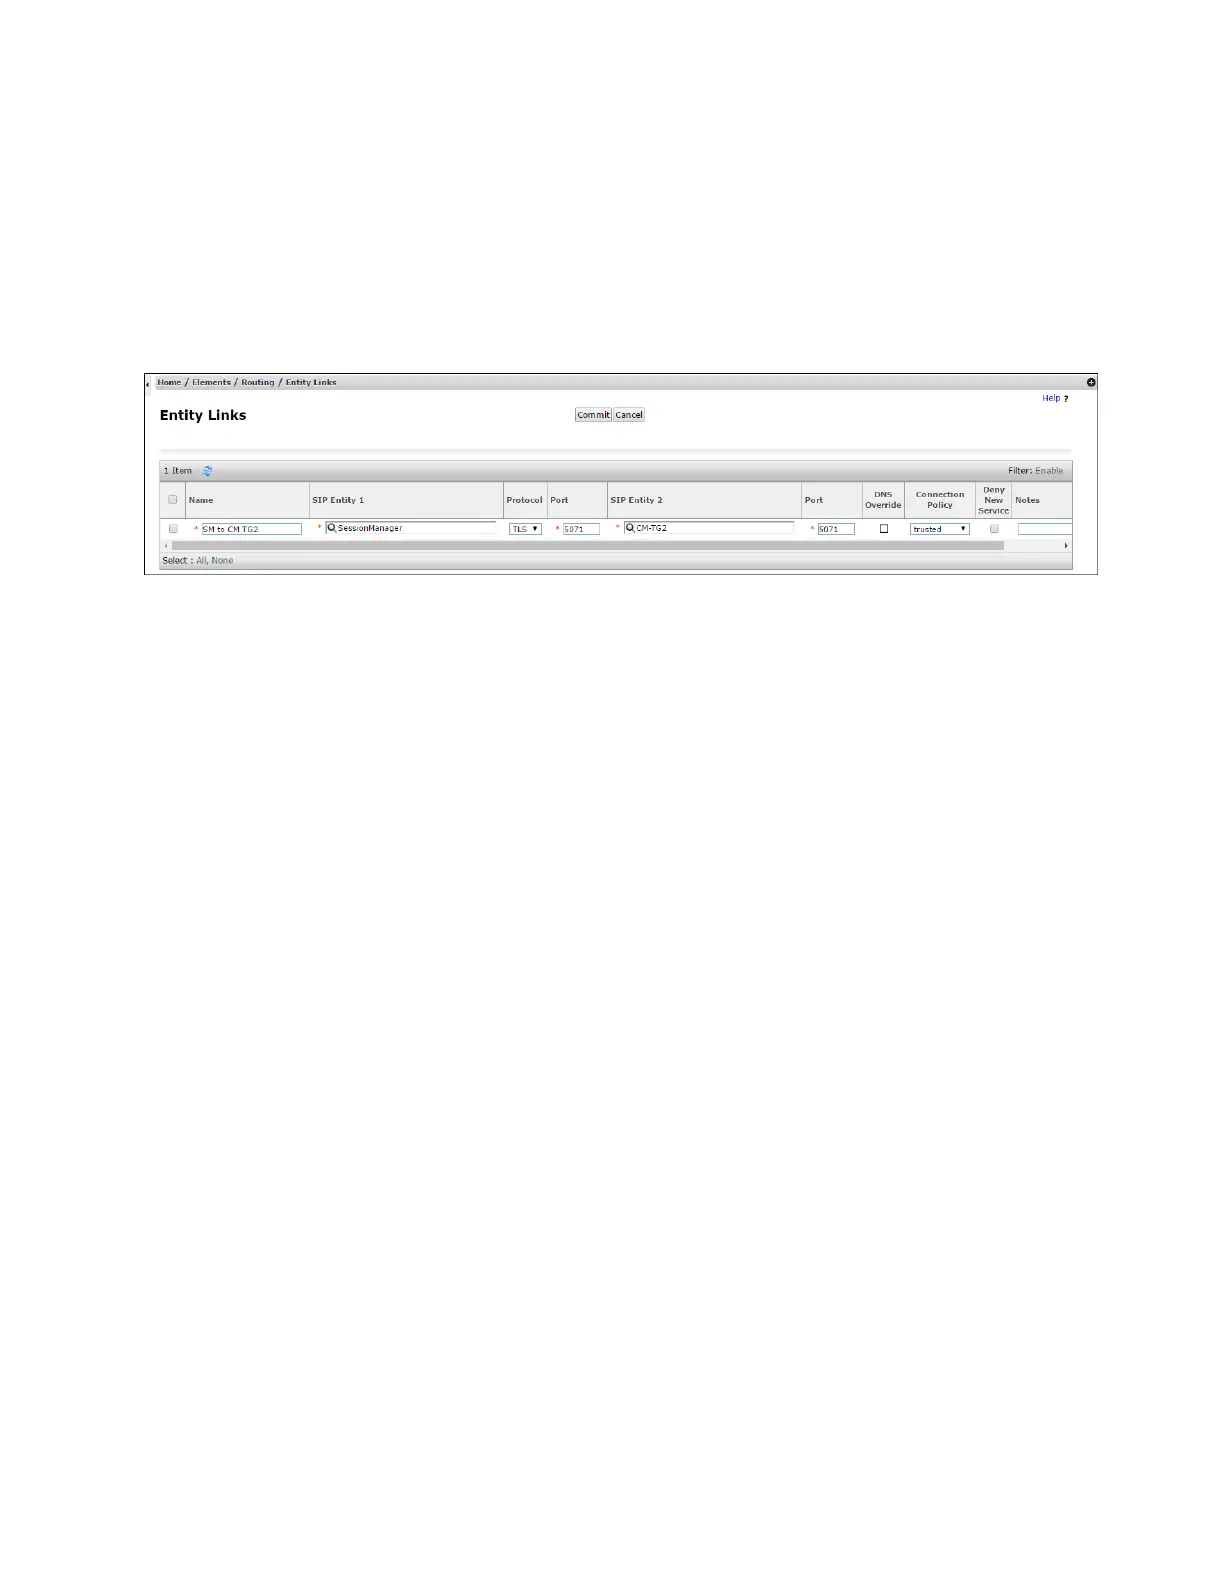
SIP Entity 1 Port – Enter 5071.
SIP Entity 2 – Select the SIP Entity administered in Section 5.4.2 for the
Communication Manager public entity (e.g., CM-TG2).
SIP Entity 2 Port – Enter 5071 (see Section 6.8.1).
Connection Policy – Select trusted.
Leave other fields as default.
Step 3 - Click on Commit.
5.5.2 Entity Link to Avaya Aura® Communication Manager – Local Trunk
To configure this Entity Link, repeat the steps in Section 5.5.1, with the following changes:
Name – Enter a descriptive name for this link to Communication Manager (e.g., SM to
CM TG3).
SIP Entity 1 Port – Enter 5061.
SIP Entity 2 – Select the SIP Entity administered in Section 5.4.3 for the
Communication Manager local entity (e.g., CM-TG3).
SIP Entity 2 Port – Enter 5061 (see Section 6.8.1).
5.5.3 Entity Link for the Verizon Business IPCC Services via the Avaya SBCE
To configure this Entity Link, repeat the steps in Section 5.5.1, with the following changes:
Name – Enter a descriptive name for this link to the Avaya SBCE (e.g., SM to SBC1).
SIP Entity 1 Port – Enter 5061.
SIP Entity 2 – Select the SIP Entity administered in Section 5.4.4 for the Avaya SBCE
entity (e.g., SBC1).
SIP Entity 2 Port – Enter 5061.
5.5.4 Entity Link to Avaya Aura® Messaging
To configure this Entity Link, repeat the steps in Section 5.5.1, with the following changes:
Name – Enter a descriptive name for this link to Messaging (e.g., SM to AAM).
SIP Entity 1 Port – Enter 5061.
SIP Entity 2 – Select the SIP Entity administered in Section 5.4.5 for the Aura®
Messaging entity (e.g., Aura Messaging).
SIP Entity 2 Port – Enter 5061.
5.6. Time Ranges
Step 1 - In the left pane under Routing, click on Time Ranges. In the Time Ranges page click on
New (not shown).
 Loading...


