3 - 6
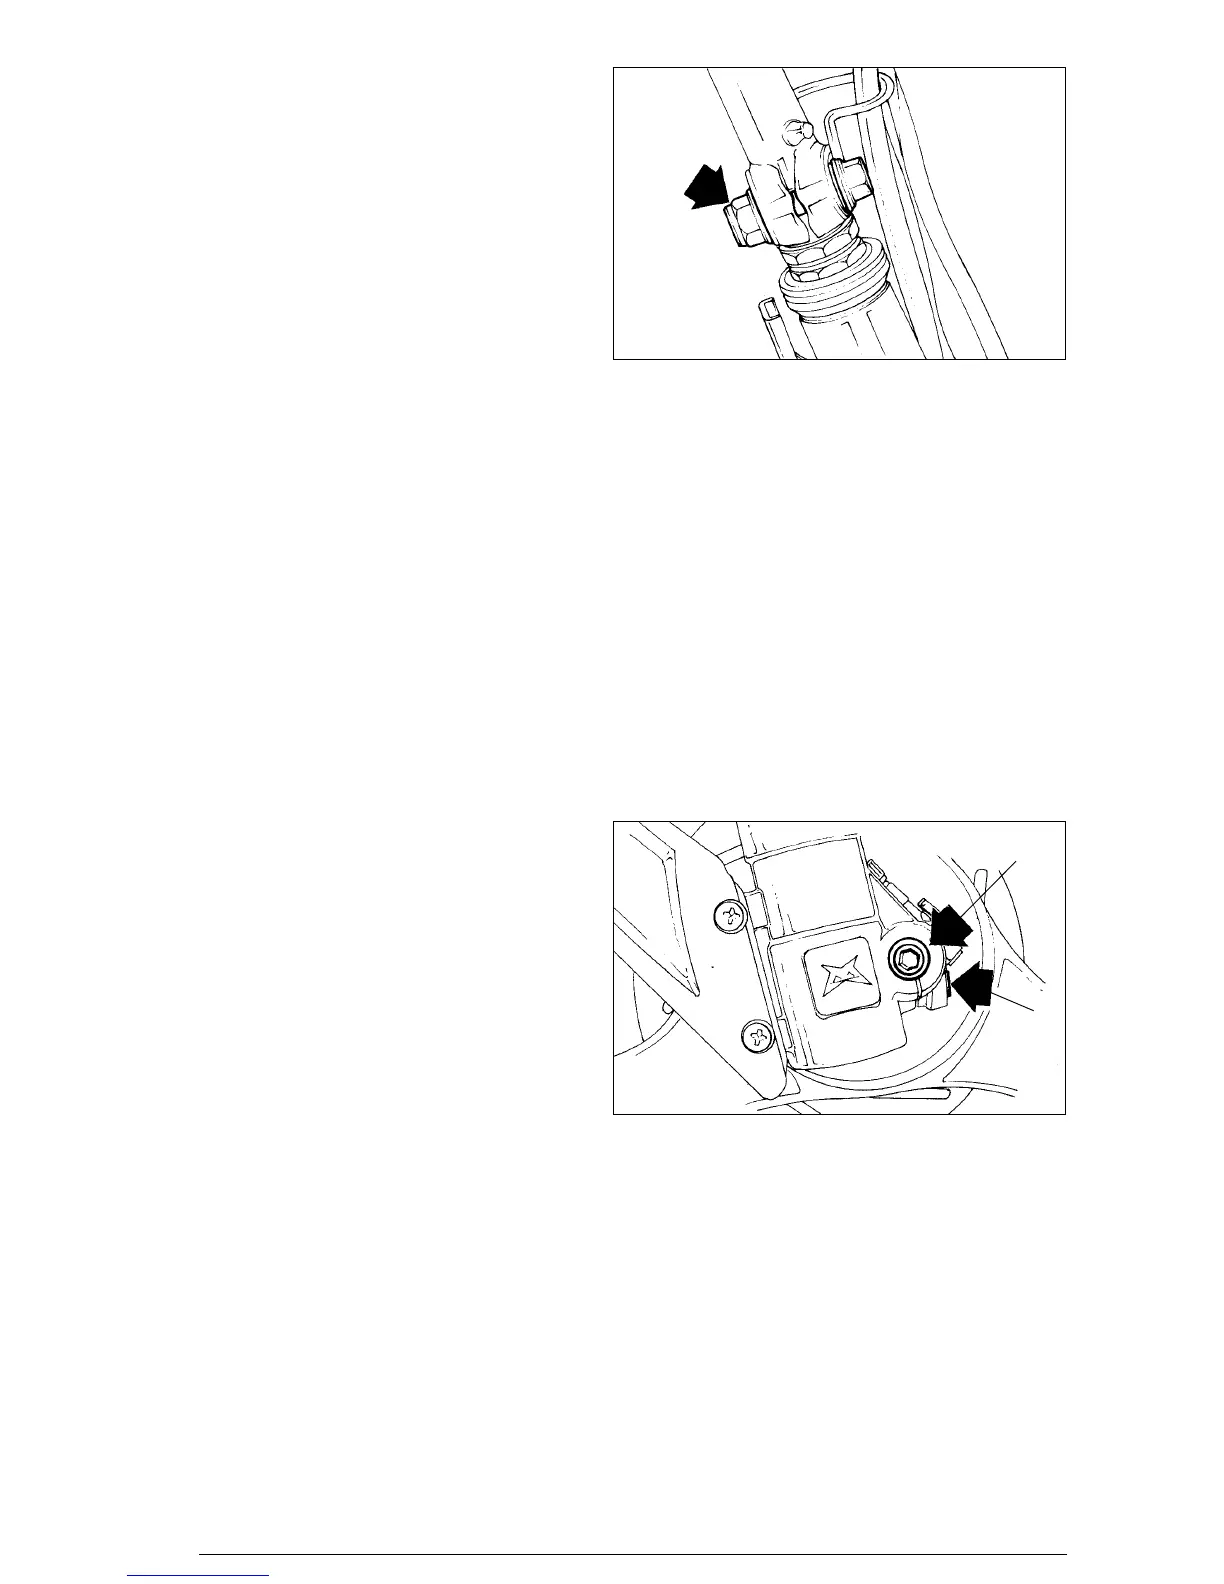
Handlebar assembly
- Position the handlebar correctly then introduce the screw
into its seat and tighten the nut shown in the figure: driving
torque 4,3-4,5 Kgm.
- Refit the brake pump and gas control.
- Refit the rear brake control (air cooled model).
- Refit the rear brake pump (water cooled model).
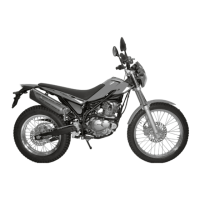
Front wheel axle disassembly
- Act on clamp 1 shown in the figure, then act on the hexa-
gonal hole directly on axl 2, remove the axle, then remo-
ve the wheel.
➁
➀
Einbau des Lenkers
- Lenker in der richtigen Position anbringen,
Befestigungsschraube anbringen und die Mutter mit dem
vorgeschriebenen Anzugsmoment von 4,3 - 4,5 Kgm fest-
ziehen.
- Bremspumpe und Gaszug wieder anbauen.
- Bremshebel Hinterradbremse (Luftgekühltes Modell)
anbauen.
- Bremspumpe Hinterradbremse (Modell mit
Flüssigkeitskühlung) anbauen.
Montage du guidon
- Positionner le guidon correctement, introduire alors la vis
dans son siège et serrer l’écrou montré sur la figure au
couple 4,3-4,5 Kgm.
- Remettre en place le maître-cylindre et la commande gaz.
- Remettre en place la commande de frein arrière (modèle à
refroidissement par air).
- Remettre en place le maître-cylindre de frein arrière
(modèle à refroidissement liquide).
Montaje manillar
- Colocar el manillar en su adecuada posición, después
introducir el tornillo en su relativo alojamiento y apretar la
tuerca indicada en la figura al par de 4,3-4,5 Kgm.
- Volver a montar la bomba freno y el mando gas.
- Volver a montar el mando freno trasero ( modelo refrige-
ración por aire).
- Volver a montar la bomba freno trasera ( modelo refrige-
ración por agua).
Ausbau vordere Radachse
- Befestigung 1 lösen und anschließend Inbusschraube 2
direkt an der Achse drehen. Zuerst die Achse und dann das
Rad entfernen.
Dépose de l’axe de roue arrière
- Agir sur la fixation 1 montrée sur la figure, puis sur l’orifi-
ce six-pans directement sur l’axe 2. Extraire l’axe, puis
déposer la roue.
Desmontaje eje rueda delantera
- Actuar mediante la fijación 1 indicada en la figura,
después actuar en el orificio héxagonal directamente en el
eje 2, sacar el eje , y la rueda.