14 Biodex Medical Systems, Inc. © 2017
2. Assembly and Installation
The Balance System SD is shipped in a single carton. Except for the printer, which the user
must install as explained below, the entire system is factory assembled and ready to operate.
Printer Installation
1. Refer to the supplied printer manual to unpack the printer and ensure that it has not been
damaged by shipping.
2. Position the printer on the Biodex-provided printer stand.
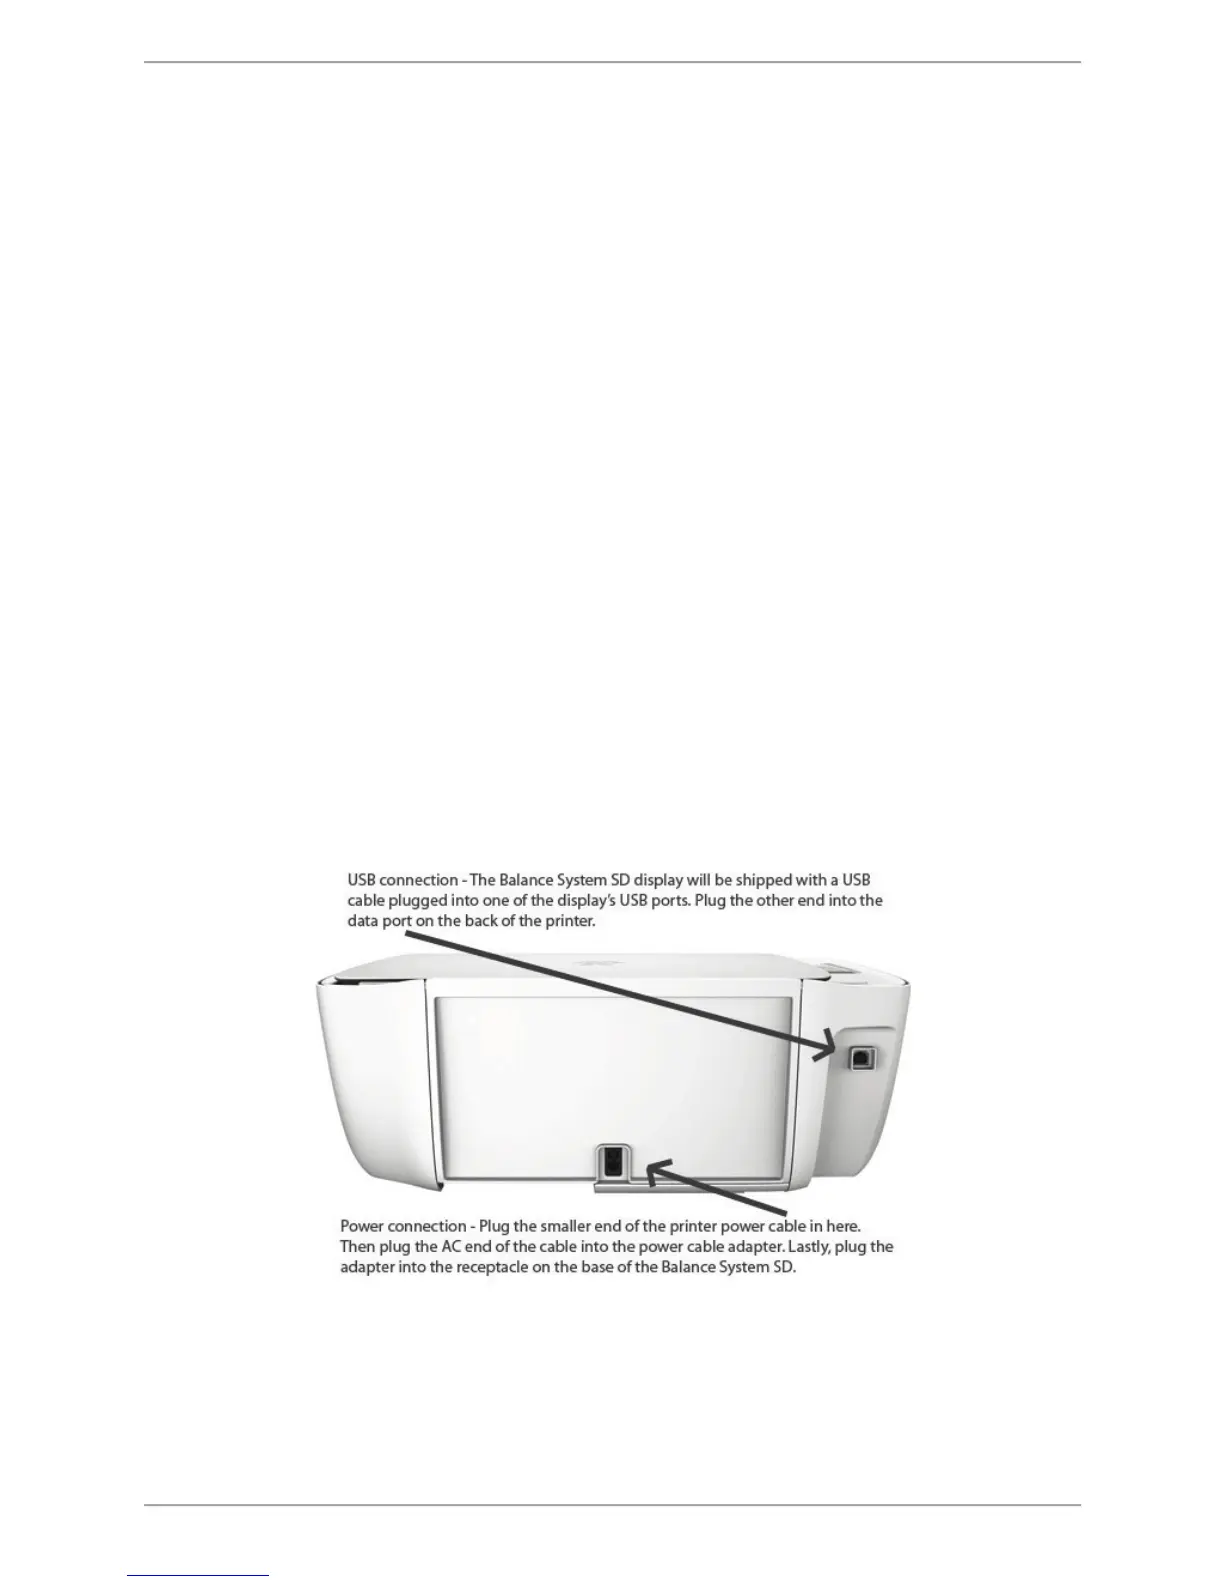
3. Locate the printer power cable. Plug the small end into the power receptacle on the back of
the printer.
4. Insert the AC plug end of the printer power cable first into the Biodex-provided power
adapter, and insert the adapter plug into the power cable receptacle on the back, lower
base of the Balance System. Do not connect any other equipment to this receptacle.
5. Locate the Biodex-provided USB cable that will be pre-installed in one of the USB ports on
the Balance System display. Connect the other end of the cable to the port at the back of
the printer.
6. Ensure both cables are positioned such that they will not interfere with the patient or get
caught in the Balance System platform or handles.
7. Refer to the printer manual for directions on installing ink cartridges and paper.
8. With power ON to the Balance System, press the <Power ON> switch on the printer. Refer to
the printer manual for additional printer information.
Figure 2.1. Connect the power cable and USB cable to the rear of the printer.
Parts and Adjustments
Mechanical adjustments to the Biodex Balance System are straightforward and
uncomplicated. In fact, there are only three adjustments that need be addressed to