80 Biodex Medical Systems, Inc. © 2017
Test Completion Screen TimeOut: This setting determines how long the Test Results screen will
be displayed before the screen saver activates following completion of the exercise session. The
default is one minute, but the range can be adjusted from 0:00 to 30:00 minutes. Touch the
<> or <> keys to increase or decrease the value.
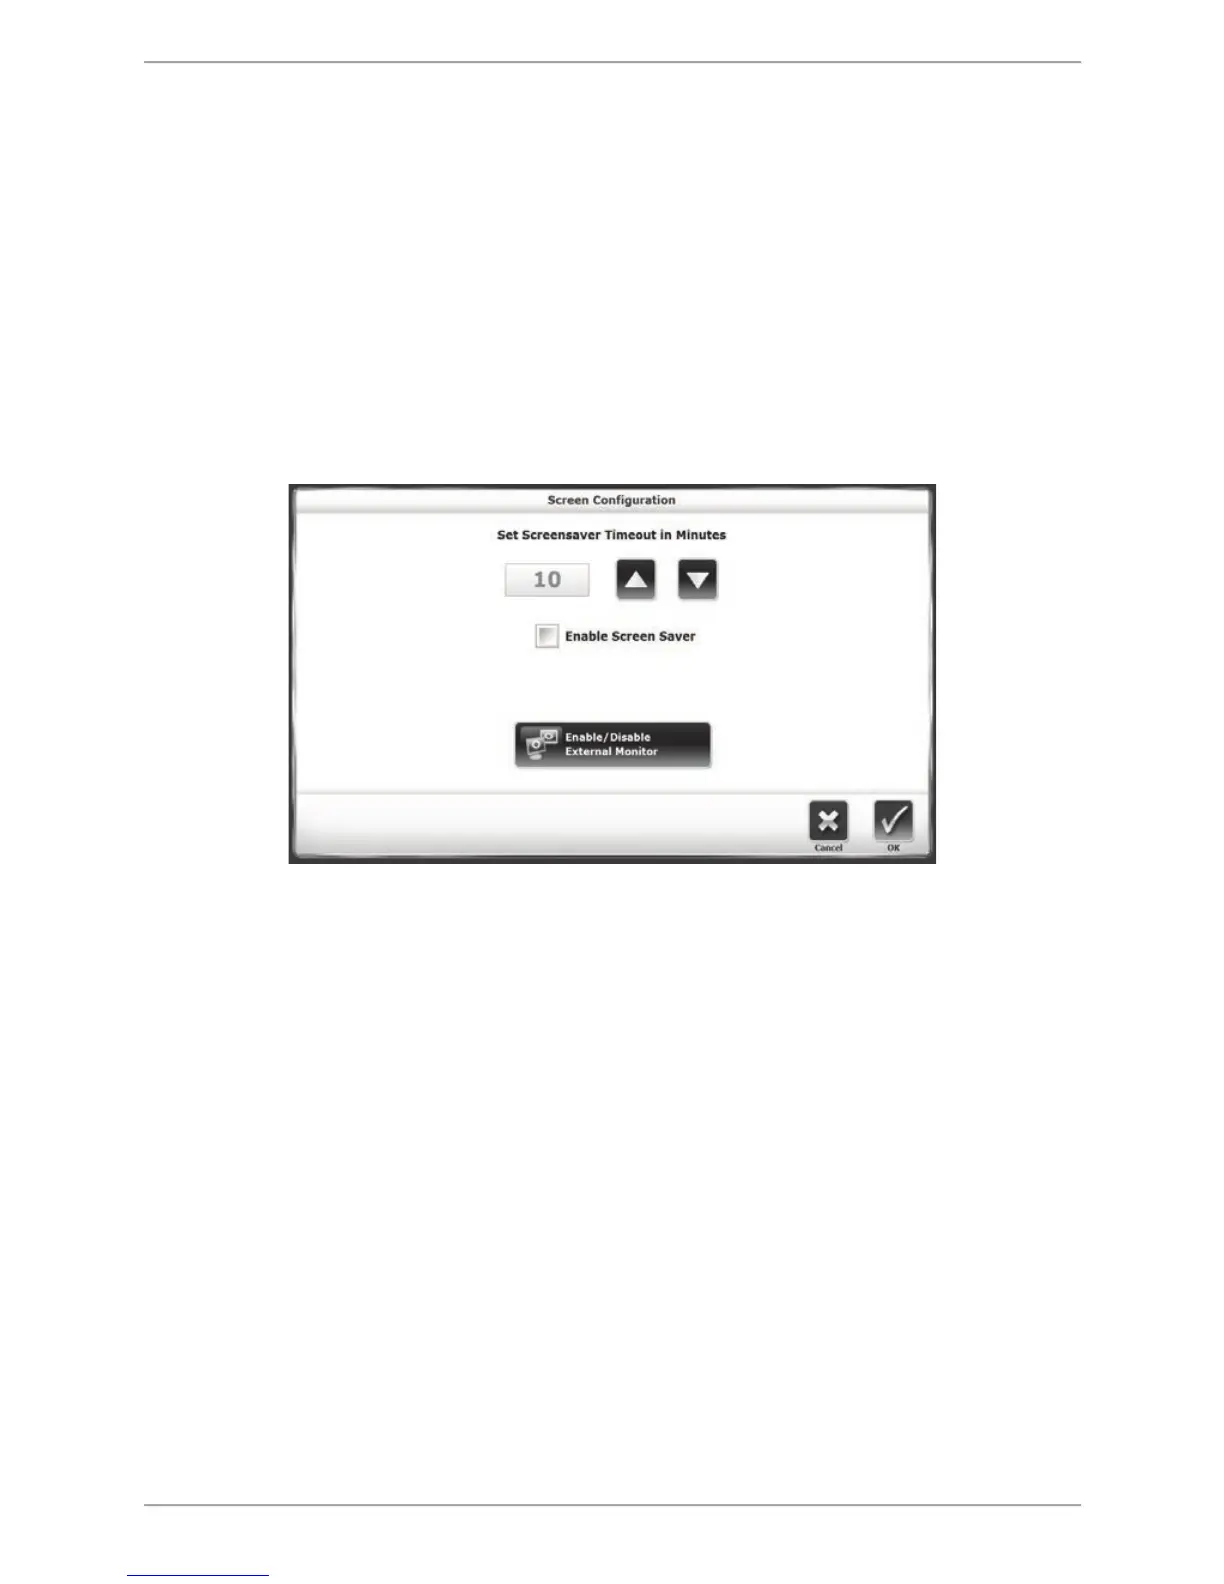
Screen Configuration: The Screen Saver setting determines how long the display screen remains
ON when the system is no longer in use. To activate the Screen Saver, touch the box next to
<Enable Screen Saver>. When the box is green, the Screen Saver function is enabled. Once the
selected time expires, the screen fades to black even if the Balance System SD printer remains
ON. Use the <"> or <> keys to increase or decrease the value displayed in 1 minute
increments. The Time Out range is from 00:00. To enable an external monitor, ensure that a
separate monitor is plugged in the display’s VGA port and that the external monitor is turned
on. Touch <Enable/Disable External Monitor> once. The external monitor will mirror the display
screen.
Figure 8.23. Screen Configuration settings, including the Screen Saver function (touch box next to
Enable Screen Saver to activate), and the Enable/Disable External Monitor button.
Touch <OK> to confirm the changes and return to the Configuration screen. Touch <Cancel> to
return to the Configuration screen without making any changes.
Set Date/Time: Touch <Set Date/Time> to change the system time or date. Touch to highlight
the value to change, use the <> or <> keys to increase or decrease the value as desired.
Touch <OK> to return continue and return to the Configuration screen.
Tone Volume: Touch any section of the horizontal bar to select a new tone volume setting.
Selecting low numbers along the bar will result in lower volume while selecting high numbers
makes the louder. Tone volume settings range from 0 to 10.
Measure Units: The device can be configured to display either U.S. or metric measurements. To
change units, touch the displayed units and touch the desired setting to select.
Change Access ID Code: At the Default Settings screen, users can change the Access Code used
to access the Default Settings screen, as well as other secure settings in the device software. To
change the access ID code, select a New Access ID Code by entering the value using the
displayed keypad. Press <OK> to save the New Access ID Code and return to the Default
Settings screen.