Balance System SD (with v4.X software) 87
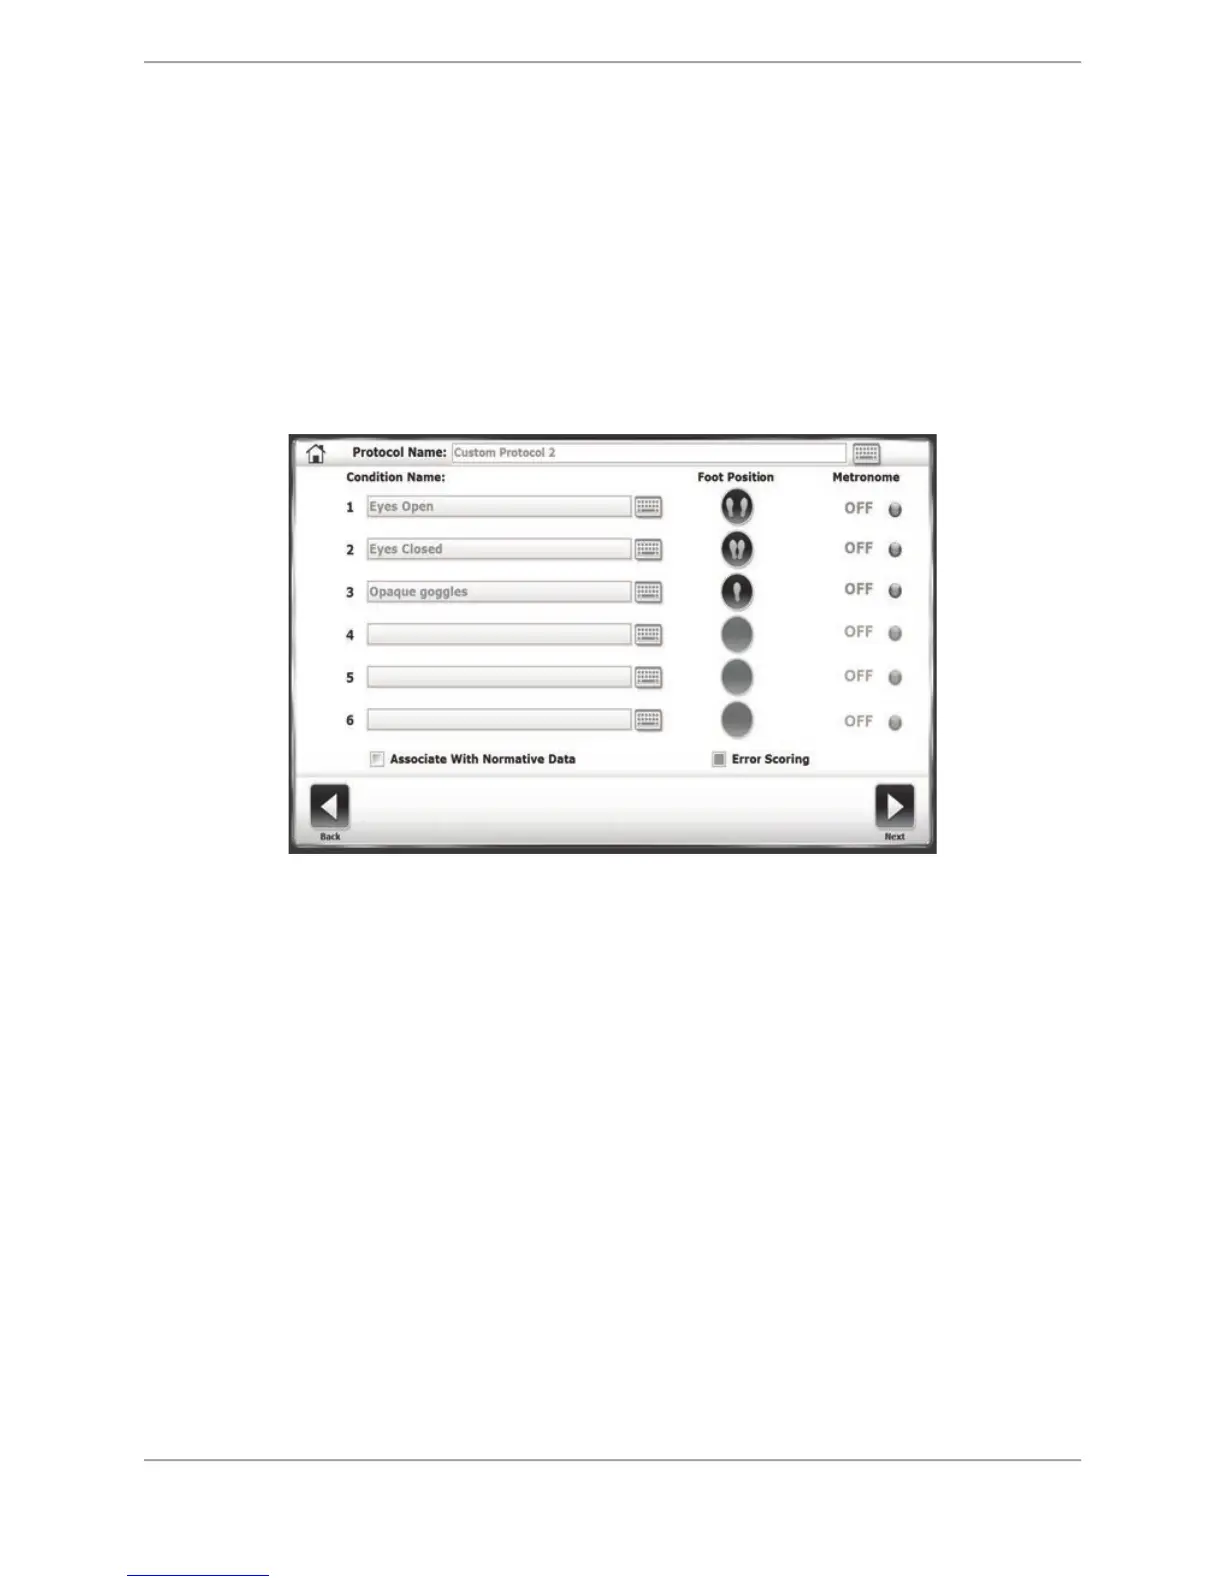
12. Touch the <Foot Position> icon next to each condition name to customize a foot position,
regular stance, narrow base of support, single leg (left or right), or tandem straight.
13. Touch the <Metronome> field to choose a metronome time if using a vestibular ocular
reflex (head shake). The frequency can be 1, 2, or 3 Hertz per second for a 30-degree
rotation from facing forward in both directions (60 degrees total).
14. Touch the Associate with normative data square to denote that this protocol will be
connected to a set of normative values. Note that the square will turn green when selected.
Practitioners can select from one of the normative data sets that come with the device or
they can add their own to be associated with this protocol.
15. Touch the Error Scoring square if conducting a BESS test and errors need to be reported.
Figure 8.29. Custom Sensory Test Setup screen.
16. Touch the <Next> button to access the Custom Protocol Overview screen.
17. The Custom Protocol Overview screen features the options that have been selected for the
new Custom Sensory Integration test. From this screen, the tracing function can be turned
on or off.
18. Touch the <More Options> button to access the Options screen for the Custom Sensory
newly created Integration test. From this screen, the Test Trial Time, Number of Trials, Rest
Countdown can be changed. Note that one or more of the conditions can be deselected.
19. Touch <OK> to return to Protocol Overview screen. Touch the <Save Protocol> button to
save the new protocol.
20. Touch the <Home> button from the Custom Protocol Overview screen to return to the main
menu.
21. Touch the <Testing> button.
22. Touch the <Custom Sensory Integration> button to access the Custom Sensory Integration
screen featuring the newly created protocol.