5-36
Confidential
c) If the alphabetical character displayed is not the desired one, repeat step b)
until the desired character is displayed.
<Number and corresponding characters>
E.g. When entering “Q”
Push the or button to display “7” on the LCD, and push the OK button.
“7” is displayed on the LCD.
Push the or button again to display “7” on the LCD, and push the OK
button. “P” is displayed on the LCD.
Push the or button again to display “7” on the LCD, and push the OK
button. “Q” is displayed on the LCD.
d) Push the button to display “?” on the LCD, and push the OK button to
change the flashing digit. Repeat these operations until the nine-digit serial
number is entered.
(3) When serial number entry is completed, push the OK button.
The new setting is stored, and the machine returns to the initial state of the
maintenance mode.
To abort serial number entry, push the Stop button. Setting is canceled, and the
machine returns to the initial state of the maintenance mode.
*2
Press the OK button while the number of times that the consumable part has been
replaced is displayed, the date last time the consumable part was replaced is displayed.
Press the OK button again, and the number of times the consumable part has been
replaced is displayed again.
*3
Average print rate: Print area/printable area
*4
Paper type according to the printer driver settings. It is not necessarily matched with the
type of the actual fed paper.
*5
01 to 10 are entered in ## in chronological order. When you press the OK button as the
machine error history is displayed, the page counter values when the errors occurred are
displayed.
<Operating Procedure>
(1) Press the 8 and 0 buttons in this order in the initial state of the maintenance mode.
In the case of the model without the numeric keys; Press the or button. The
“MAINTENANCE 80” appears on the LCD. Then press the OK button.
(2) Each time the Start button is pressed, next log information item appears on the LCD in
the order. Press the button to go to the next item. Press the button to go back to
the previous item.
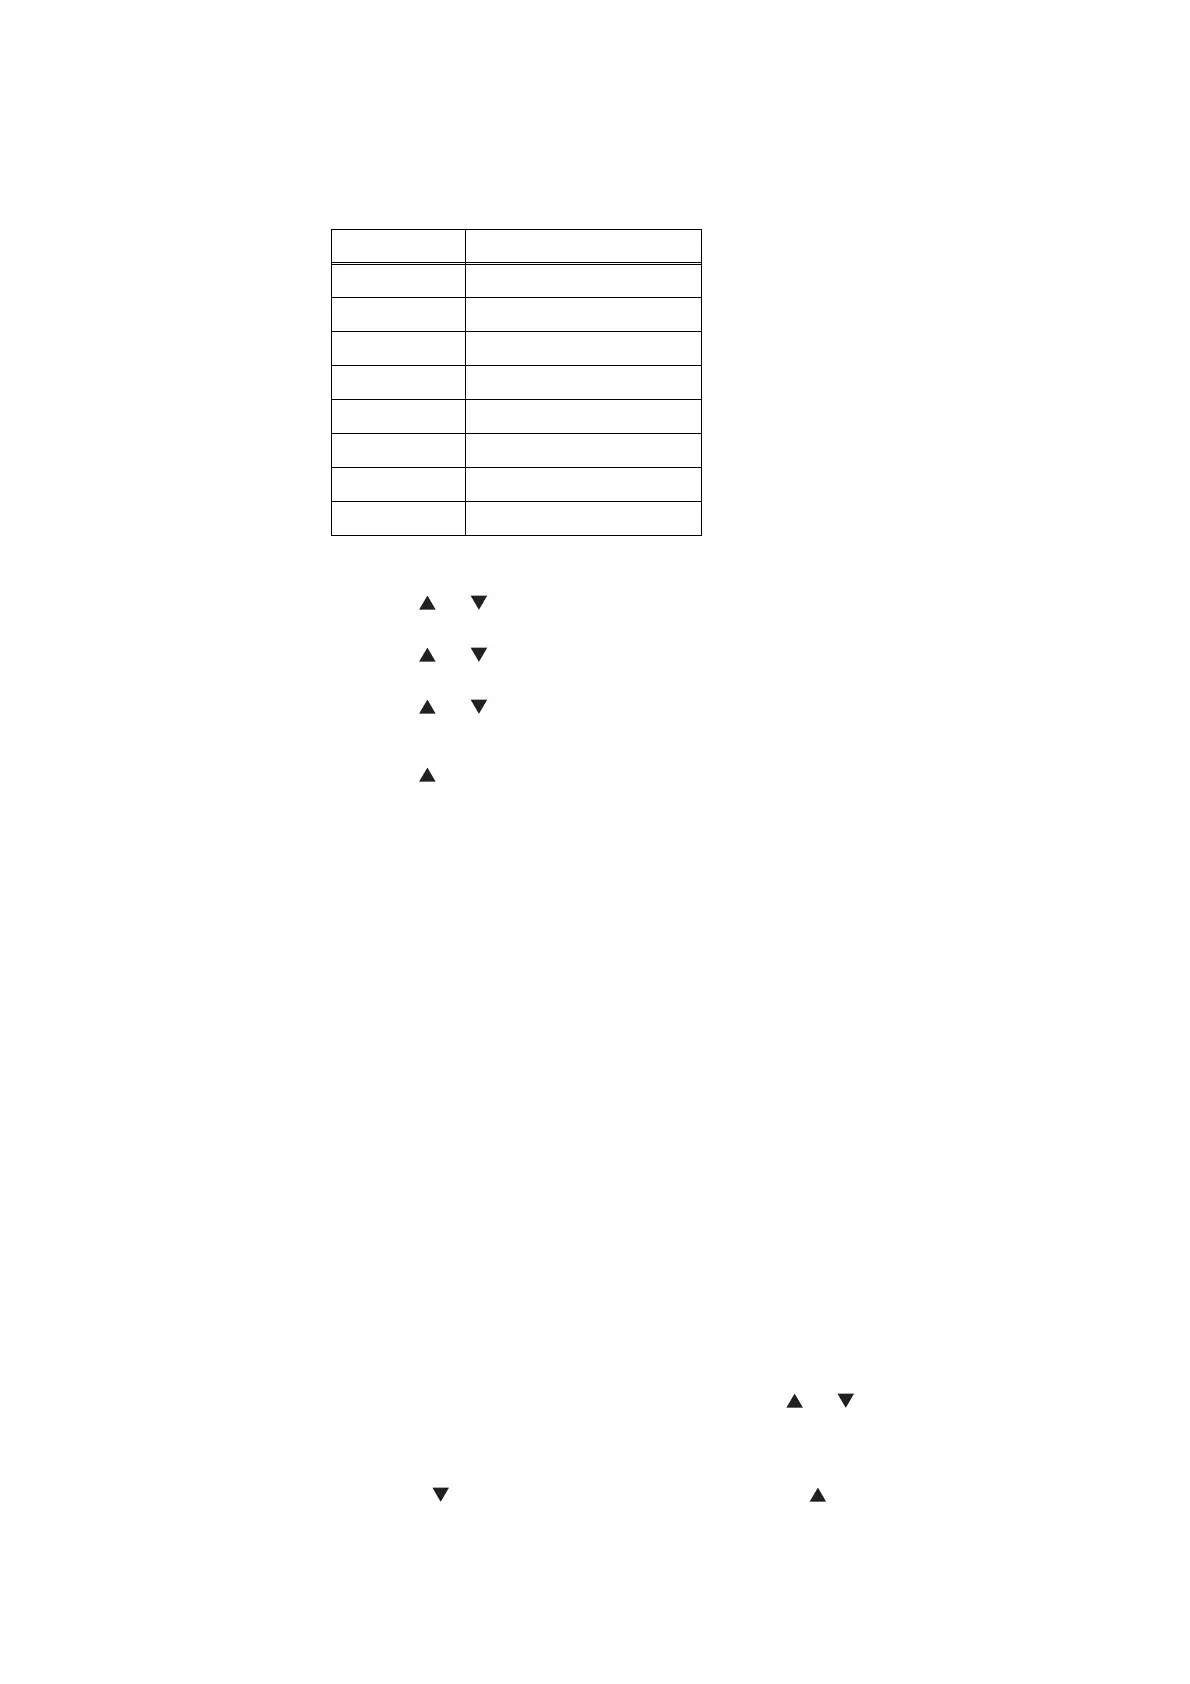
Number Assigned characters
2 A, B, C
3 D, E, F
4 G, H, I
5 J, K, L
6 M, N, O
7 P, Q, R, S
8 T, U, V
9 W, X, Y, Z
 Loading...