EasyManuals Logo

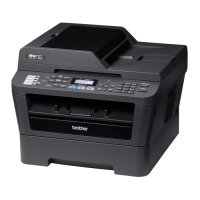
Brother MFC-7365DN Service Manual

Brother MFC-7365DN
343 pages
To Next Page IconTo Next Page
To Previous Page IconTo Previous Page
Page #226 background imageLoading...
Page #226 background image
3-82
Confidential
9.20 Fuser Unit
(1) Release the harness of the fuser unit from the guides of the main frame R ASSY.
(2) Disconnect the connector of the low voltage power supply PCB ASSY while pushing the
hook of the connector of the fuser unit.
Fig. 3-68
(3) Put the connector of the fuser unit through the hole of the main frame R ASSY.
Fig. 3-69
Guide
Guides
Connector
(low voltage power
supply PCB ASSY)
Main frame R ASSY
Connector
(low voltage power
supply PCB ASSY)
Connector (fuser unit)
Hook
Connector (fuser unit)
Hole

Table of Contents

Other manuals for Brother MFC-7365DN

Questions and Answers:

Question and Answer IconNeed help?

Do you have a question about the Brother MFC-7365DN and is the answer not in the manual?

Brother MFC-7365DN Specifications

Printing Specifications IconPrinting Specifications
print technologyElectrophotographic Laser
print speedUp to 24ppm
print resolutionUp to 1200 x 600 dpi
Copying Specifications IconCopying Specifications
copy speedUp to 24cpm
copy resolution600 x 600 dpi
copy reduction/enlargement25% - 400% in 1% increments
Scanning Specifications IconScanning Specifications
scanner typeColor Flatbed with ADF
document glass size8.5” x 11” (letter)
scan resolutionOptical: Up to 600 x 2400 dpi
Paper Handling IconPaper Handling
paper size maximumUp to 8.5” x 14” (legal size)
paper input capacity maximum250-sheet capacity paper tray, single-sheet manual feed slot
output capacity maximum100 sheets (face down), 1 sheet (face up)
Weight and Dimensions IconWeight and Dimensions
unit dimensions15.9” W x 15.7” D x 12.4” H
unit weight25.6 lbs.
carton weight32.6 lbs.
carton dimensions20.7” W x 20.1” D x 19.4” H

Related product manuals