3-37
Confidential
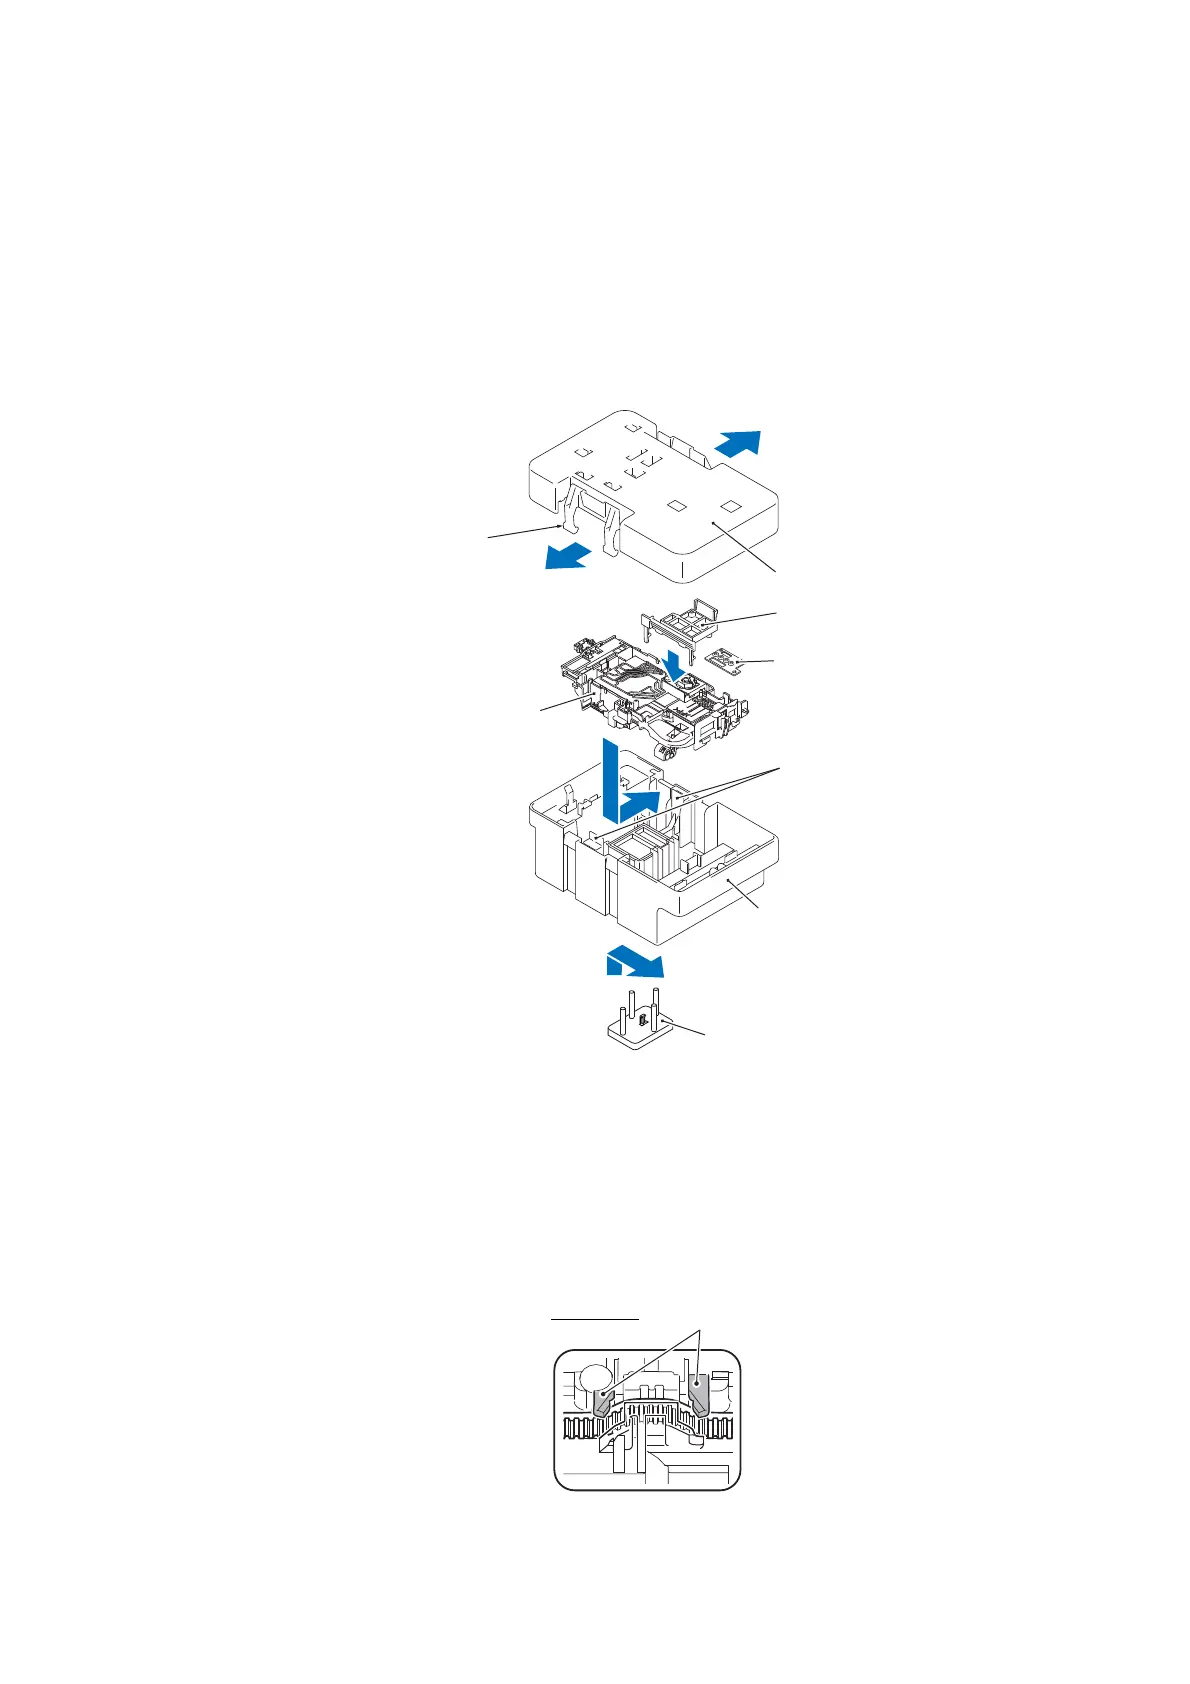
Note When storing a removed head/carriage unit for a long period, put it correctly inside the head
casing by following the procedure below. Leaving the head/carriage unit outside the head casing for
a long period will dry the print nozzles and ink supply ports and will make the head unusable.
1) Set the head/carriage unit on the head casing (lower), then slide it to the right.
2) Release the cap holder latches, push the cap holder against the head, and seal the nozzle.
3) Attach the joint cap to the joint rubber.
4) Attach the head casing (upper).
5) Fit the cap stopper into the head casing (lower) and slide it towards you to fix it in place.
Assembling Note Mount the head/carriage unit, using the following steps.
1) Set the leveler roller ASSY on the engine unit. (Refer to page 3-35)
2) When mounting a new head/carriage unit, apply lubricant to the unit, as specified in Section 5 of
this chapter.
3) Insert the CR timing belt into the head/carriage unit with the belt teeth positioned on the inside.
Confirm that the belt is fitted under the latches.
(3_045)
Latch
Head casing (upper)
Joint cap
Head joint rubber
Cap holder
Head casing (lower)
Cap stopper
Head/carriage unit
(3_046)

 Loading...