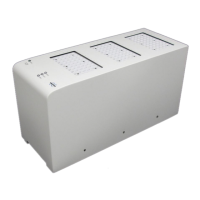
Sample Stage
48 H148850_3_003
9.1 Installing the Sample Stage
Follow the guidelines in the section Choosing a Location [}23] to choose a location for the
system. Keep in mind that:
• You will need to be able to access the back of the system to install cables.
• Place the autosampler within 1.2 meters of a power outlet.
• Allow at least 5 cm behind the power supply for cable egress, ventilation, and access to
the power switches. Always position the equipment so that it is easy to disconnect the
power cord.
9.1.1 Unpacking the Sample Stage
Inspect external packaging upon receipt for signs of shipping damage. Inspect all items
during unpacking and notify the carrier immediately of any concealed damage.
If the system is shipped or removed from storage during cold weather, allow the packaged
equipment to equilibrate to room temperature before opening and exposing to warm, humid
air. It is usually sufficient to provide four to eight hours for this purpose.
NOTICE
Material Damage from Condensation
Condensation that forms on or inside the device may cause equipment damage.
u Allow the device to dry thoroughly before connecting it to a power source and operating
it.
Remove the packing checklist from the shipping container, and check off items against it.
Leave accessories in the packing until you are ready to install them.
Keep the factory packaging for use in case the product ever needs to be returned or shipped
to another location.
9.1.2 Setting the Address for Dual Sample Stage Applications
The system is capable of supporting various sample stage and temperature controller
configurations. If the system will be configured for dual sample stage operation, the rack
address for the second sample stage must be changed before installing the sample stage on
the sample changer.
In order for the second sample stage to be recognized by the host computer software the
sample stages must have different addresses. The factory programmed default sample stage
address is hexadecimal “B” or 11. If there is a second sample stage, its address needs to be
changed to “C” or 12. The address can be set by turning a dial on the TEC board inside the
sample stage.