Installation
24 H148850_3_003
6.1.1.1 Space Requirements
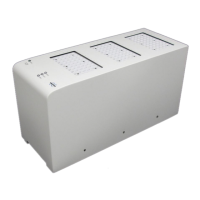
The recommended footprint for the Sample Automation XYZ sample changer (with or without
optional enclosure) is shown in the following table.
Recommended Space Including Cables/Tubing
Height 1 m (23.0")
Width 113 cm (41.0")
Depth 1 m (31.0")
Table6.1: Physical Characteristics
Allow at least 10 cm behind the device for cable egress, ventilation, and access to the power
switches. Always position the device so that it is easy to disconnect the power cord.
6.1.1.2 Work Surface Requirements
The device must be placed on a very sturdy countertop or table. Do not place the device on a
wheeled cart or folding table. During operation, the device produces both vertical and
horizontal forces. The work surface must support the equipment without shaking or wobbling.
6.1.1.3 Power Requirements
The sample changer receives power through the connection to the external power supply.
Place the sample changer within 1.2 meters of a power outlet.
WARNING
Fire and Shock Hazard
Incorrect installation or use of the power supply may result in a fire or shock hazard.
u Use only the provided power supply.
u The power supply must be plugged into an outlet which has a protective ground
connection.
u Ensure that the power cord is disconnected before removing any covers.
The sample changer is intended to operate from DC power supplied through the provided
power supply. The power supply is provided power through an AC power source that will not
apply more than 240VAC between the supply conductors and ground. A protective ground
connection, by way of the grounding connector in the power cord, is required for safe
operation.
Ensure that you position the sample changer so that the location where the power supply
cord plugs into it is easily accessible (is not blocked) and it can be quickly disconnected if
needed. In case of hazard, the sample changer should be disconnected from the power
source.
The power supply socket is on the back of the sample changer below the power switch.
Connect the power supply to the sample changer first and then connect a line cord to the
power supply. Do not apply power to the power supply until ready to operate the sample
changer.
Additional outlets will be needed for the temperature units and for the NMR instrument.