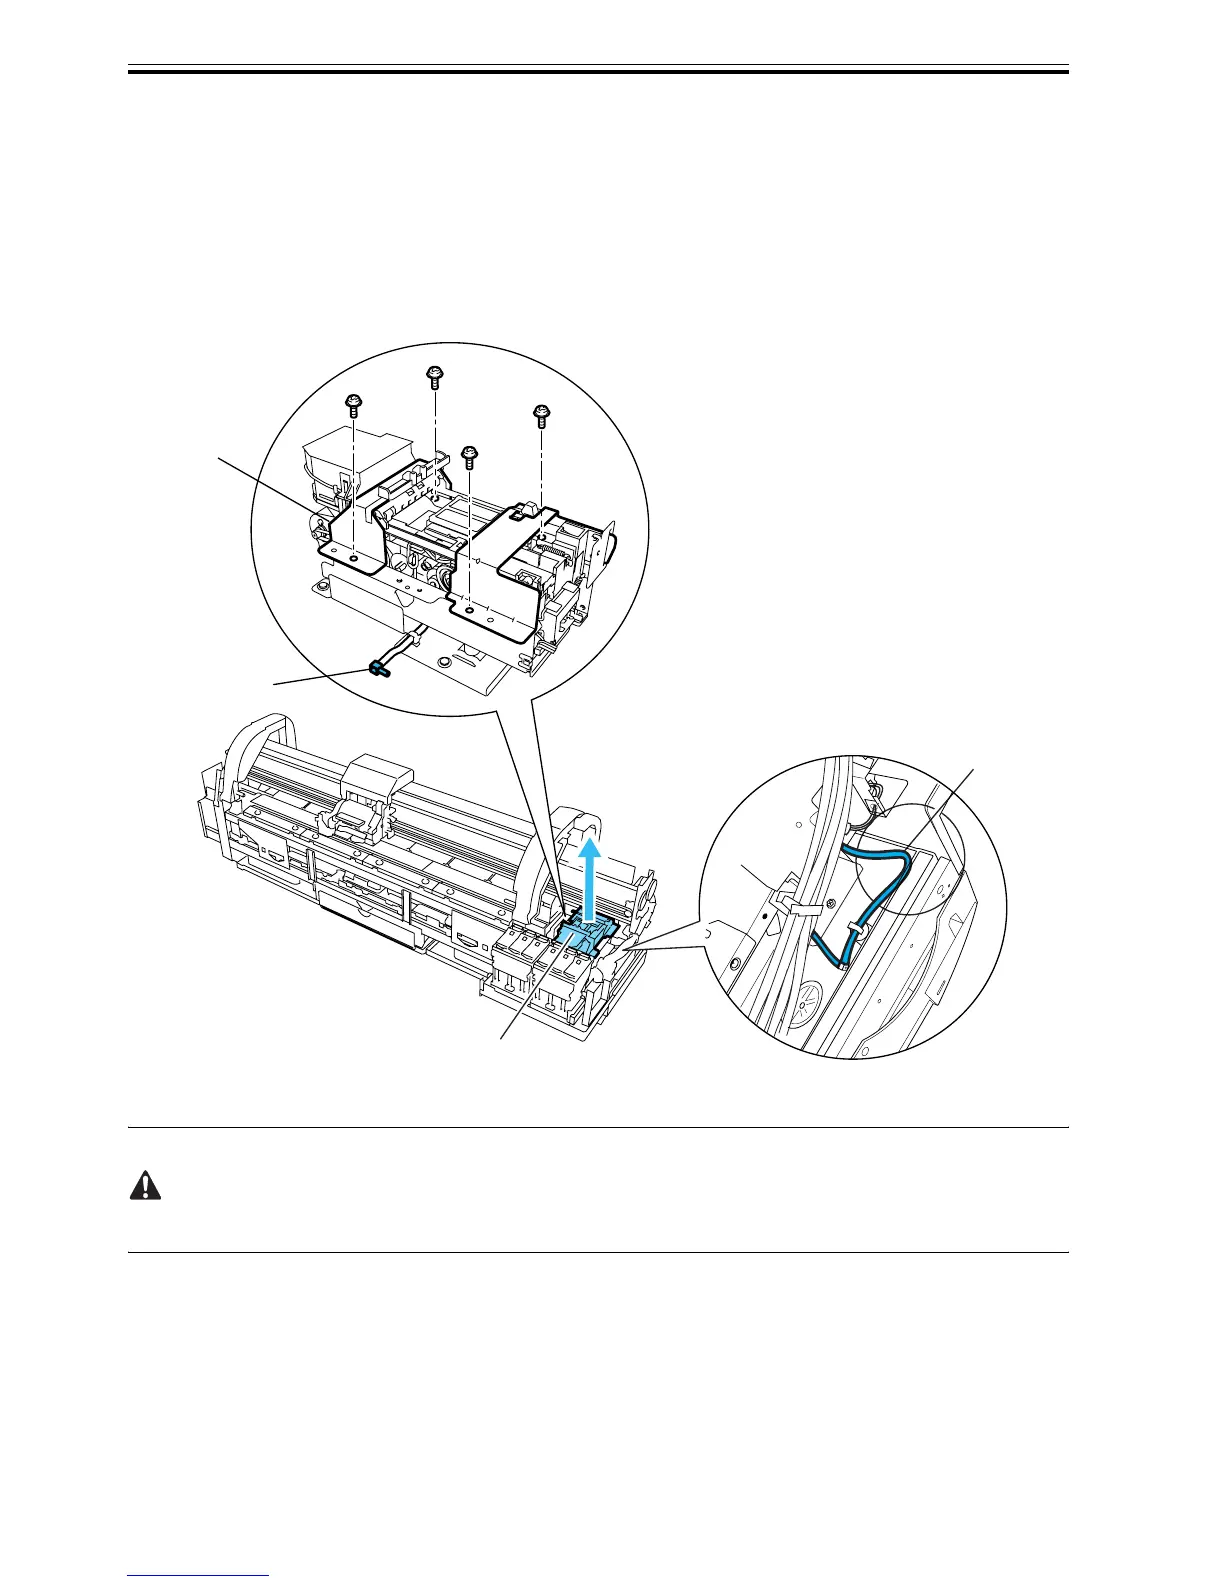
EasyManuals Logo

Canon imagePROGRAF IPF700 Service Manual

Canon imagePROGRAF IPF700
202 pages
To Next Page IconTo Next Page
To Previous Page IconTo Previous Page
Page #110 background imageLoading...
Page #110 background image
Chapter 4
4-20
4.3.10 Purge unit
0012-6374
b. Removing the purge unit
(1) Switch off the printer and move the carriage to above the platen. See Disassembly/Reassembly > Tips on
Disassembly/Reassembly > Open Cap/Shift Wiper Unit.
(2) Disconnect the ground wire from the side of the purge unit.
(3) Remove the connector and release the harness from the harness guide.
(4) Unscrew four screws and remove the waste ink tube joint, and then remove the purge unit.
F-4-29
-Install the purge unit with care not to let the waste ink tube[3] bent.
-Exchange absorbents that exist under the purge unit at the same time when you exchange purge unit.
[1]
[3]
[2]
[1]

Table of Contents

Other manuals for Canon imagePROGRAF IPF700

Questions and Answers:

Question and Answer IconNeed help?

Do you have a question about the Canon imagePROGRAF IPF700 and is the answer not in the manual?

Canon imagePROGRAF IPF700 Specifications

General IconGeneral
Maximum Print Resolution2400 x 1200 dpi
Ink TypePigment-based
Number of Ink Colors5
Ink ColorsCyan, Magenta, Yellow, Black, Matte Black
ConnectivityUSB 2.0, Ethernet
Hard DriveNo
Operating SystemsWindows, Mac OS
Print TechnologyThermal Inkjet
Media ThicknessUp to 0.8 mm
Number of Nozzles15, 360
Weight103 lbs

Related product manuals