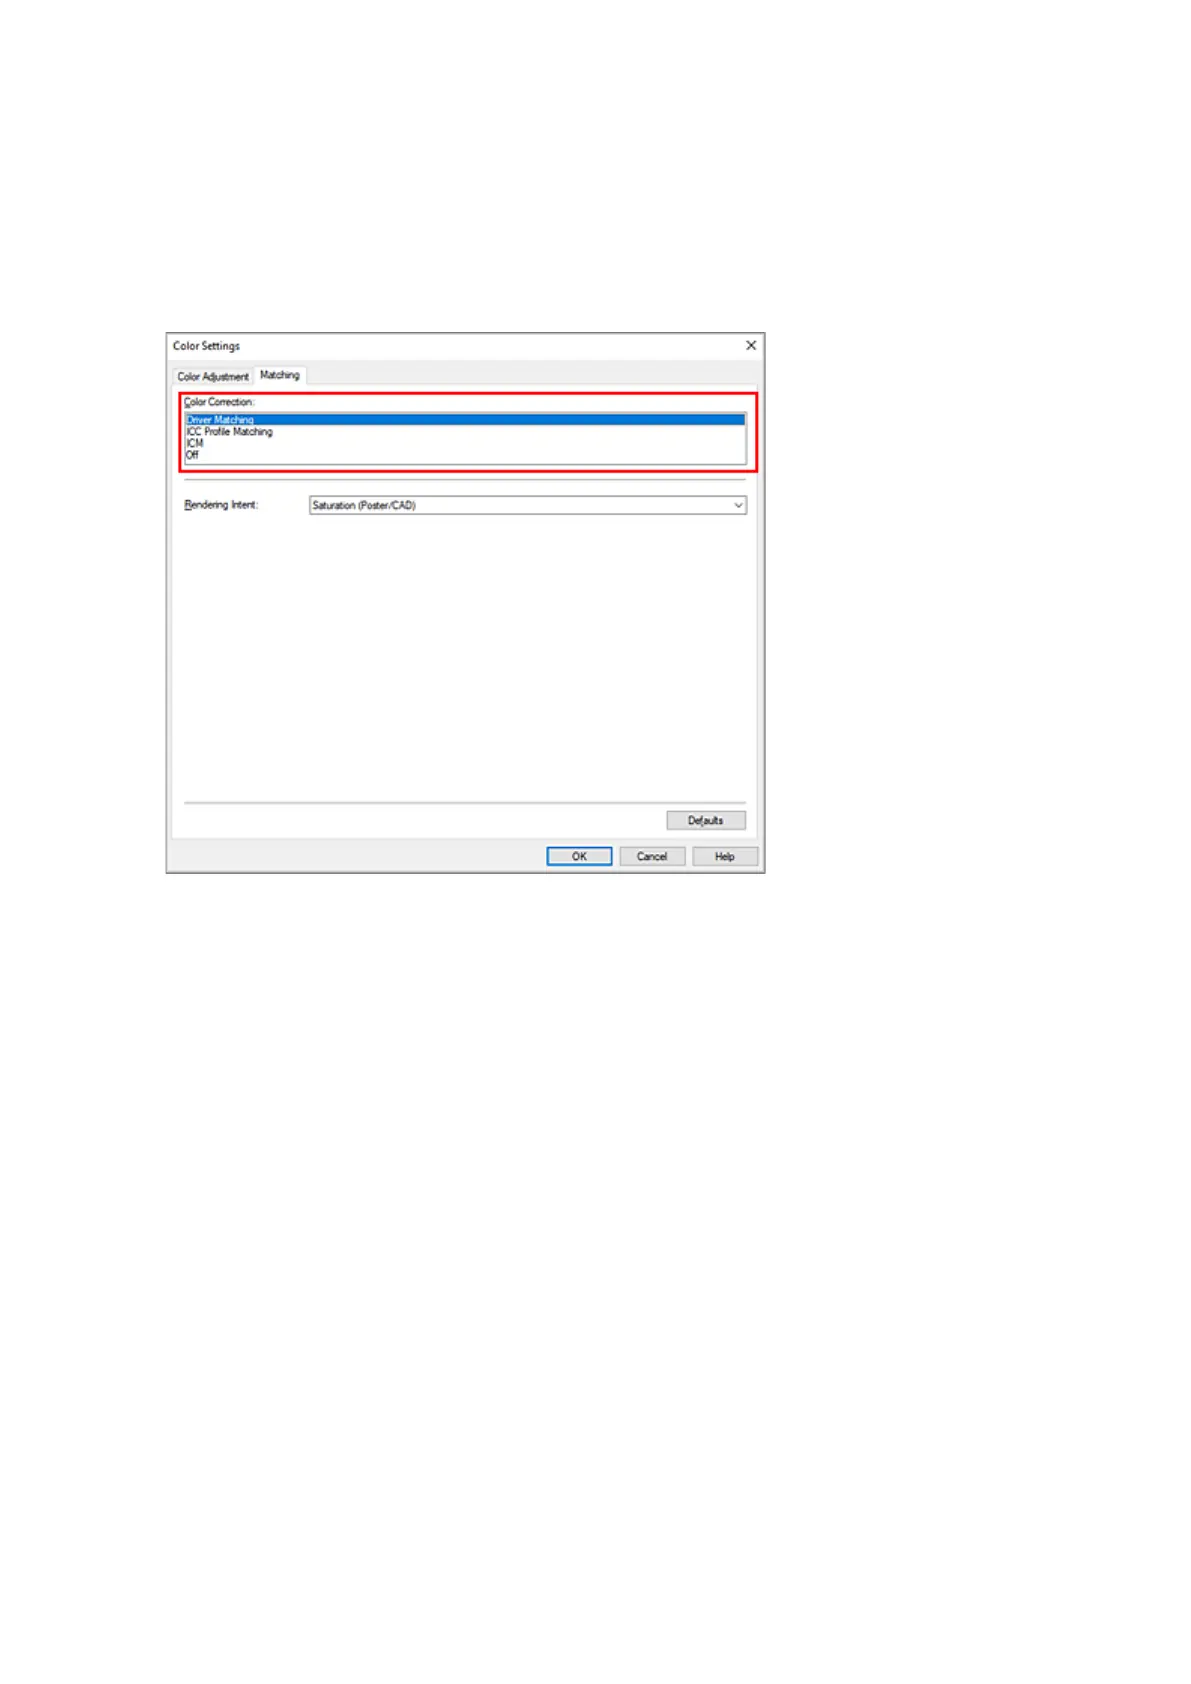
3. Select color mode3.
For Color Mode, select Color, and then click Color Settings....
The Color Settings dialog box appears.
4.
Select color correction
4.
Click Matching tab, and select Driver Matching for Color Correction.
5.
Select the rendering intent
5.
Select the coloring adjustment method in Rendering Intent.
Perceptual (Photo)
Reproduces colors of general photos naturally and features smooth gradation. In addition, selecting
this setting allows you to adjust colors easily using an application software.
Saturation (Poster/CAD)
Reproduces vivid colors on data such as a poster. In addition, prints in easy-to-see colors suitable
for line drawing.
6.
Set the other items
6.
If necessary, click Color Adjustment tab, and adjust the color balance (Cyan, Magenta, Yellow) and
adjust Brightness, and Contrast settings, and then click OK.
7.
Complete the setup
7.
Click OK on the Main tab.
When you print, the colors get adjusted by the printer driver when printing the data.
115
 Loading...