Chapter 3
3-59
3.2.4.8 Removing the Scanner
Unit
0006-3644
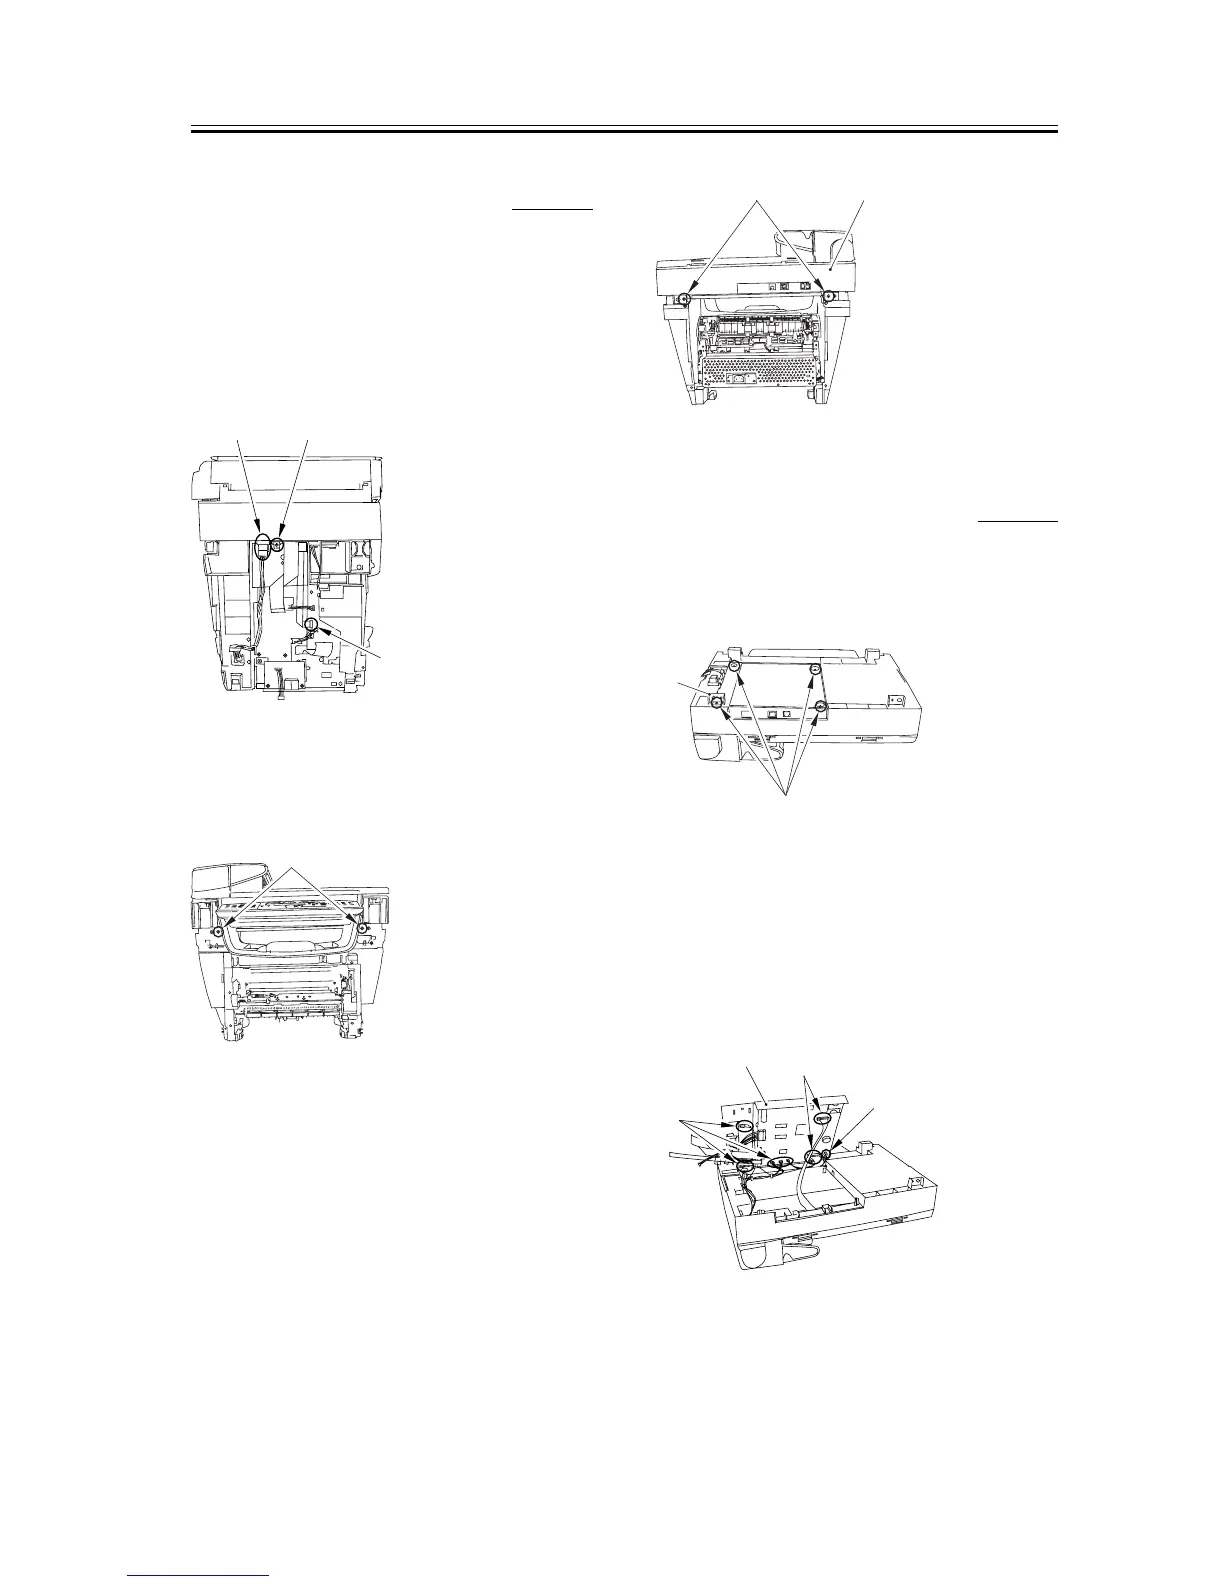
1) Remove the screw [1] and remove the connector [2]
as well as the flat cable [3] on the DCNT board.
Remove the tape holding the cable in advance.
Prepare a new tape (Part No: AZ7-0008) of a suitable
length before you attach the cable again.
F-3-254
2) Remove the two front screws [1].
F-3-255
3) Remove the two screws on the back [1]. Slide the
scanner unit [2] to the back; then, remove it by
lifting it.
F-3-256
3.2.4.9 Removing the Board
Unit
0006-3656
1) Remove the four screws [1] on the back side of the
scanner unit. Ensure that the mounting plate [2]
does not get lost.
F-3-257
2) Open up the board unit [1] and take off the
connector at six spots (five if the unit is not
equipped with the fax function) [2] and three flat
cables [3].
F-3-258
[2] [1]
[3]
[1]
[2]
[1]
[1]
[2]
[1]
[2]
[2]
[3]




 To Next Page