Chapter 3
3-92
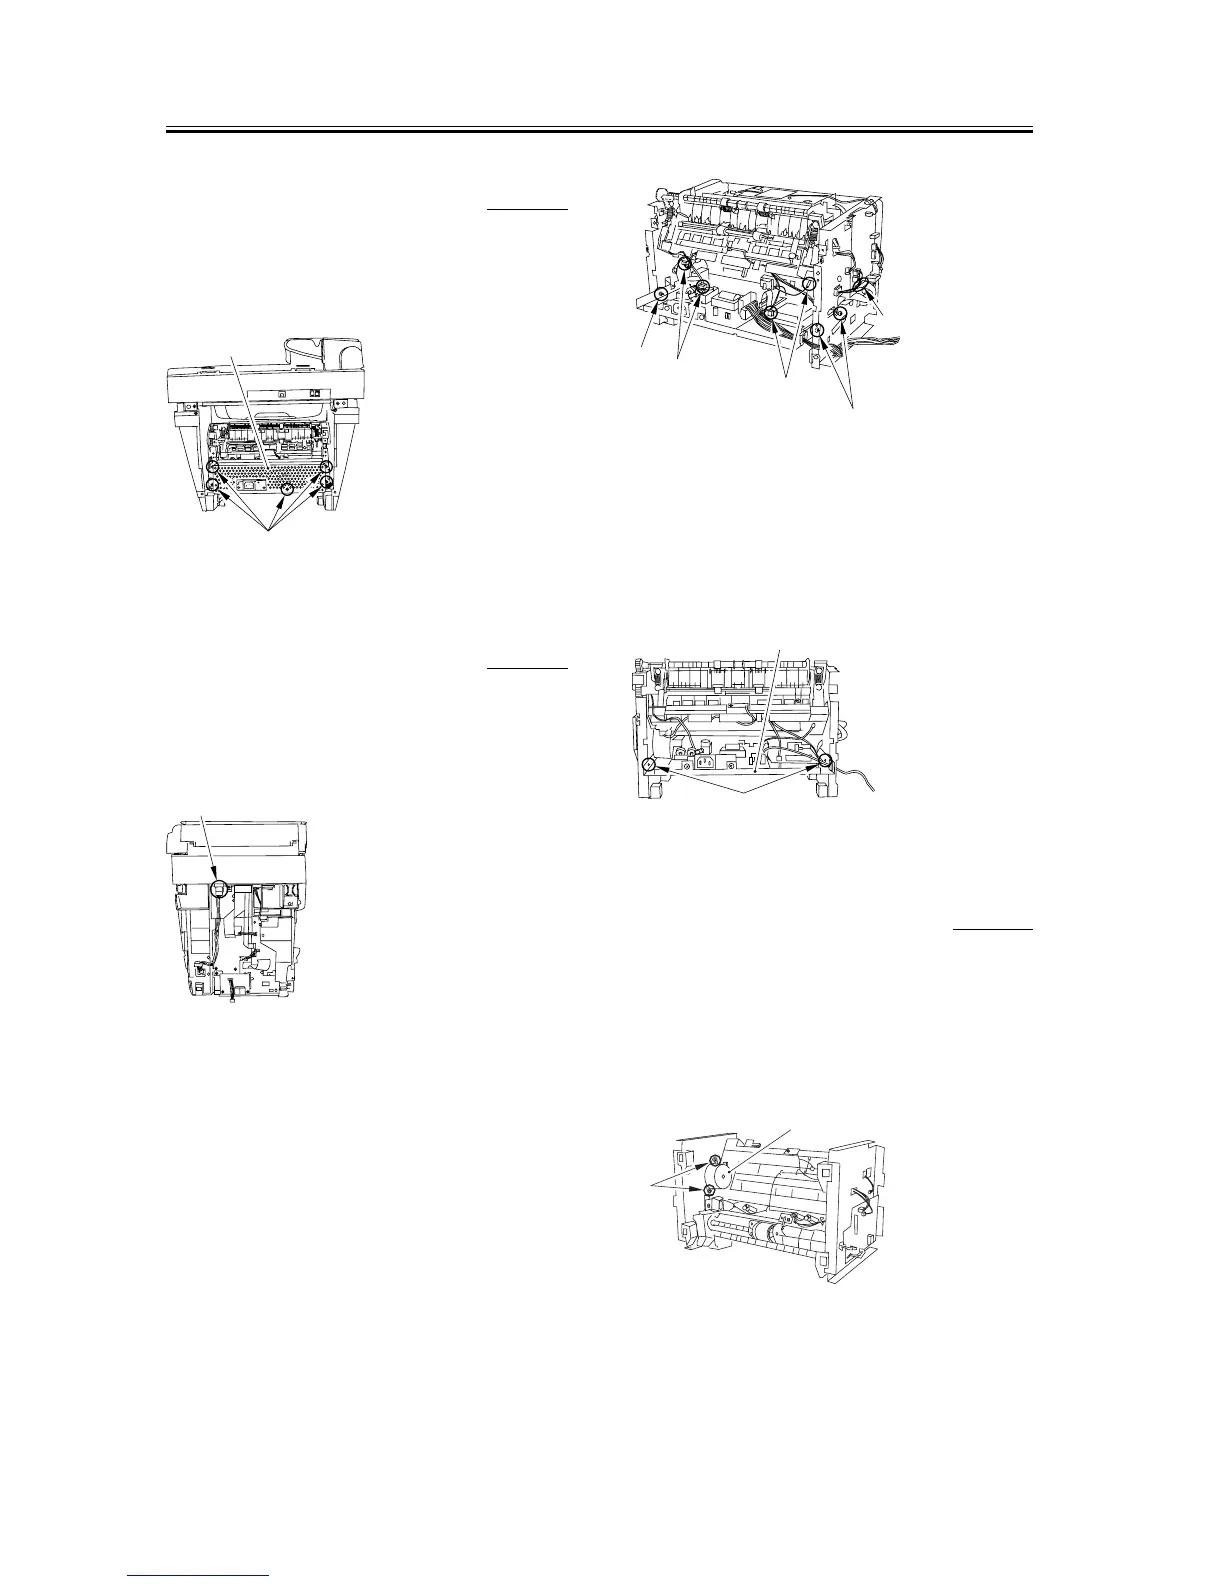
3.5.6.9 Removing the Power
Supply Shield Plate
0002-7603
1) Remove the five screws [1] to remove the power
supply shield plate [2].
F-3-397
3.5.6.10 Removing the Power
Supply Assembly
0006-3704
1) Remove the connector [1] and remove the cable
from the cable guide.
F-3-398
2) Remove the three screws [1]. (The external cover is
omitted from the illustration below to show the
instructions clearly.)
3) Remove the four connectors [2] as well as the flat
cable [3] on the DCNT board.
F-3-399
4) As you remove the bosses on both sides [1], lower
the front part of the power supply assembly [2].
Then pull it to remove the power supply assembly.
F-3-400
3.5.6.11 Removing the Main
Motor
0002-7607
1) Place the main unit down on its front face (so that
the interior of the main unit is easily visible).
2) Remove the two screws [1] to remove the main
motor [2].
F-3-401
[1]
[2]
[1]
[1]
[2]
[2]
[1]
[3]
[1]
[2]
[1]
[2]




 To Next Page