To mount the TV-VAVB3-E2
TruVu™ VAVB3-E2 CARRIER CORPORATION ©2022
Installation and Start-up Guide All rights reserved
13
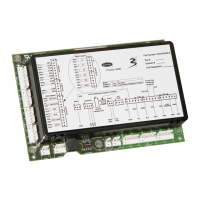
4 Secure the controller and the actuator by screwing the rear mounting tab into the VAV box, using the screw
that is supplied with the TV-VAVB3-E2.
NOTE We recommend that you use the M5 - .75 in. (19 mm), self-tapping screw that is shipped with the TV-
VAVB3-E2.
CAUTION Center the washer in the mounting screw slot. Secure the TV-VAVB3-E2 to allow lateral
movement of the damper shaft.
5 Hold down the TV-VAVB3-E2’s actuator release button and rotate the actuator clamp in the same direction
that closed the damper. Rotate the clamp until it stops, then rotate it back one notch.
6 Release the button.
7 Tighten the actuator clamp to the damper shaft by tightening the two M5 nuts.
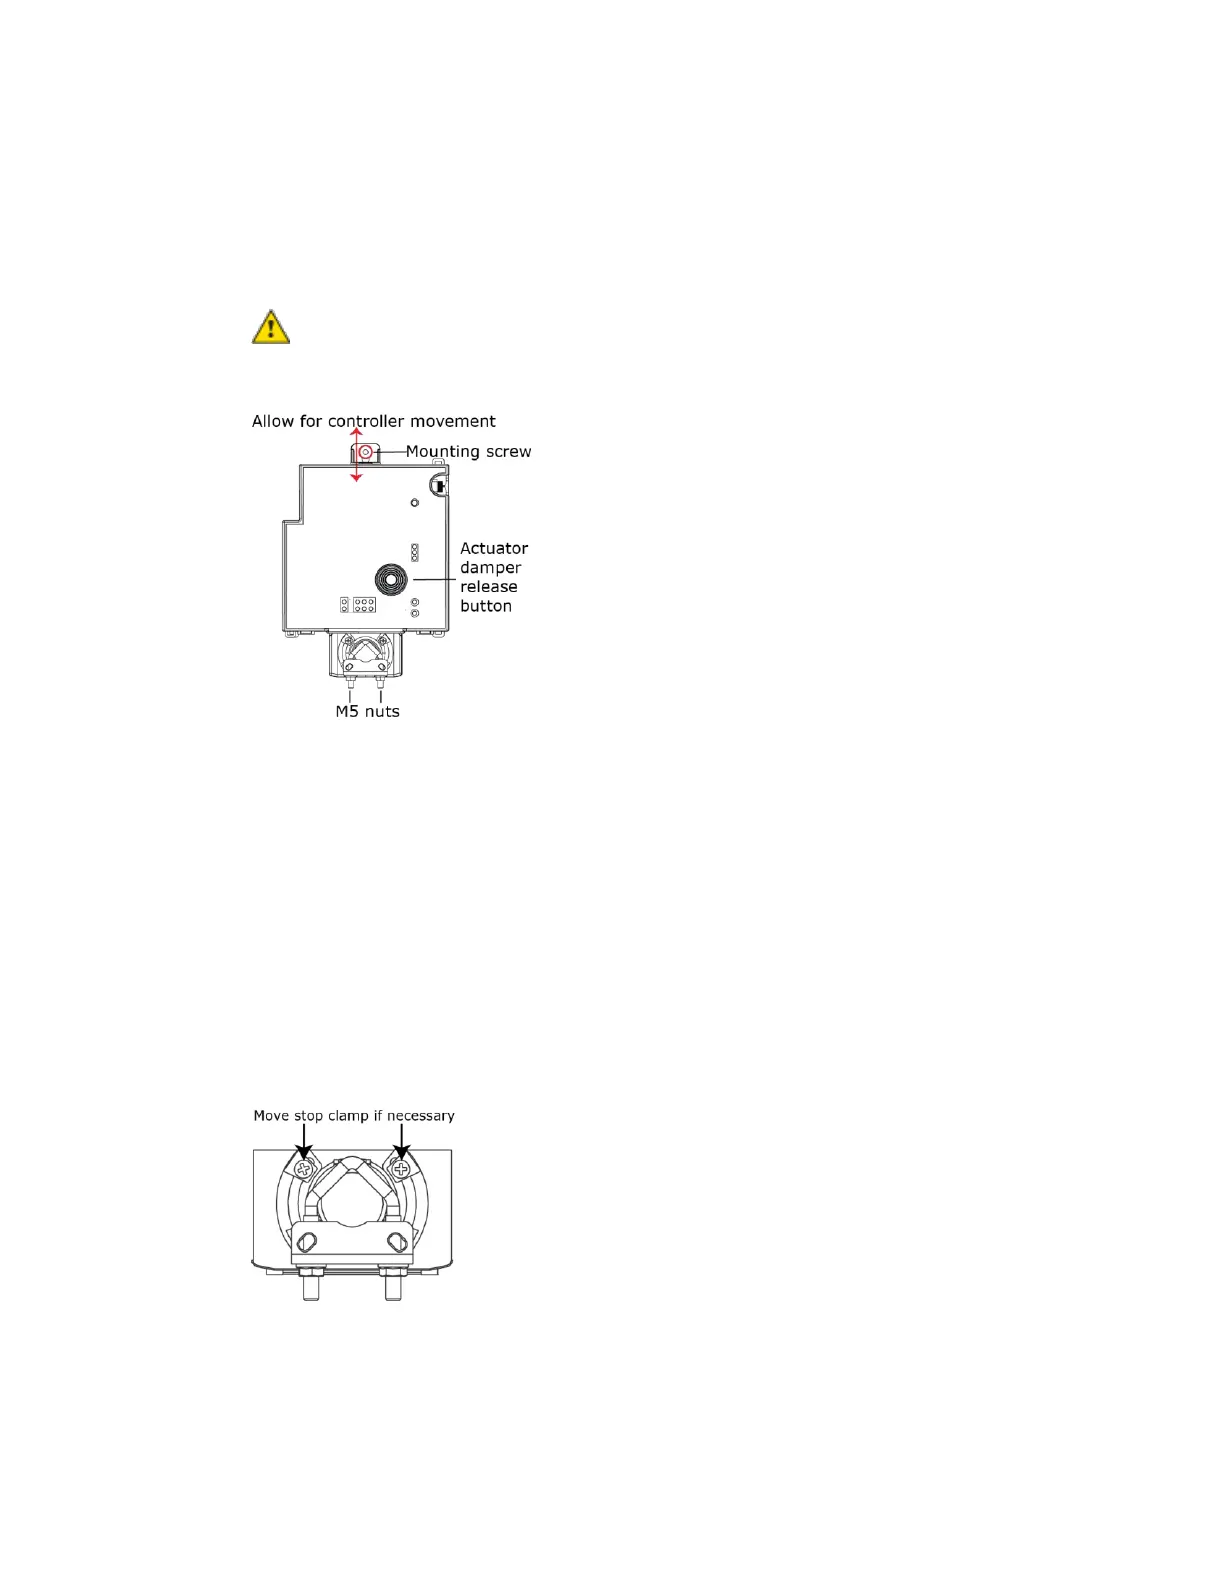
8 Hold down the actuator release button and rotate the damper from fully closed to fully open. If the damper
traveled less than 90 degrees, do the following to prevent the damper traveling past fully open:
a) Loosen the appropriate stop clamp screw.
b) Move the stop clamp until it contacts the
edge of the actuator cam.
c) Tighten the screw.
9 Hold down the actuator release button, rotate the damper to verify that it opens and closes, then release the
button.