Case Communications 6401 Rugged ADSL Router Manual – Rev 1.5
SECTION 5 – ADVANCED CONFIGURATION Page 5.55
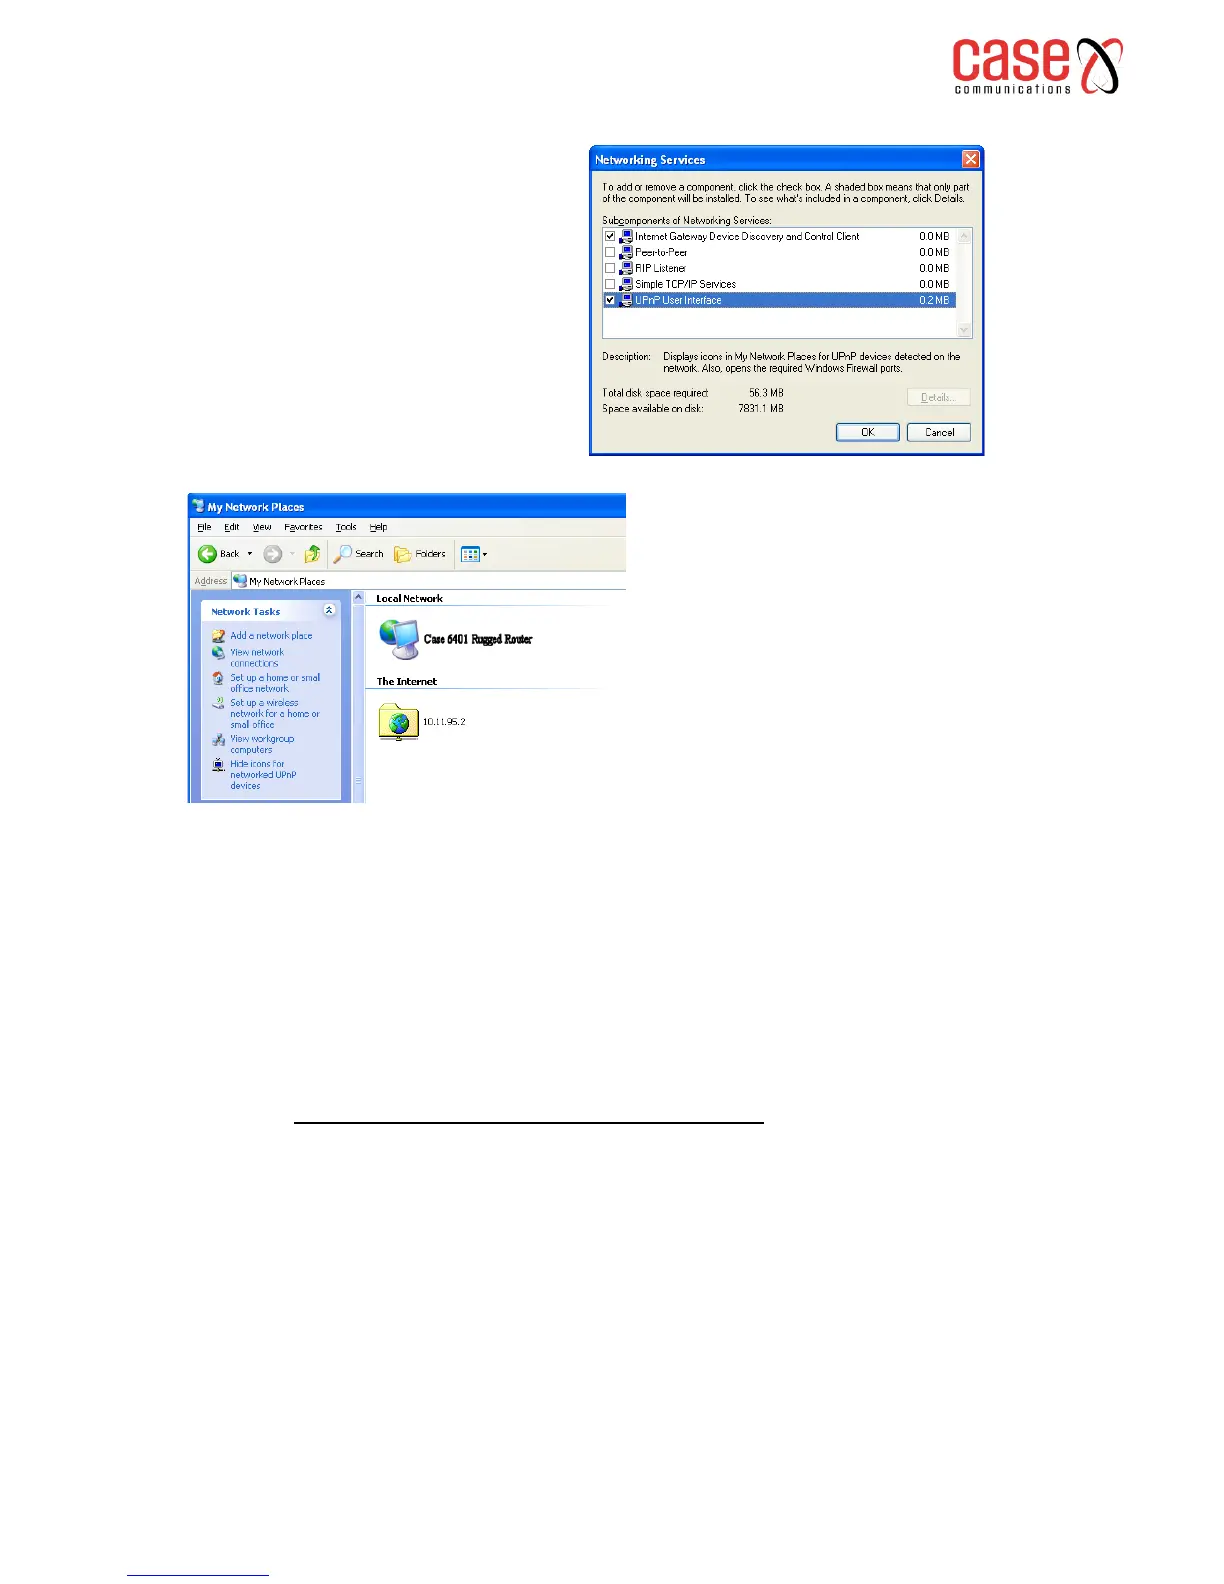
5. After finishing the installation, go to My Network Places. You will find an icon (e.g., Case 6401
Rugged Route) for UPnP function.
6. Double click on the icon, and the ADSL router will open another web page via the port for UPnP
function. The IE address will be directed to the configuration main webpage as shown in the graphic.
7. Now, the NAT traversal function has already been provided. The ADSL router will create a new
virtual server automatically when the router detects that some internet applications is running on the
PC.
5.12.4 CONFIGURING UPnP ON A WINDOWS 7 PC
On newer versions of Windows UPnP has been changed to Network Discovery and on most
installations of Windows 7 it is installed and enabled by default.
To enable Network Discovery:
1. Go to Control Panel and select “Network and Sharing Center”
2. Select “Change advanced sharing settings”
3. Under “Home or Work” ensure that Network Discovery is turned on.
4. Under “Public” ensure that Network Discovery is turned off (to prevent a possible
network security issue)
3. Select Networking Services and
click Details. Click the UPnP User
Interface check box.
4. Click OK. The system will install
UPnP components automatically.