In this example procedure, the first device will be bypassed and an FPGA image
will be assigned to the second device.
• For the first device, press Bypass.
• For the second device, select the FPGA image (*.mcs) from the Drivers USB:
Drivers USB > ECLIPSE DRIVERS > Omega-Median-Delta > xxxxxx – EQUE
FPGA
(where xxxxxx represents the product number).
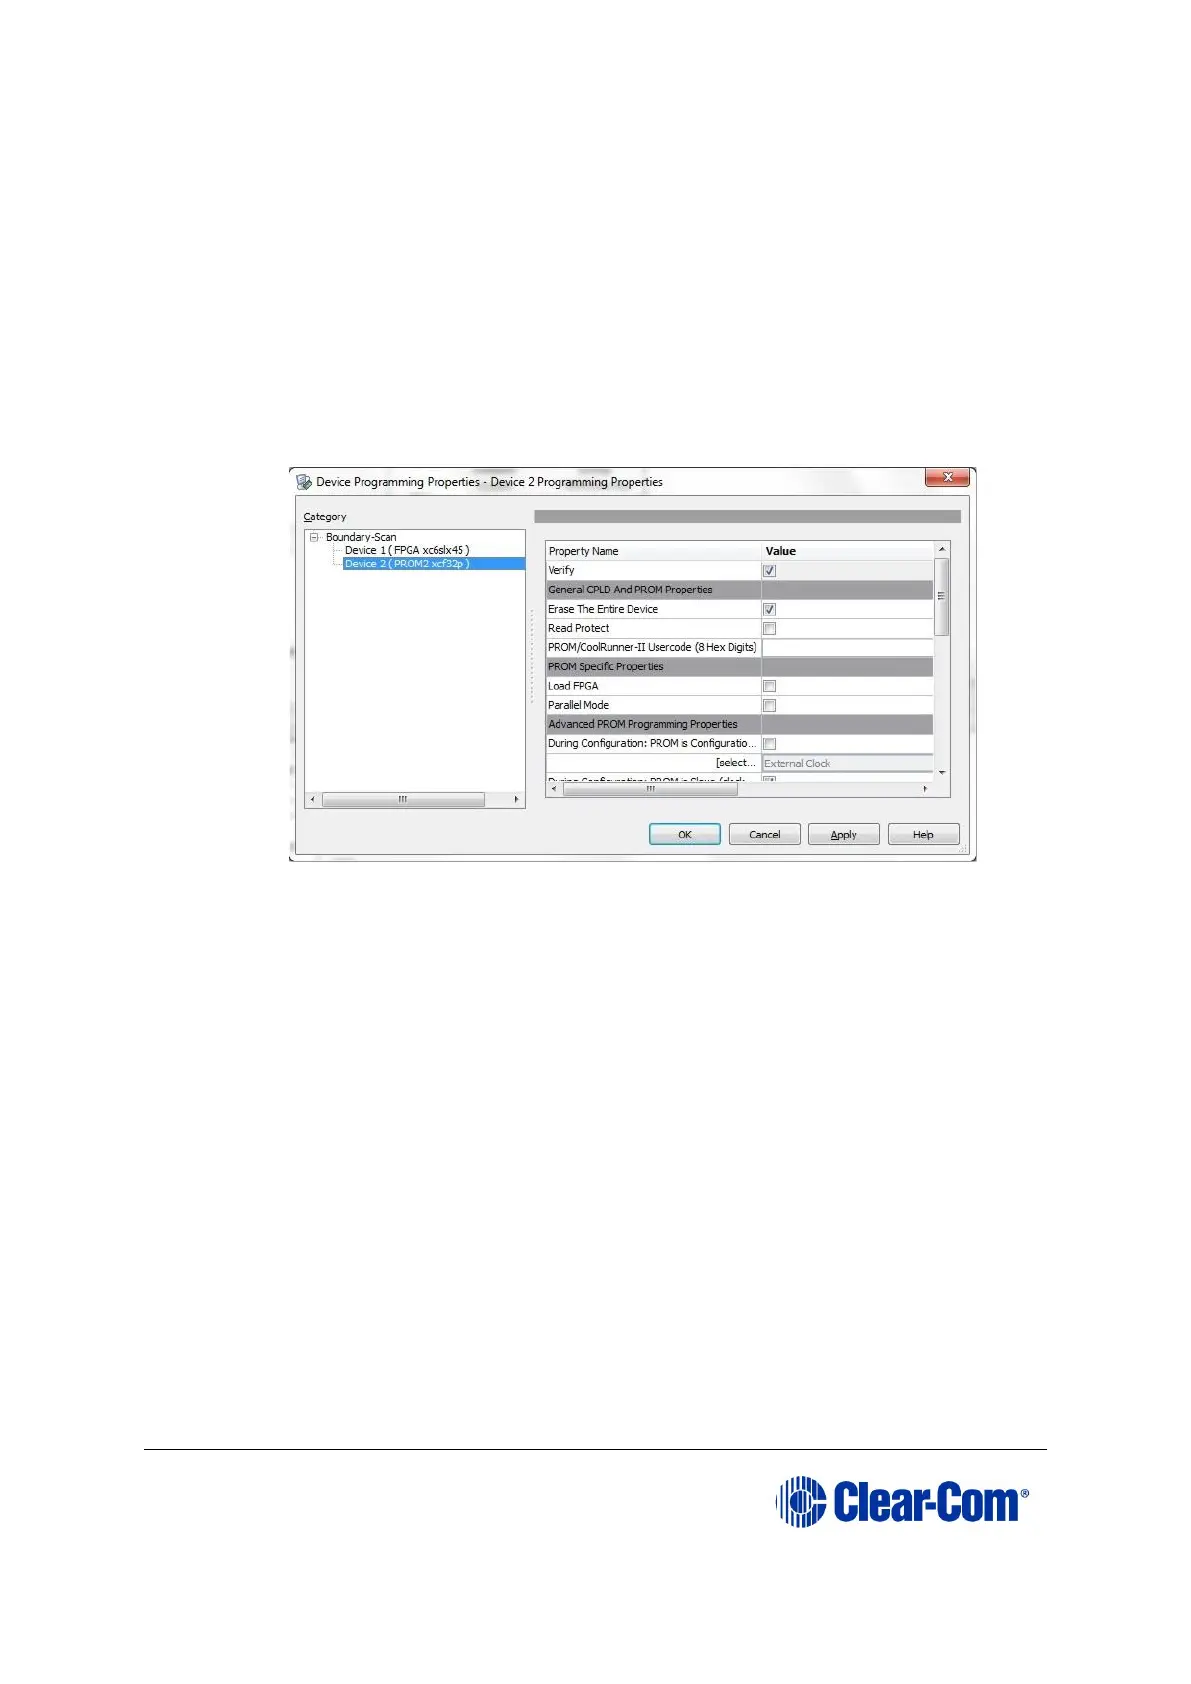
A summary dialog is presented. Ensure that the Erase Before Programming
and Verify flags are set. Click OK.
Figure 9-19: Example Xilinx device programming properties
9. Right click the second device and select Programming.
The upgrade starts, and takes approximately 2 minutes to complete. When the
upgrade is complete, the Program Succeeded message is displayed in the main
window.
10. Power down the UUT.
9.5 Upgrading the E-QUE card (MK1) boot ROM
Only upgrade the E-QUE (MK1) boot ROM after the main E-QUE application code has
been upgraded.
Note:
The procedure below is for E-QUE (MK1) cards only. To upgrade the PROM of an E-QUE
card (MK2), see 9.6 Upgrading the E-QUE card (MK2) boot ROM.
To upgrade the E-QUE card (MK1) boot PROM: